How To ... Create a MonoChrome RenderEffect
MAXScript lets you create scripted plug-ins which function similar to plug-ins written in MSVC++ using the Max SDK. One of the scriptable plug-in classes is the RenderEffect class. We will write a very simple plug-in which will simply remove the color from the rendering.
Related Topics:
Scripted Plug-ins and RenderEffects
Getting and Setting Pixel values
RenderEffect Progress Callback Mechanism
NATURAL LANGUAGE
Create a scripted RenderEffect to change the rendered image after rendering.
Go through all lines in the image and through all pixels in each line
Replace the color information in each pixel with the monochrome value, keep alpha
Update the renderer progress bar based on the current line and total number of lines


MAXSCRIPT
   plugin RenderEffect MonoChrome
   name:"MonoChrome"
   classID:#(0x9e6e9e77, 0xbe815df4)
   (
   rollout about_rollout "About..."
   (
     label about_label "MonoChrome Filter"
   )
   on apply r_image progressCB: do
   (
     progressCB.setTitle "MonoChrome Effect"
     local oldEscapeEnable = escapeEnable
     escapeEnable = false
     bmp_w = r_image.width
     bmp_h = r_image.height
     for y = 0 to bmp_h-1 do
     (
       if progressCB.progress y (bmp_h-1) then exit
       pixel_line = getPixels r_image [0,y] bmp_w
       for x = 1 to bmp_w do
       (
         p_v = pixel_line[x].value
         pixel_line[x] = color p_v p_v p_v pixel_line[x].alpha
       )--end x loop
       setPixels r_image [0,y] pixel_line
     )--end y loop
     escapeEnable = oldEscapeEnable
   )--end on apply
   )--end plugin
Step-By-Step:
plugin RenderEffect MonoChrome
name:"MonoChrome"
classID:#(0x9e6e9e77, 0xbe815df4)
(
A scripted plug-in starts with the constructor plugin followed by the superclass of the scripted plug-in ( renderEffect ) and the class name of the plug-in ( MonoChrome ). In addition, we have to provide the name which will appear in the effects list, and a unique classID .
The classID is used by 3ds Max to recognize the plug-in class when loading the scene. To generate a new unique ID, you can use the GenclassID() method in the Listener and copy the result into the script.
To keep all versions of this plug-in compatible around the world, it is recommended to copy the above classID though.
Scripted RenderEffect Plug-ins
rollout about_rollout "About..."
(
label about_label "MonoChrome Filter"
)
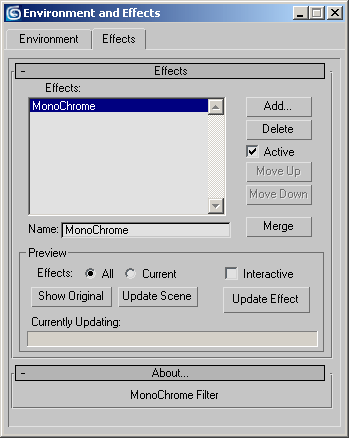
The plug-in will have no controls. We will create a very simple rollout containing a single line of text just to show the user he has loaded something.
on apply r_image progressCB: do
(
A renderEffect plug-in has a main handler which will be executed each time the effect is applied to the image. The image buffer of the renderer will be passed as the only parameter to the handler - we use a user variable named r_image which will contain the image we will work on. Also, we define a progress callback object in order to update the main renderer progress bar while processing the image.
Scripted RenderEffect Plug-ins
RenderEffect Progress Callback Mechanism
progressCB.setTitle "MonoChrome Effect"Using the setTitle method in the progressCB object, we define the name to be displayed in the Rendering Effect progress window resp. the Renderer Progress window during processing. In the former case, the line will read "Currently Updating: MonoChrome Effect". In the latter case, the line will read "Current Task: MonoChrome Effect".
RenderEffect Progress Callback Mechanism
local oldEscapeEnable = escapeEnable
escapeEnable = false
In order to be able to capture and process the pressing of the Escape key during the main loop of the effect without actually breaking the script execution, we will have to disable the MAXScript Escape key handling. For this purpose we will store the current state of the Escape handling ( true or false ) in a temporary user variable and then assign false to the MAXScript System Global variable controlling the Escape handling. Later on, after the main loop, we will set it back to its original state stored in the oldEscapeEnable user variable.
bmp_w = r_image.widthWe will need the width of the rendered image. We store the .width property of the image in the user variable bmp_w .
bmp_h = r_image.heightWe will also need the height of the rendered image. We store the .height property of the image in the user variable bmp_h .
for y = 0 to bmp_h-1 do
(
We will loop through all lines in the image. Image pixel access requires 0-based indexing, this means the upper left pixel of a 640x480 image has coordinates [0,0] and the bottom right pixel has coordinates [639,479]. The variable y will be assigned the values from 0 to the height of the image minus 1 each time the for loop repeats itself.
if progressCB.progress y (bmp_h-1) then exitThis line does two things:
Since the .progress method of the progress callback object returns true when the user has pressed Escape and false otherwise, we check the return value and exit the loop when true is returned. This will bring us to the line after the end of the y loop.
The same method also accepts two arguments – the current value and the max. value needed to calculate the progress percentage. In our case, we supply the current line and the total number of lines. For example, if we are on line 300 and the bitmap has 600 lines, the progress bar will show 50% done...
RenderEffect Progress Callback Mechanism
pixel_line = getPixels r_image [0,y] bmp_wThe getpixels function reads pixels from the specified file starting at the position supplied by the Point2 value and reads the number of pixels specified by the last value. The result will be assigned as array to the user variable pixel_line . We start reading at the first pixel to the left and read all bmp_w pixels - a whole scanline contains as many pixels as the width of the image.
for x = 1 to bmp_w do
(
Now we can loop through all values in the array of pixel values. Because arrays in MAXScript are 1-Based, we count from 1 to the width of the image.
p_v = pixel_line[x].value
pixel_line[x] = color p_v p_v p_v pixel_line[x].alpha
This is the actual core of the code - we get the .Value property of the color (its greyscale intensity) and generate a new color value with Red, Green and Blue values equal to the .Value of the original pixel. To keep the alpha channel untouched, we just add the original alpha value to the RGBA color. We store the result at the same position in the array and thus overwrite the color information with a grayscale version!
)--end x loop
setPixels r_image [0,y] pixel_line
After processing all pixels of a scanline, the setpixels function writes the array pixel_line containing the new grayscale values back into the image starting at the same position. This overwrites the colors in the current line y .
)--end y loopWe are ready with the loops and the whole bitmap has been changed. The on apply handler will return the resulting bitmap to the system and it will be shown in the Virtual Frame Buffer.
escapeEnable = oldEscapeEnableAs mentioned before, we will have to set the MAXScript Escape key handling to its original state before the render effect loop.
)--end on apply
)--end plugin
Using the Script
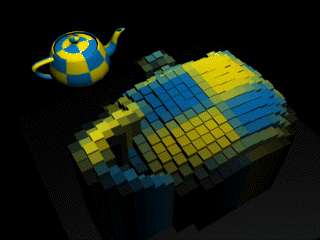
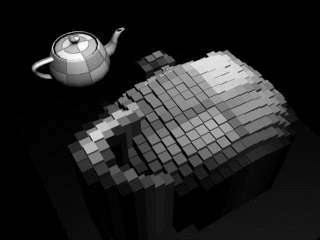
After evaluating the script, a new plug-in effect called "MonoChrome" will appear on the Renderer > Effects... > Add... list. Add it to the effects queue and render the scene. The result will be a monochrome version of the rendering. Note that scripted renderEffects are relatively slow compared to "real" plug-ins written with the SDK, but are very flexible and fast to prototype.
In the Virtual Frame Buffer, you can take a look at the Alpha and Monochrome version of the image - the Alpha should be unchanged, and the Monochrome version should be identical to the RGB image generated by the renderEffect.
Where to go from here
A relatively easy change to this basic script would be the change of only every Nth line of the bitmap. By just adding a by 2 option to the for y loop you will affect only every second line!
for y = 0 to bmp_h-1 by 2 doAdding by 2 to the x loop too will affect only a grid of pixels! You could play with values higher than 2, or even add UI controls for user-defined line and pixel steps.
A more complex change to the script would be the tinting of the monochrome image by using different proportions of the monochrome value in the R, G and B channels. To do this, you could add a rollout and a paramBlock defining 3 Float values and let the user specify how much of each channel to be used. Then multiply the p_v value by the 3 values while assigning them to the R, G and B values of the image.
Back to