Texture Coordinates
This section discusses how UVW texture coordinates are interpreted by the renderer for texture maps in 3ds Max. The Mesh class provides access to the texture coordinates of a Mesh. The PatchMesh class provides access to the texture coordinates of a Patch. Both use a very similar approach. In this section we'll look at how this is done for the Mesh class.
The texture coordinates are available in the Mesh class public data member UVVert *tVerts;
Note that a UVVert is simply a Point3, i.e.: typedef``Point3``UVVert;
tVerts is a pointer to the list of texture vertices. Each UVVert stores a single UVW coordinate (as the X, Y and Z public data members of the Point3). The UVW coordinates parallel the relative direction of the XYZ coordinates. If you look at a 2D map image, U is equivalent to X, and represents the horizontal direction of the map; V is the equivalent of Y, and represents the vertical direction of the map; W is the equivalent of Z and represents a direction perpendicular to the UV plane of the map. For a 2D mapping, only two of the coordinates are used, i.e. UV, VW, or WU. This provides greater flexibility for the user as it allows them to flip the orientation of the map relative to the geometry. Radio buttons in the Materials Editor user interface allow the user to choose which two are used. The texture coordinates don't provide exclusive control over the mapping -- the material containing the map may apply other transformations that affect how the texture coordinates are interpreted by the renderer. First we'll look at the default case where the material imparts no additional transformations. Later we'll see what happens when the material applies a transformation, and how we can access and interpret additional material transformations.
The texture coordinates stored in the tVerts array can be any floating point values. If we assume that the settings in the material do not apply any additional transformations (the default settings), then an image is fit in its entirety between texture coordinates 0.0 to 1.0. For example, if the two triangles pictured below in Figure 0 had the mapping coordinates shown at each vertex, the bitmap image in figure 1 would be mapped across the entire two triangles. This mapping is shown in Rendering 1. As you can see, the mapping coordinates from 0.0 to 1.0 provide an exact match, fitting the bitmap across the entire quad.

Figure 0:
tVerts array)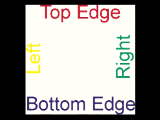
Figure 1: The original bitmap (on a black background).

Rendering 1:
The next example shows how an image can be tiled across the geometry by using mapping coordinates greater than 1.0. The X mapping coordinate for vertex 1 and vertex 2 are 2.0 (and the material tiling check box are enabled in the Materials Editor). This results in the image being repeated in the U direction twice as shown below. Note that it is only tiled once in V since the Y coordinates are still 1.0.

Figure 2:
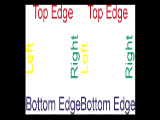
Rendering 2:
The next example shows how negative texture coordinates are used to reverse the way the image is mapped to the geometry. In the figure below, the X texture coordinates are -2.0 for vertex 1 and vertex 2. This results in the image be mirrored about the vertical axis of the map. It is also repeated twice since the coordinates are -2.0 and not -1.0.

Figure 3:
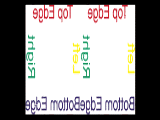
Rendering 3:
The next diagram shows how mapping coordinate greater than 0.0 start the image off at a offset within the image. Here the coordinates are the same as in example 1, except all the values have been shifted by 0.5 in X and 0.5 in Y. This results in the image being shifted on the geometry. Here again, tiling is on, so the pattern begins in the center of geometry, but is tiled and thus reappears from the left and bottom edges.

Figure 4:
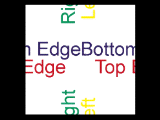
Rendering 4:
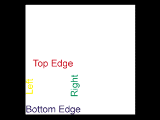
There is something special about UVW coordinates in the range of 0.0 to 1.0. If image tiling is turned off in the Materials Editor (the 'Tile' check box is unchecked for a certain direction), then the image will only appear where the texture coordinates are in this range. UV values outside the range 0.0 to 1.0 will not be mapped when tiling is off in that direction. This is shown in the diagram below. The material editor settings have tiling off in both the U and V directions, and the mapping coordinates are from [0.0 to 2.0]. Note that the image only appears where the mapping coordinates are in the range [0.0 to 1.0], i.e. the lower left corner.

Figure 5:
Rendering 5:
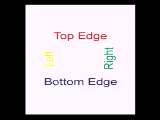
As mentioned above, users may alter the tiling, mirroring, angle, and offset settings from within the material. These controls adjust the position of the map relative to the mapping coordinates. In the figure shown below, the material controls have been used to add an additional transformation to the mapping shown above in figure 5. The texture coordinates stored with the geometry are just the same, but a U Offset of 0.5 and a V Offset of 0.5 were used to shift the map onto the center of the geometry. Additionally, a U tiling setting of 0.75 was used to 'stretch' the mapping in the U direction. Thus the image is no longer square, but is rather elongated in U. Rendering 6 below shows the resulting image.
Rendering 6:
Developers may access all the users material transformation settings using the methods of class StdUVGen.