- Show ShadingGroups/ Show Materials/ Show Textures/ Show Lights
-
You can show connections to shading groups, materials, textures, and lights.
Example:
Suppose you create a NURBS sphere, then use the Hypershade to create and assign a Phong shading group to it. Next you use the Hypershade to create a 2D checker texture and assign it to the Phong node.
The Hypershade displays the following contents:

The following dependency graph appears when you select Rendering > Show Shading Groups in the Hypergraph.
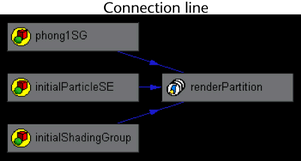
The connection lines between nodes show connection direction. The connection line originates at a node that outputs data, and the line points to a node receiving the data as input. The example above shows that the flow of output goes from the phong1SG shading group to the renderPartition.
Although you can see most of the same nodes in the Hypershade, the dependency graph shows the nodes in a flow diagram. This makes it easy to see the connections between the nodes that make up a shading group.
As shown in the figure below, if you move your mouse pointer over a connection line, a tooltip appears, identifying the output node name, the attribute that provides the output, the input node name, and the attribute that receives the input.
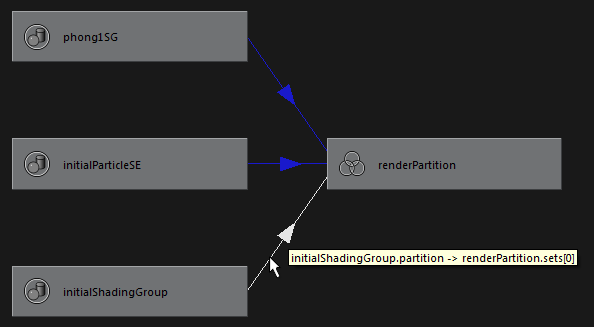
Node name and attributes are separated by a period, for example, initialShadingGroup.partition. In the figure, the partition attribute of initialShadingGroup is output to the sets attribute of renderPartition.
In many cases, you must be familiar with Maya internal operation details to understand the node and attribute names you see in the white boxes.
- Create Render Node
-
Create a render node with a texture map in the Hypergraph.