When creating cluster deformers, you can set the creation options first and then create a deformer, or you can immediately create a deformer without changing the current settings. If you’re not sure what the current creation options are, checking them before you create a deformer can save you time adjusting the deformer’s attributes afterwards.
Important: Avoid changing the number of points on the deformable object (for example, CVs, vertices, or lattice points) after you create a deformer. Changing the number of points can lead to unexpected deformation effects. Try to be sure you are happy with the deformable object’s topology before you begin using deformers. You might want to save a copy of the object in case you want to do further modeling.
To create a cluster deformer
- Select one or more deformable objects.
- In the
Rigging menu set, select
Deform > (Create)
Cluster.
The cluster deformer is created and a small C icon - the cluster handle - displays on the object.
Tip: You can control the placement of the cluster handle by changing the handle’s Origin values in the Attribute Editor. Select the handle, find the clusternHandleShape tab in the Attribute Editor, and set the Origin X, Y, and Z-axis values you want.
To set cluster options and create a deformer
- Select a deformable object.
- In the
Rigging menu set, select
Deform > Cluster >
 to open the
Cluster Options.
- In the
Cluster Options, set the options you want, then click
Create.
See also Advanced deformer options.
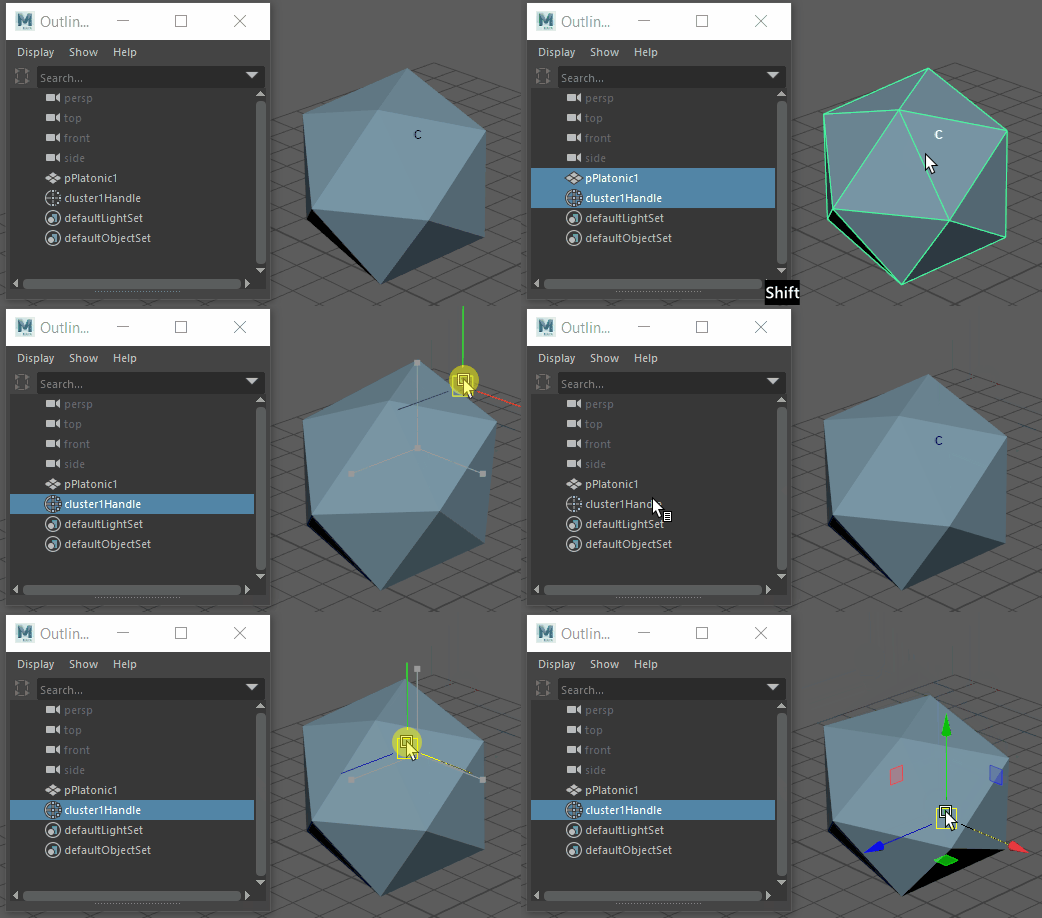
To select a cluster deformer handle
- Select the area with the cluster "c" icon.
- Shift-select to exclude everything else from the selection.

Select the "c" and shift-select to remove everything else, or select the clusterhandle in the Outliner.