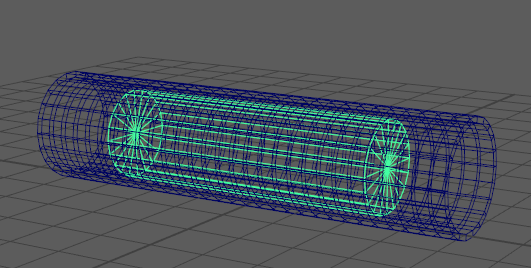
The Proximity Wrap deformer lets you use geometry as drivers to modify other ("Target") geometry. Once you create the deformer node, you need to set "Drivers" and connect them using the Attribute Editor Edit Node window. (See the Proximity Wrap Deformer options Attribute Editor section for details.)
Unlike other Maya deformers, which need you to select the geometry to deform before applying the command, with the Proximity Wrap deformer, you must connect the geometry and drivers after running the command.
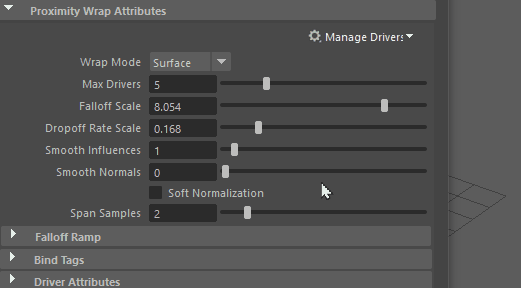
You can use the Dropoff Rate Scale attribute in the Proximity Wrap deformer attributes to control the inverse distance weight from the driver.
Create a Proximity Wrap deformer
- Select the object(s) you want to deform in the Outliner, the Viewport, or the Node Editor. This is the geometry that is guided by the driver geometry.
- Select
Deform > (Create) Proximity Wrap >
 (The Deform menu appears in the Animation, Modeling, and Rigging
menu sets).
(The Deform menu appears in the Animation, Modeling, and Rigging
menu sets).
The Create Proximity Wrap deformer options window appears.
- Set the creation options, for example, the Wrap Mode, which is the method the drivers use to influence the geometry (See Proximity Wrap Deformer Options for descriptions of each setting and what it does.)
- Click Apply and Close to create the deformer to the selected geometry.
- With the
Proximity Wrap deformer object/node
still selected, open the
Attribute Editor.
Note: Maya creates a Proximity Wrap deformer node for each object you want to deform, so you will see Proximity Wrap 1, Proximity Wrap 2, and so on as tabs in the Attribute Editor.
- In the
Attribute Editor, switch to the
Proximity Wrap1 tab, expand the
Proximity Wrap Attributes and pin the tab using the
Pin Tab icon
 .
.
- Select a primitive to represent the driver of the deformation in the Outliner, the Viewport, or the Node Editor.
- In the
Attribute Editor
Proximity Wrap1 tab, expand the
Manage Drivers menu and select
Add Selected as Driver. The selected primitive becomes the driveris created and connected to the deformer.
 Note: To add multiple driver geometries, Shift-select the geometry before clicking Add Selected as Driver in the Manage Drivers menu.
 - To configure the settings for new drivers, select Edit New Driver Defaults to open the Proximity Wrap Drivers window.