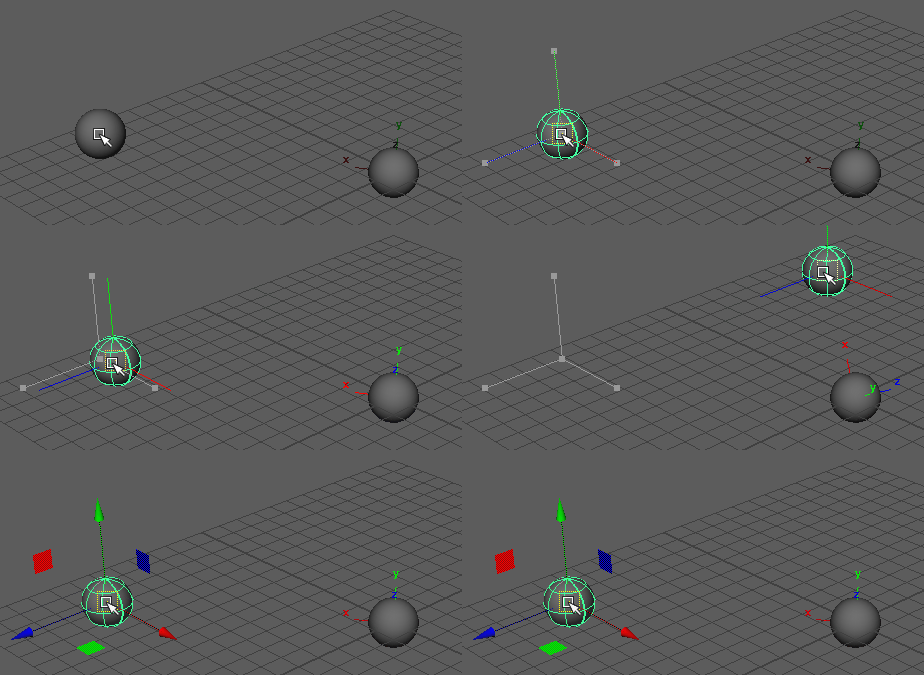
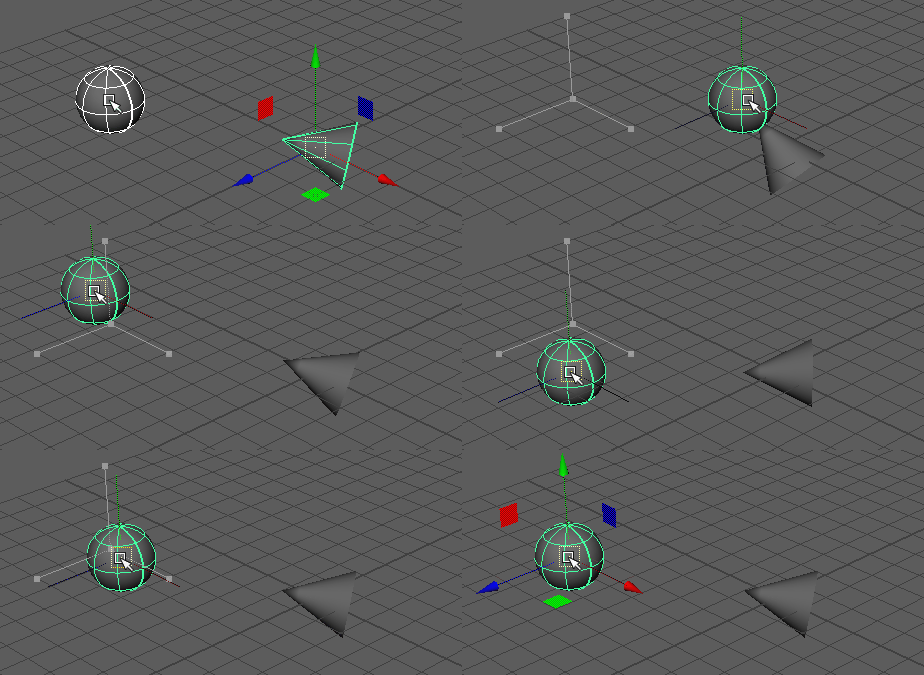
This section includes two examples of implementing aim constraints.
Aiming a sphere at a sphere
To set up the two spheres
- Create a NURBS sphere.
- Move the sphere some distance away from the center of the scene.
- Create another NURBS sphere. Leave it at the scene’s origin.
- Display the sphere’s local rotation axis (Display > Transform Display > Local Rotation Axes).
To create an aim constraint
- Select the sphere you moved (nurbsSphere1), and then select the sphere at the origin.
- If you are sure that the constraint options have their default settings, select
Constrain > Aim. (To be sure that you are using the defaults, select
Constrain > Aim>
 . Click
Reset Settings, and then click
Add.)
To use the aim constraint
Select the sphere you moved (nurbsSphere1), and select the Move Tool. As you move the sphere, the other sphere (nurbsSphere2) rotates accordingly.

Note how nurbsSphere2’s local rotation X-axis always points at the nurbsSphere1. Also, note how nurbsSphere2’s local rotation Y-axis always tries to point as closely as possible in the same direction as the scene’s Y-axis.
By default, the aim vector causes nurbsSphere2’s local rotation X-axis to point at nurbsSphere1. Also, by default, the up-vector causes nurbsSphere2’s Y-axis to align itself as closely as possible with the scene’s Y-axis.
Aim a cone at a sphere
Create a sphere and a cone
- Create a NURBS sphere.
- Move the sphere some distance away from the scene’s origin.
- Create a NURBS cone.
To create an aim constraint
- Select the sphere, and then select the cone.
- Select
Constrain > Aim >
 .
.
- Set Aim Vector to 0.0, 1.0, 0.0. (The default is 1.0, 0.0, 0.0.)
- Set Up Vector to 0.0, 0.0, 1.0.
- Set World Up Vector to 0.0, 0.0, 1.0.
- Click Add.
- Now you have constrained the cone to aim at the sphere.

To use the constraint
Select the sphere, and select the Move Tool. As you move the sphere, the cone will always point at the sphere.