To add a joint to an existing joint chain
- In the
Rigging menu set (press F3), select Skeleton > Insert Joints.
Note:
- The Insert Joint Tool does not have tool settings.
- You can insert joints into the joint chains of skinned characters. However, for the newly inserted joint to influence the skin, you need to add it to the skin as an influence (Skin > Edit Influence > Add Influence).
- Click the joint you want as the parent of the new joint, and then drag it to where you want to place the new joint.
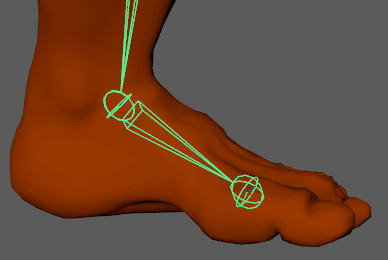
- Repeat step 2 until you finish inserting all the joints you want.
- When you have finished adding joints, press Enter to exit the
Insert Joint Tool.
Bones for the inserted joints are automatically oriented along the axes of the joint chain’s existing bones.
If you inserted joints into the skeleton of a bound character, the character’s bind pose automatically adjusts and its skin history is retained.