Modify NURBS surfaces
Add a row of CVs
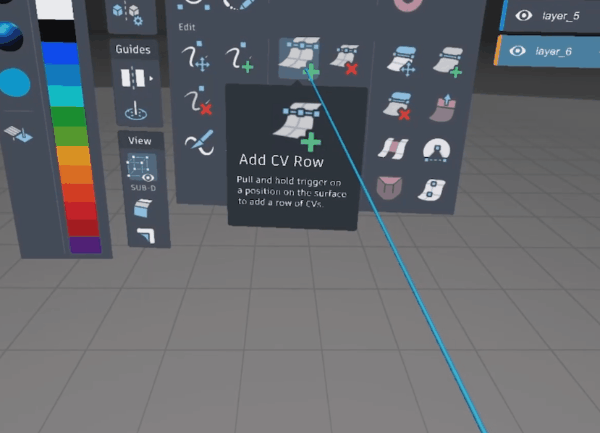
Select the Add CV Row tool
 , and hover over the surface.
A green dashed line appears at the stylus tip. This shows the direction in which the row of CVs will be placed.
Tap left or right on the analog stick (Oculus) or D-pad (VIVE) to change the direction of CV placement.
Pull and hold trigger to preview the CV row.
Position the CV row, then release the trigger to place.
Delete a row of CVs
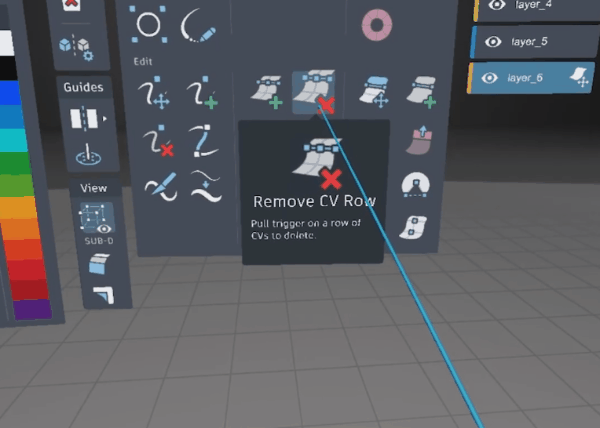
- Select the Remove CV Row tool
 .
. - Intersect the stylus with the CV row you want to delete, and then pull the trigger.
Extrude
Use the Extrude tool to create new NURBS surfaces from curves or surface boundaries, or to extend curves.

Select the Extrude tool
 .
.To create a new surface from a curve, hover the stylus over a curve. The curve highlights and a wavy line appears.
Pull the trigger and drag to create a surface.
To extend a curve, hover over the end of a curve.
Pull the trigger and drag to extend it.
Divide surfaces
Use the Surface Divide tool to split a surface into two separate pieces.
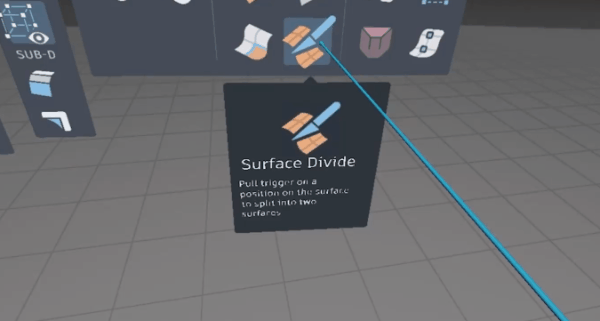
Select the Surface Divide tool
 .
. Intersect the stylus with surface where you want to make the cut.
The stylus displays a white dashed-line indicating the direction of cut.
Pull and hold the trigger to preview the cut-line.
Tap left or right on the analog stick (Oculus) or D-pad (VIVE) to change the direction of the cut.
With the Tool Hand, position the cut-line, then release the trigger to make the cut.
The surface is split into two separate pieces each having the same number of CVs as the original.
Align surfaces
Use the Align tool to align the edge of a surface to another surface, surface edges to curves, or align two curves.
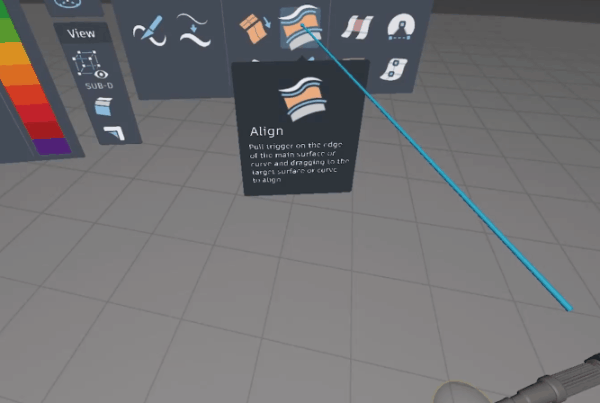
- Select the Align tool
 .
. - Hover the stylus over the edge of the source surface, then pull and hold the trigger. The edge highlights and a line appears indicating the tool is looking for a target input.
- Drag the line to the target surface edge. The source edge moves into alignment with the target edge. Adjust alignment by moving the stylus along the target edge.
- Release the trigger to complete. Use the same steps to align a surface edge to a curve.
Extend a surface boundary
Use the Extend tool to extend a NURBS surface boundary in any direction.
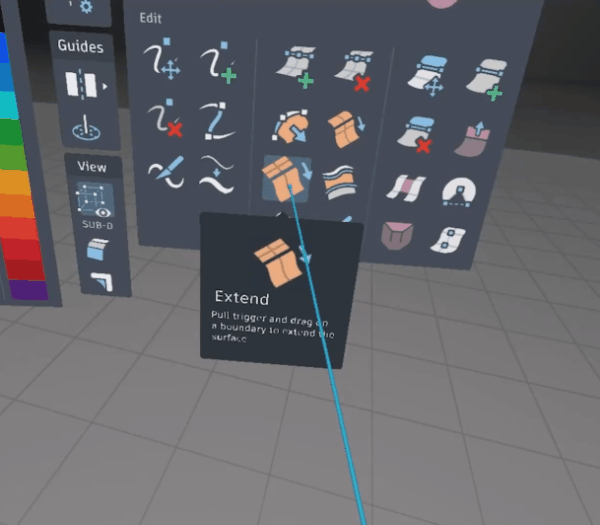
Select the Extend tool
 .
.Hover the stylus over the edge of a surface.
The edge highlights and a wavy line appears.
Pull the trigger and drag to extend the surface boundary in any direction.
Extrapolate
Use the Extrapolate tool to extrude a surface boundary in one direction.
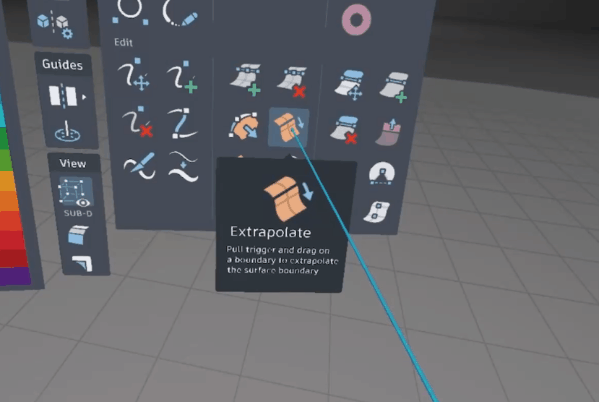
Select the Extrapolate tool
 .
.Hover the stylus over the edge of a surface.
The edge highlights and a wavy line appears.
Pull the trigger and drag to extrapolate the surface boundary in one direction.
Corner Patch
To create a corner patch, you must have one shared vertex between two surfaces.
- Select the Corner Patch tool
 .
. - Pull and hold the trigger on a boundary edge. A wavy line highlights the first edge.
- Drag and release the trigger on the adjacent boundary edge to create a corner patch between them.
Use the Flip Normals tool to correct surface orientation if necessary.
Flip surface normals
Flip the orientation of a surface to correct an inside-out or inverted face.
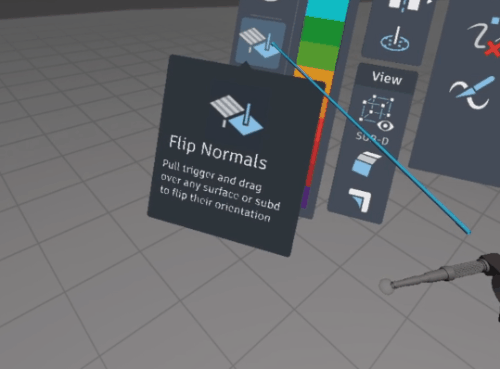
Select the Flip Normals
 tool from the Color & Materials Palette.
Pull the trigger on the target surface to flip it.
The stripes appear on the inward side of the surface, while the outward side is rendered with the selected material and color.