To create a custom menu set
- Select the Status Line menus drop-down list, and then select Customize.
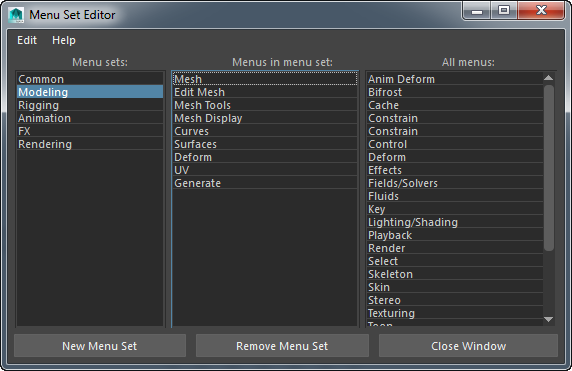
The Menu Set Editor appears.
- Select Edit > New Menu Set.
- Enter a unique name for the custom menu set.
- Select Create.
The new custom menu set appears in the Menu sets column, the Status Line drop-down list, and the Hotbox.
To add menus to a menu set
- In the Menu sets column, select the name of the menu set you want to add menus to.
If the menu set you select already contains menus, they are listed in the center column, Menus in menu set.
The All menus column of the Menu Set Editor lists all of the menus used in Maya. Any of these menus can be added to a menu set.
- To add a menu to the currently selected menu set, do one of the following:
- Double-click the menu name in the All menus column.
- Middle-drag the menu from the All menus column into the Menus in menu set column.
- With the menu selected, right-click and select Add to Menu Set. Tip:
To add multiple menus to a selected menu set in one operation, select the menus in the All menus column and middle-drag them into the Menus in menu Set column.
To reorder menu sets or menus
- In the Menu Set Editor, middle-click the menu set or menu and drag it up or down in its column.
To remove menus from a menu set
- Select the name of the menu set you want to remove menus from.
The menus already contained in the menu set are listed in the Menus in menu set column.
- Do one of the following:
- Double-click the menu name in the Menus in menu set column.
- Middle-drag the menu from the Menus in menu set column to the All menus column.
- With the menu selected, right-click and select Remove from Menu Set.
To remove a menu set
- Select the name of the menu set you want to remove.
The menus contained in the menu set are listed in the Menus in menu set column.
- Do one of the following:
- Select Edit > Remove.
- Right-click the menu set and select Remove.
To rename a menu set
- Do one of the following with the menu set selected in the Menu sets column:
- Right-click and select Rename.
- Select Edit > Rename.
- Enter a new name for the menu set and click Rename. Tip:
You can also rename a menu set in the Menu sets column by double-clicking its name, entering a new name, and pressing Enter.
To revert a default menu set to its original state
- Click the Status Line drop-down list and click Customize.
The Menu Set Editor appears.
- To restore a default menu set (Modeling, Rigging, Animation, Dynamics, and Rendering), select the menu set in the Menu sets column and do one of the following:
- Right-click and select Revert <menu_name> to Default.
- Select Edit > Revert <menu_name> to Default.
To restore the default menu sets
- Select the Status Line drop-down list and select Customize.
The Menu Set Editor appears.
- Select Edit > Restore Default Menu Sets.
To reuse a menu set from a previous version
- Copy the menuSetPrefs.mel file from the legacy preferences folder into your current preferences folder. Note: Rename the current menuSetPrefs.mel to ensure that you do not overwrite the current default.
- When you restart, the New Default Menu Sets Found dialog appears. Click Skip. A warning then appears to warn you that choosing to skip the menu set update will hide functionality.
- Click Ok.