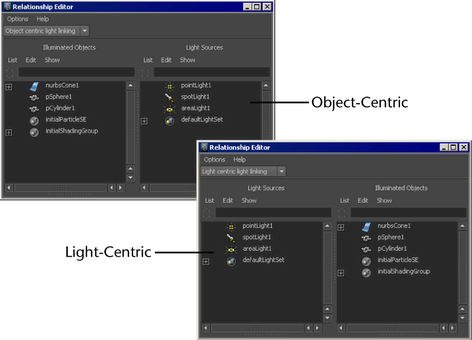
Selecting a light linking option opens the Relationship Editor in either Light-Centric or Object-Centric mode.
Note: Linking single objects to single lights is the preferred method of light linking.

To create a light set
- In the Relationship Editor, select Light Centric Light Linking.
- In the left panel (Light Sources), select the lights you want to include in a new set and select
.
Maya adds a new light set to the bottom of the light list.
To create an object set
- In the Relationship Editor, select Object Centric Light Linking.
- In the left panel (Illuminated Objects), select the objects you want to include in a new set and select
.
Maya adds a new object set to the bottom of the object list.
To add or remove an object or light from a set
- In the Relationship Editor, select Set Editing from the drop-down menu.
- In the left panel (Sets), select the set.
The objects (or lights) in the set are highlighted in the right panel.
- In the right panel (Objects), select the objects (or lights) you want to add to the set and clear the selection of objects (or lights) you want to remove from the set.
Link lights and surfaces from the command line
From the Maya command line, type:
lightlink -light <lightName> -object <surfaceName>
For example, to link spotLight1 and nurbsSphere1, type:
lightlink -light spotLight1 -object nurbsSphere1
Important: In Maya prompt or batch mode, the regular clean up process that amalgamates the data from several lightlinker nodes into one does not take place. This may result in several lightlinker nodes when scenes are imported or referenced. To prevent this behavior, import or reference scene data during an interactive session. If prompt or batch mode must be used, ensure that you invoke the
lightlink -q command to first force the loading of the module that contains the amalgamation routine.