
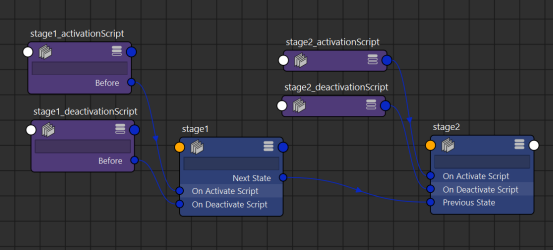
You can execute Python script nodes sequentially using a state machine, which consists of several stage nodes that are daisy chained together. This is handy for building interactive experiences such as tutorials, demos, and walkthroughs directly in the application. These nodes allow you to easily insert, remove, or rearrange the order of execution of the scripts involved via the Node Editor.
Note: In order to use stage nodes, the stage.py plug-in must first be loaded via the
Plug-in Manager.
To build and run a state machine
- Make sure stage.py is loaded in .
- Open the Node Editor.
- Create
two
stage nodes.

- Connect stage1's
Next State attribute to stage2's
Previous State attribute.

- In each stage's
On Activate and
On Deactivate attributes, enter the Python code you'd like to execute when the stage begins and ends (either directly in the field, or by connecting a
script node set to
Python mode).
- (Optional) Connect a
Time Slider Bookmark node to the stage nodes to automatically frame those bookmarks when the stage is activated.
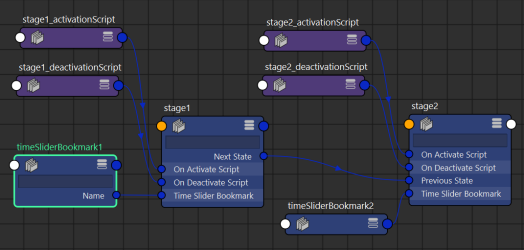
- (Optional) Add additional stage nodes after stage2 following the same pattern.
- Once your chain is complete, you can execute it from the start using the MEL command :
stage -e -a "stage1"
To progress from the current stage to the next
- Do one of the following:
- Turn on the Condition attribute on the current stage.
- Turn on the End of Animation attribute on the current stage, then play the scene.
- Set the Time Delay attribute of the current stage to any positive, non-zero number (the state machine will automatically progress to the next stage after that many seconds).
- Run the command:
stage("<current stage>", edit=True, next=True)