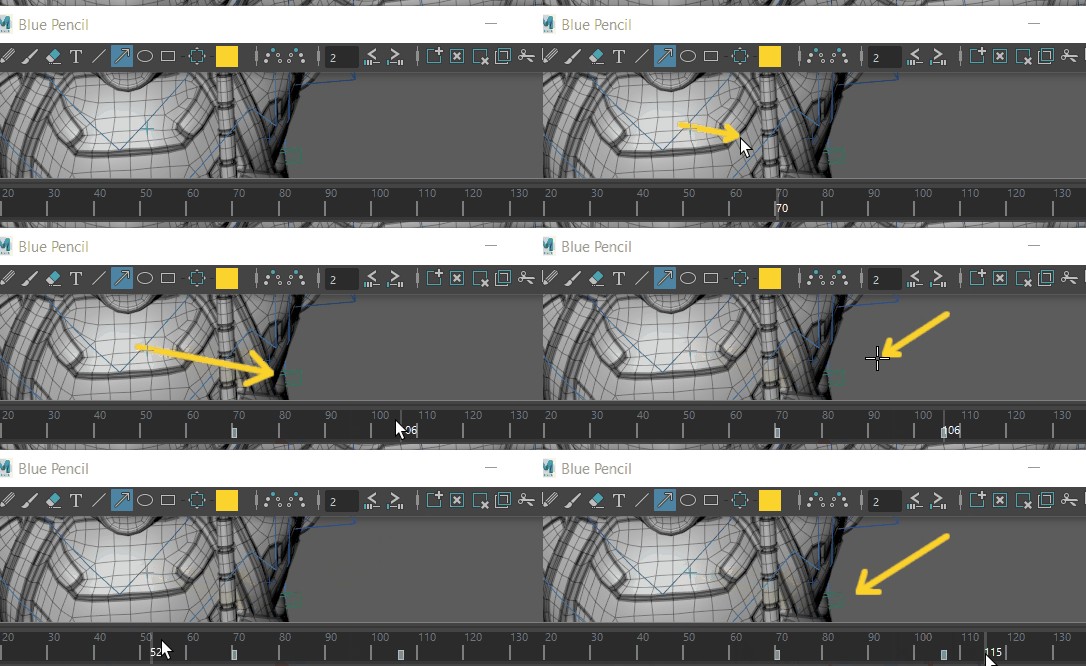
Blue Pencil is a 2D drawing tool that lets you draw in 3D space. Blue Pencil replaces Maya's previous drawing tool Grease Pencil, and offers more comprehensive drawing tools for animation and review. You can use the Blue Pencil tool to draw on frames in the Viewport that you can layer, edit, retime, and export.
To use Blue Pencil to draw in the Viewport, do one of the following:
- Click the
Blue Pencil icon
 in the
Panel toolbar.
- Select from the Animation menu set (F4).

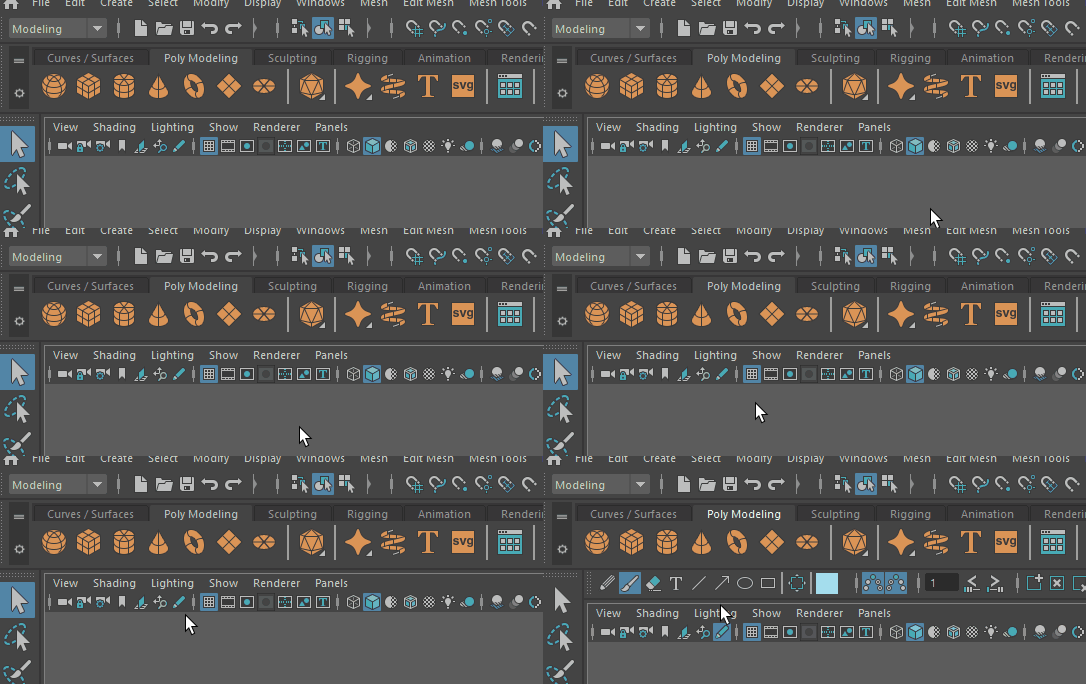
The Blue Pencil toolbar appears below the Shelf
| To... | Do this: |
|---|---|
| Open the Blue Pencil toolbar | Select the
Blue Pencil icon
 from the
Panel toolbar. You can also select
from the Animation menu set (F4). from the
Panel toolbar. You can also select
from the Animation menu set (F4).
 |
| Close the Blue Pencil toolbar |
To close the Blue Pencil toolbar, click the X in the upper right corner. Note: Clicking the
X closes the toolbar, but
Blue Pencil remains active.
To exit Blue Pencil, press Q or switch to another tool. |
| Change Blue Pencil Settings |
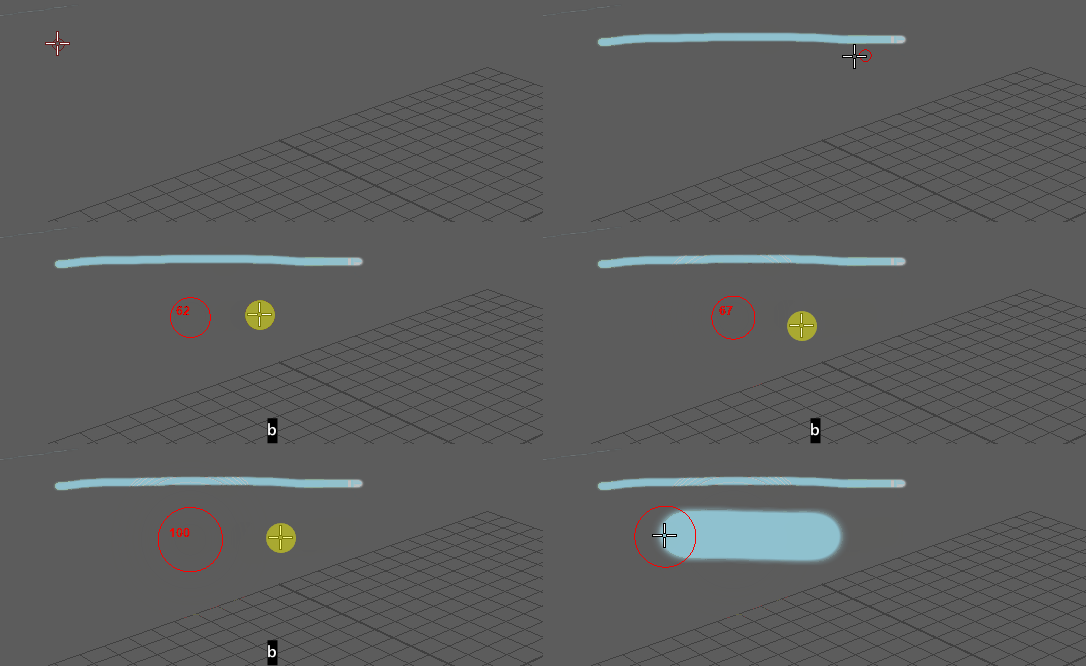
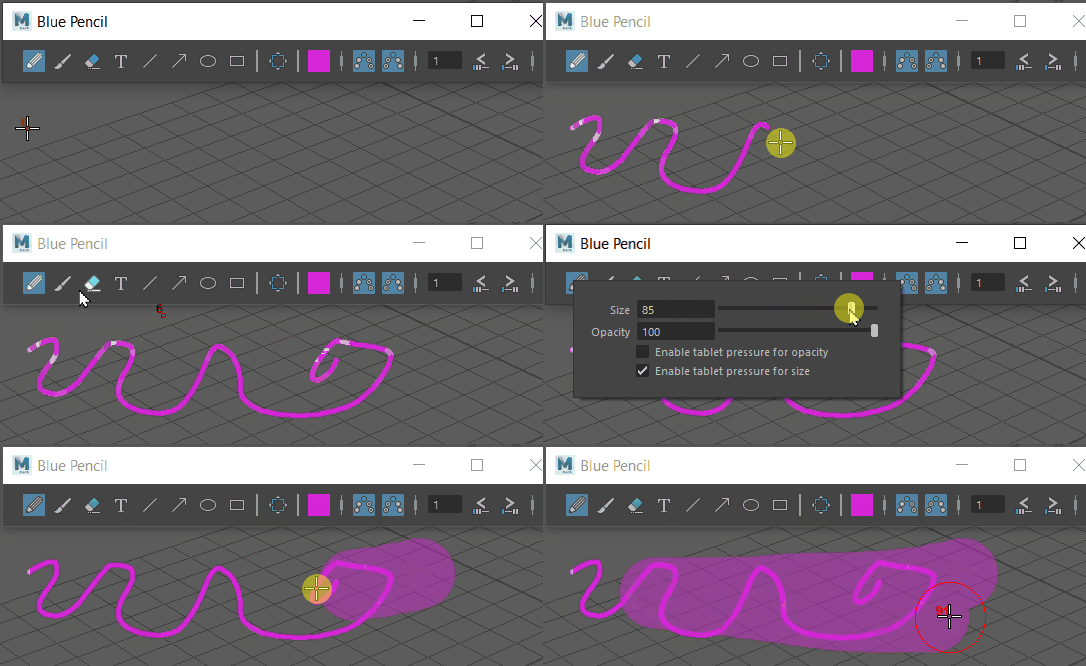
To change the stroke
size, press
B and drag in the Viewport.
 To change
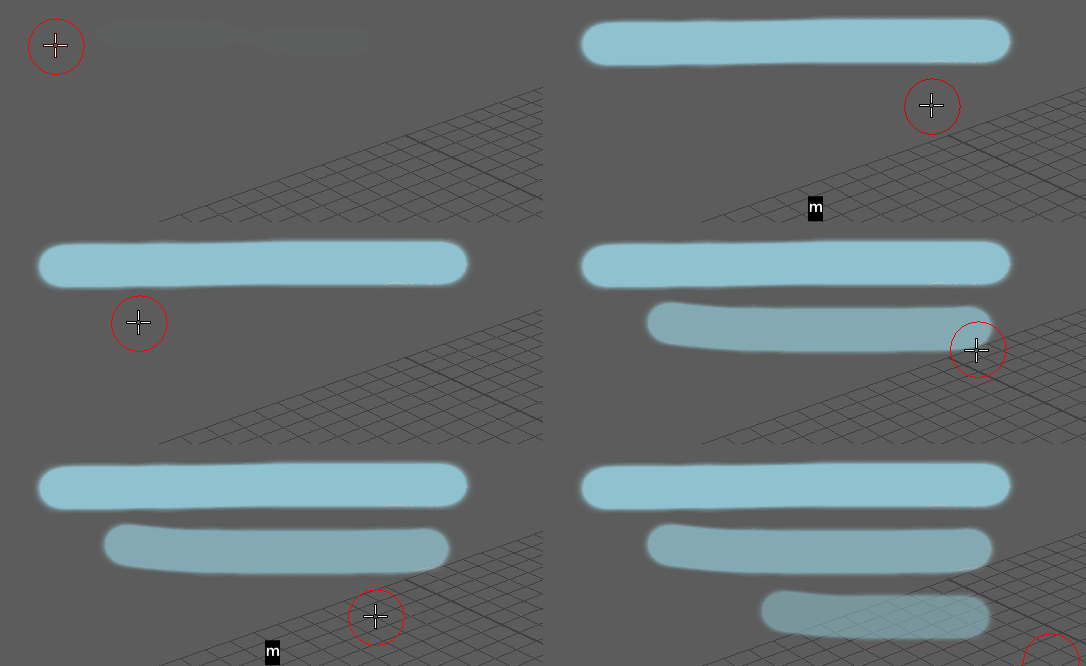
opacity, press
M and drag in the Viewport.
 You can also right-click a tool in the
Blue Pencil toolbar to display related settings. See
Adjust Blue Pencil tools for more.
 See the following row for how to Open the Blue Pencil Tool Settings |
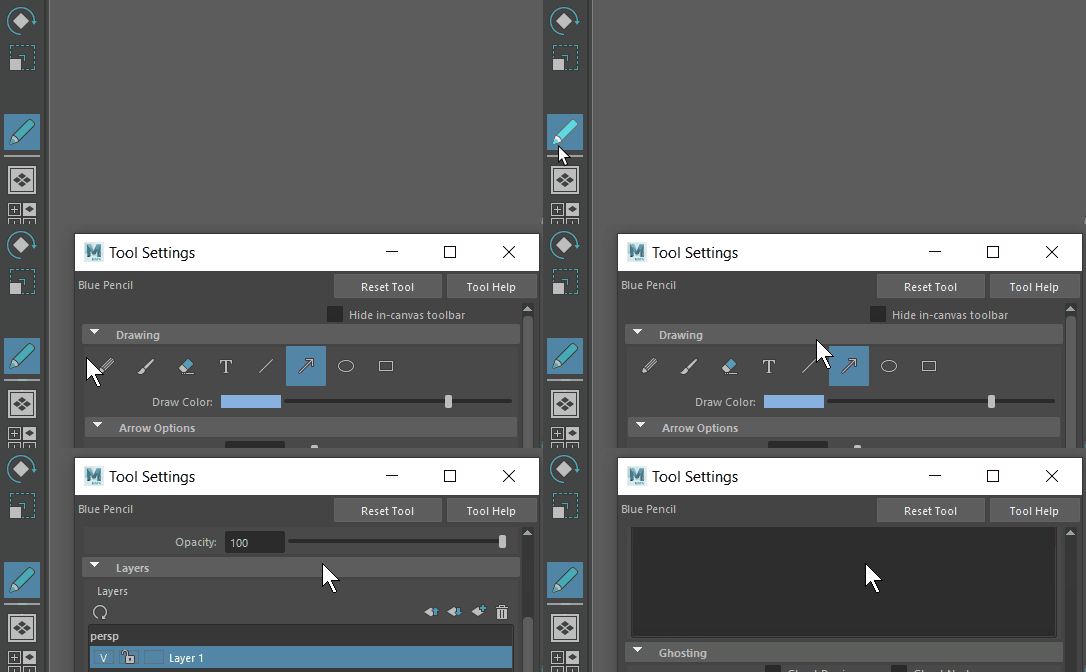
| Open the Blue Pencil Tool Settings | While
Blue Pencil is the active tool, double-click the
Blue Pencil icon in the Last Used Tool area of the
Tool Box.
For more advanced settings, click the Tool settings icon
 in the upper right corner of Maya. in the upper right corner of Maya.
 |
| Add a Blue Pencil frame for drawing |
Start drawing in the Viewport and a frame is created automatically. You can also click
Add Frame
|
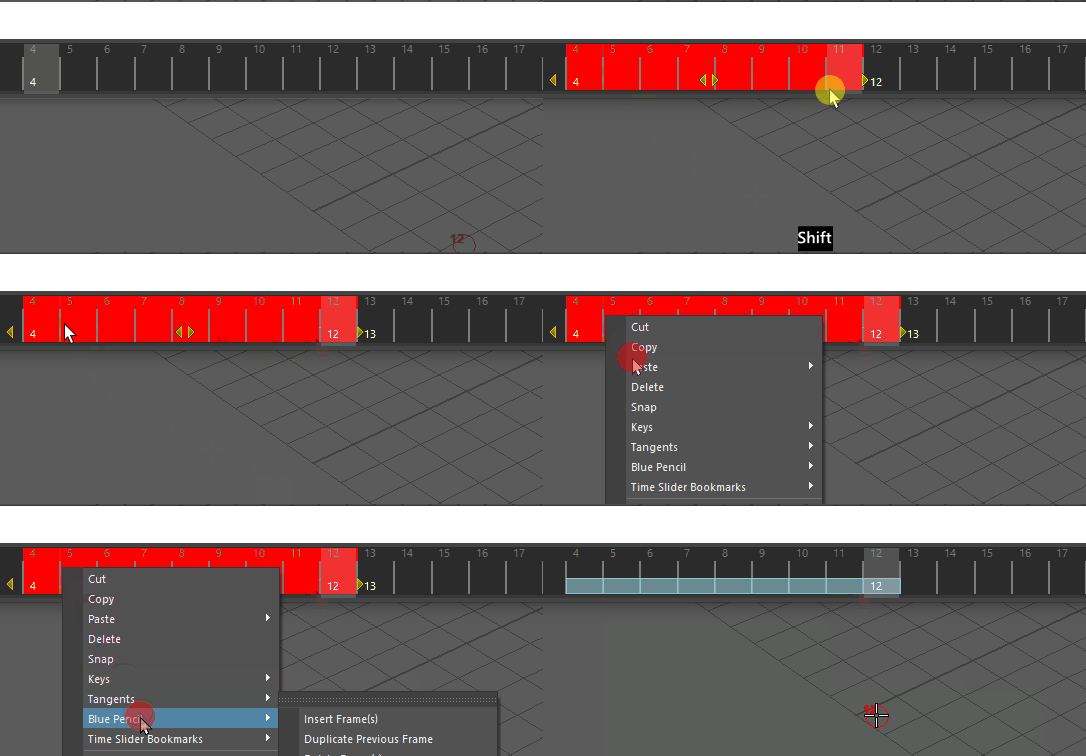
| Create multiple Blue Pencil frames at the same time | Shift-select a range on the
Time Slider, select
to create a frame for each frame in the selected range.
 |
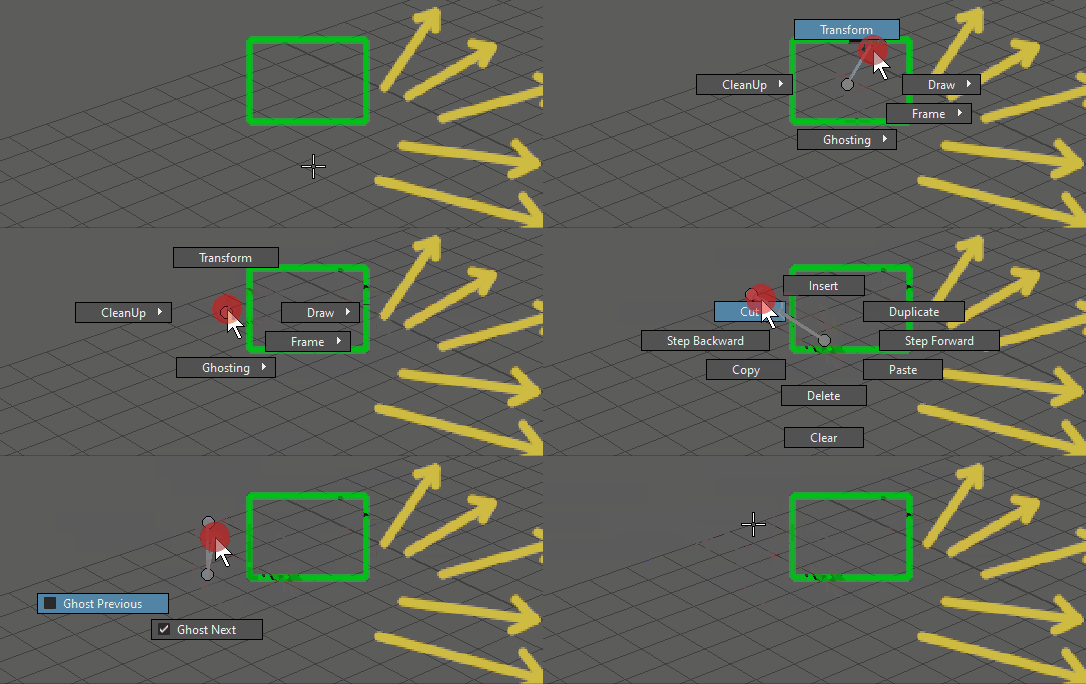
| Open the Blue Pencil Marking menu | While working with
Blue Pencil,
Shift +
Ctrl + right-click to open a Marking menu so you can switch between tools and functions.
See
Blue Pencil Marking menu for more information.
 |
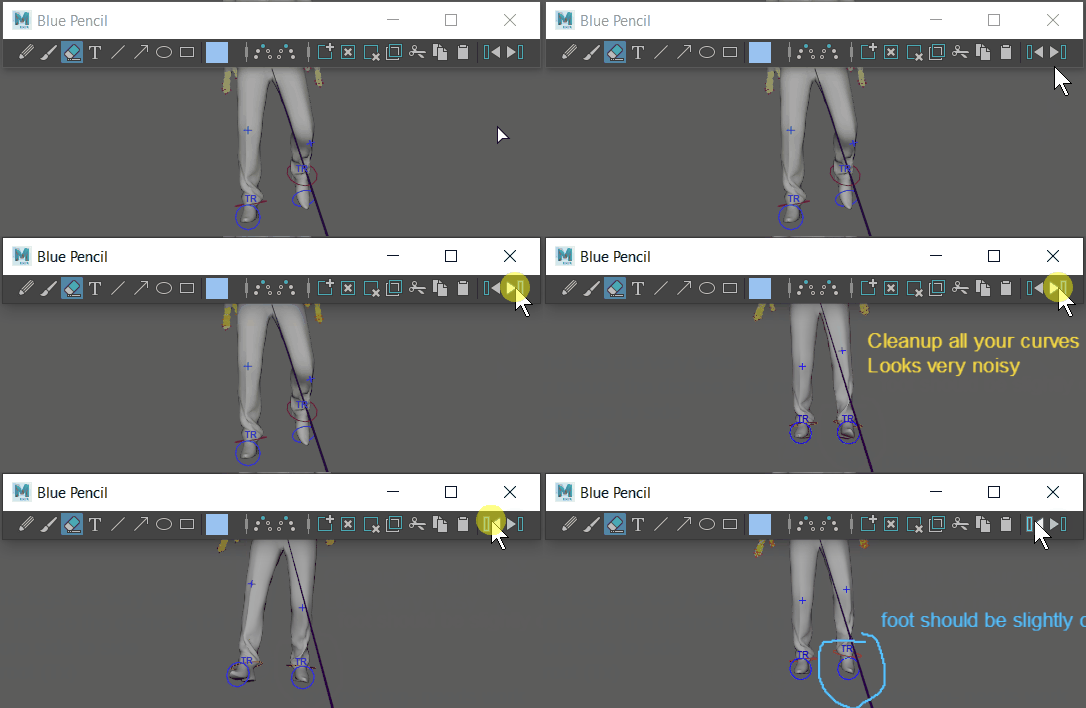
| Advance frames | Click
Jump to Previous
 or
Jump to Next or
Jump to Next
 Frames. Frames.
 |
| Add text | Click the
Text tool icon
 and start typing. and start typing.
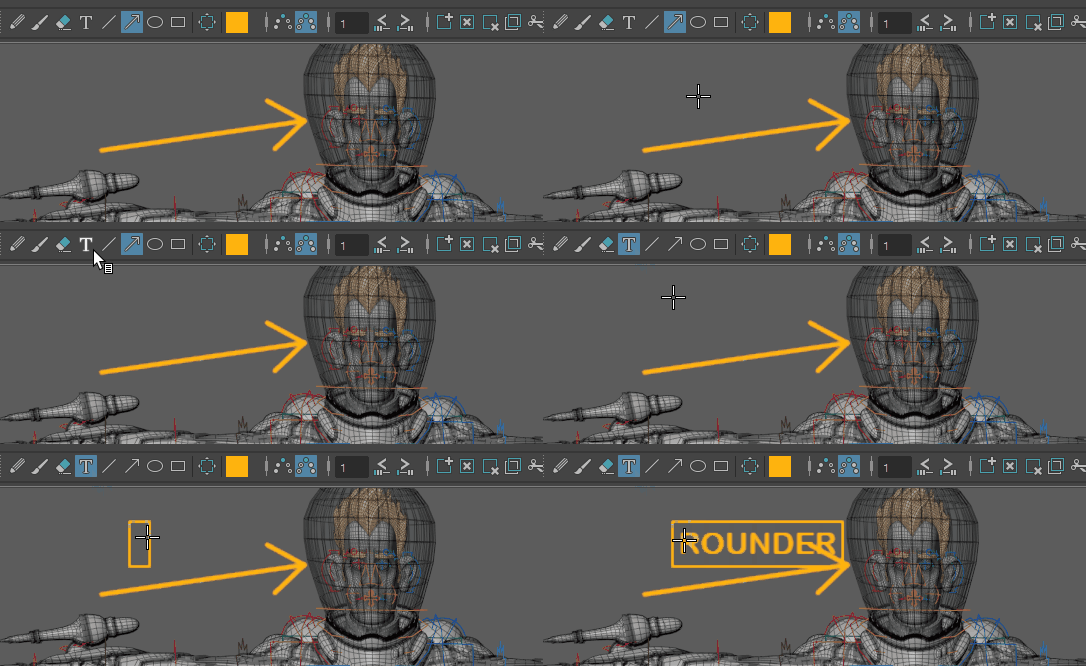 Note: Currently,
Blue Pencil text does not support Chinese or Japanese character sets. To use Chinese or Japanese character sets, copy and paste them into Blue Pencil from a text editor.
|
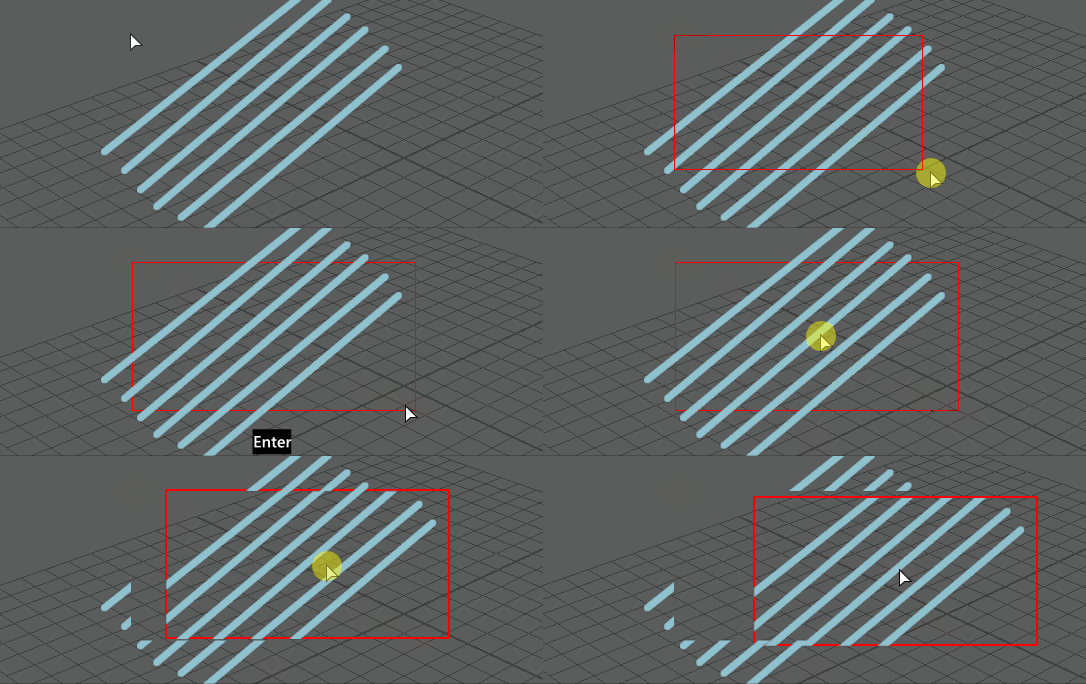
| Modify a drawing | Click the
Transform icon
 and drag in the Viewport to select a region. (You can also right-click the drawing and select
Transform) and drag in the Viewport to select a region. (You can also right-click the drawing and select
Transform)
Once you have manipulated the selection, press
Enter (or right-click the selection and select
Apply Transform) to set it.
 |
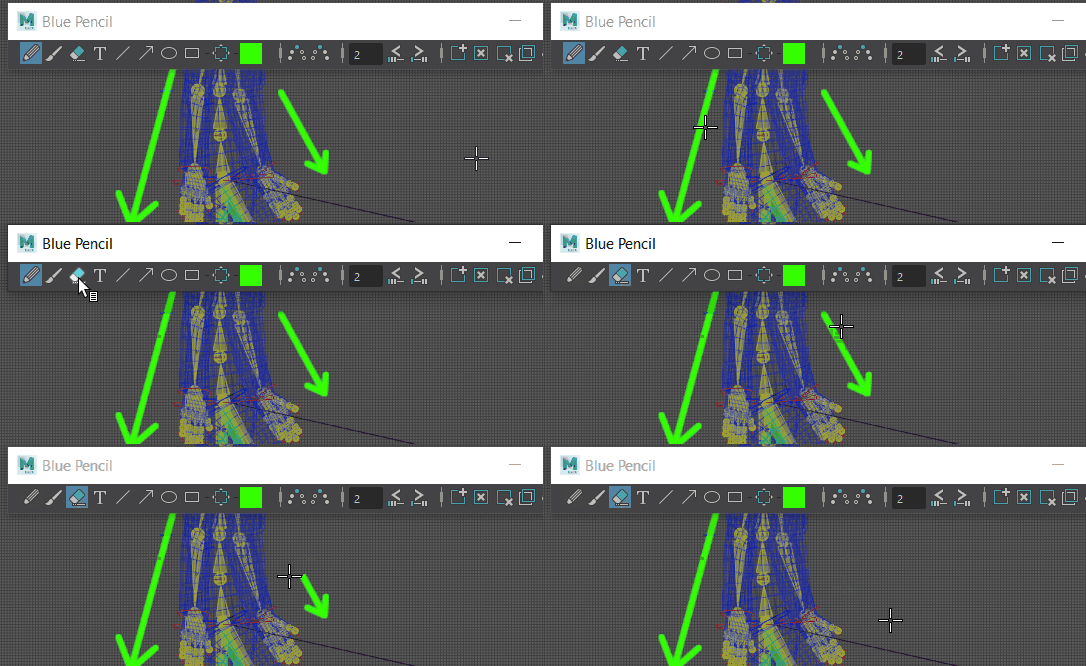
| Erase part of a drawing | Click the
Eraser icon
 and drag the cursor across parts of the image you want to erase. and drag the cursor across parts of the image you want to erase.
Erase the contents of the entire frame (without deleting the frame) with the
Clear Frame icon
 . See
Clean up Blue Pencil sketches for more. . See
Clean up Blue Pencil sketches for more.
 |
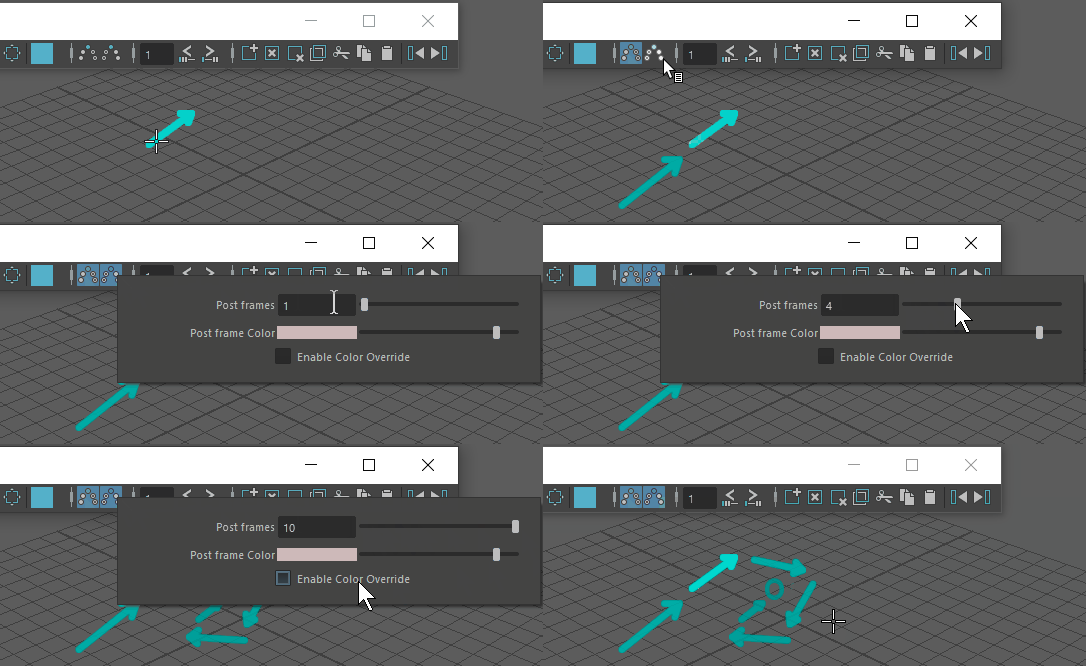
| Ghost frames | Click the
Ghost Previous
 or
Ghost Next or
Ghost Next
 icons to display
Blue Pencil frames that occur before and after. icons to display
Blue Pencil frames that occur before and after.
Right-click the Ghost icons to set how many frames and what color is displayed.
 |
| Move Blue Pencil frames on the Time Slider. | Shift-click one or more frames on the
Time Slider and once highlighted, drag it to a new location.
You can Shift + drag multiple frames. 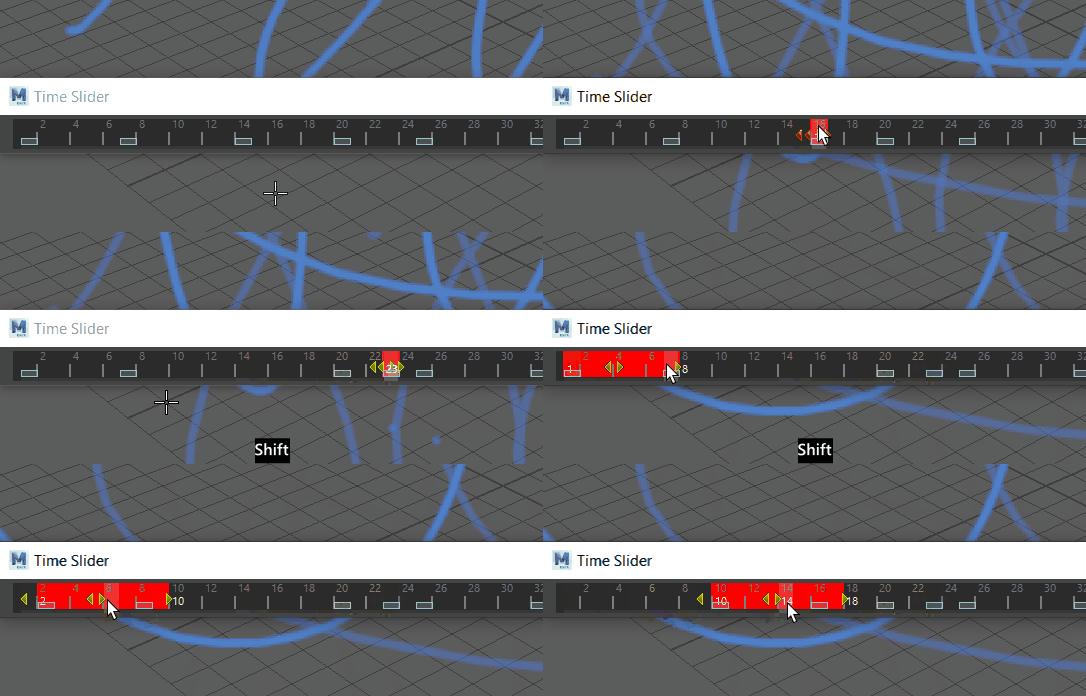 To move one or more frames by a specific increment, see Retime Blue Pencil frames on the Time Slider below. |
| Retime Blue Pencil frames on the Time Slider | Click
Retime Backward
 or
Retime Forward or
Retime Forward
 to move the frames after the current frame by the number of frames set in the
Frame Range field beside the Retime icons. to move the frames after the current frame by the number of frames set in the
Frame Range field beside the Retime icons.
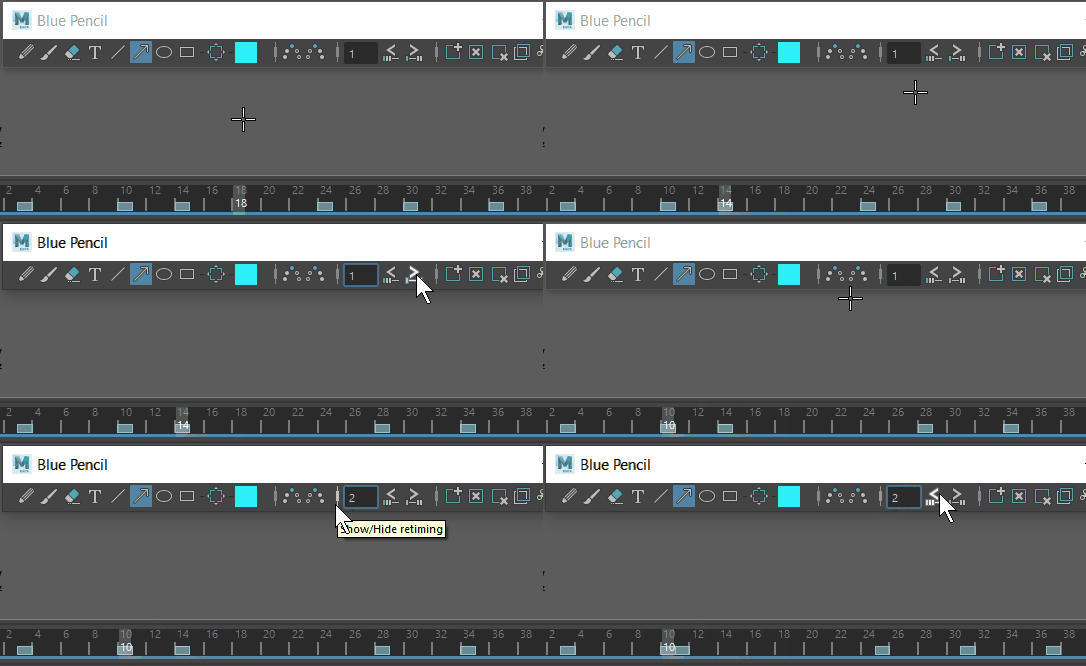 See Work with Blue Pencil frames for more. |
| Add a Blue Pencil layer to the Layer manager. | Draw in the scene and a layer is created for the current camera view. You can also click
Add New Layer icon
 in the Layer Manager. in the Layer Manager.
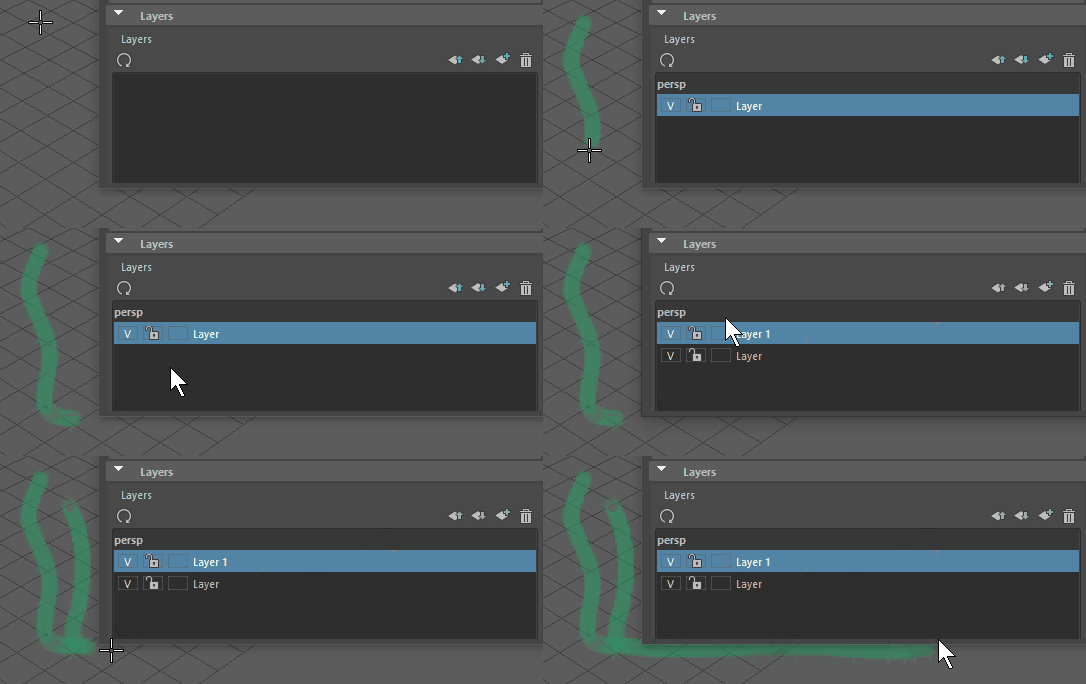 |
| Use Duplicate Previous Frame to create an animation guide | Use
Duplicate Previous Frame
 to copy sketches from earlier frames and then transform them to create an animated sketch sequence. to copy sketches from earlier frames and then transform them to create an animated sketch sequence.
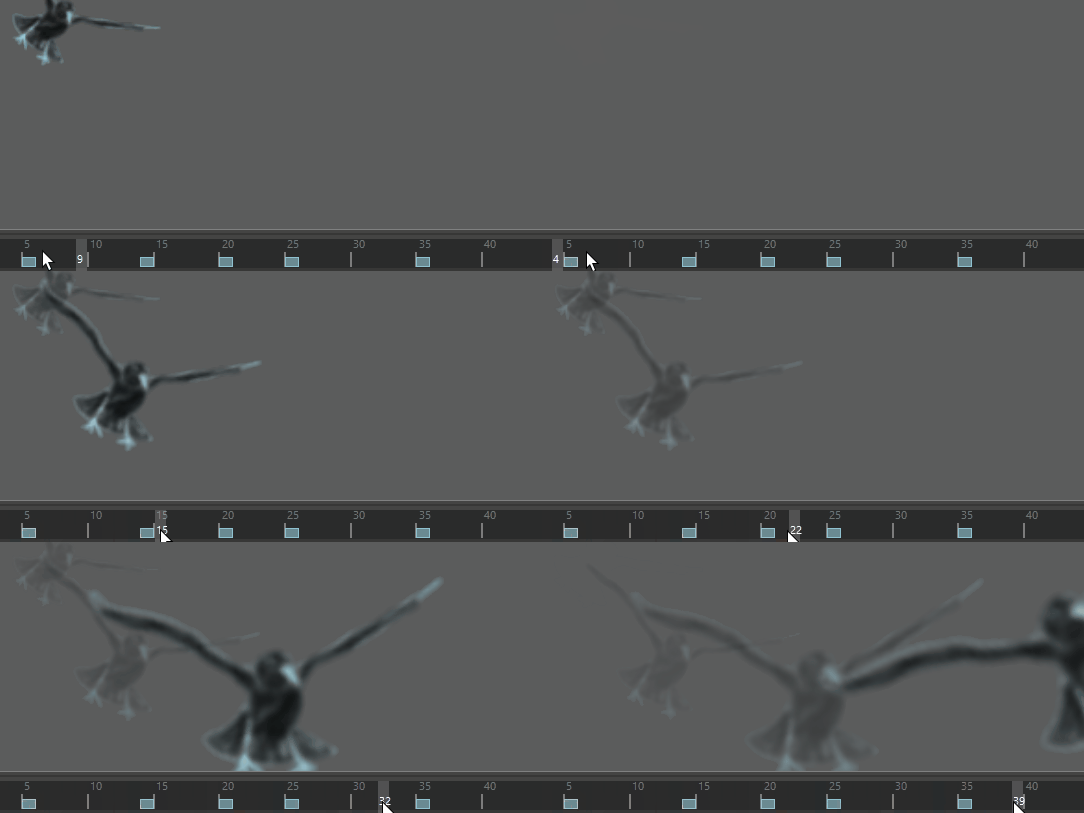 See Work with Blue Pencil frames for more. |
| Save your Blue Pencil drawings | Export your drawings in a .zip file using the Export Frames
 option in the
Blue Pencil toolbar. See Import or Export Blue Pencil frames. option in the
Blue Pencil toolbar. See Import or Export Blue Pencil frames.
|
| Draw with Blue Pencil using a tablet | Configure Maya for a tablet using the Tablet API setting in the Interface Preferences. (See also Use a tablet with Blue Pencil) |
Related topics
- Draw in the Viewport with Blue Pencil
- Modify drawings with the Blue Pencil Transform mode
- Work with Blue Pencil frames
- Preview Blue Pencil frames with ghosting
- Clean up Blue Pencil sketches
- Manage Blue Pencil layers
- Blue Pencil tool settings
- Import or Export Blue Pencil frames
- Use a tablet with Blue Pencil)
 on the
