Managing Animation using Takes
The following sections explain how to use takes and animation layers. To follow the instructions, download the files and scripts from http://area.autodesk.com/downloads/scripts/motionbuilder-animation-scripts.
Navigating Through Takes
A take (FBTake) is a level of animation in your scene.
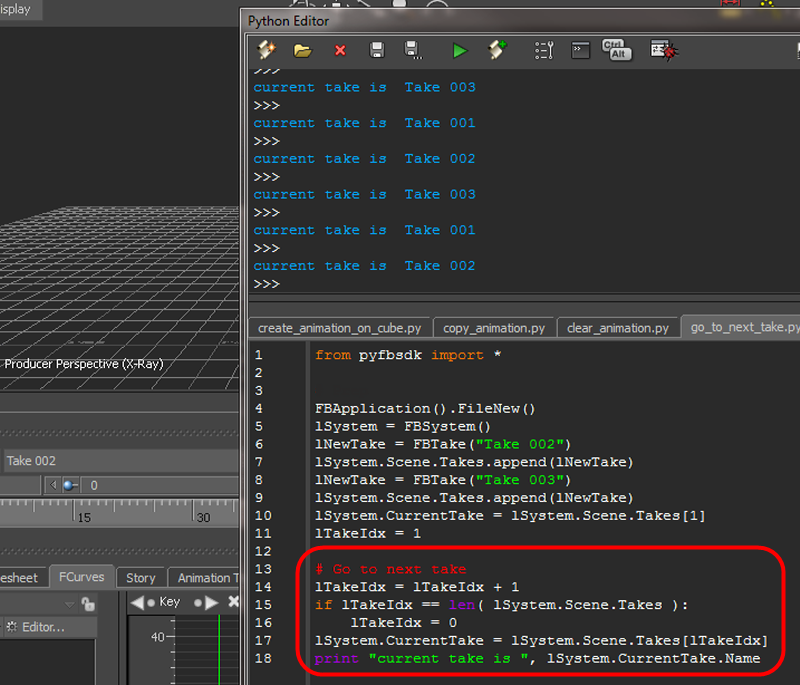
Run the go_to_next_take.py script to create two takes. You can navigate to the next take by running the Go to next take code as shown in the following figure.

Following are the points to keep in mind:
lSystem.CurrentTake– Always returns the current take.lSystem.Scene.Takes– The takes list in a scene.FBTake("Take 002")– Creates a new take.lSystem.Scene.Takes.append(lNewTake)– Adds a take to the scene.
Creating Animation on Animation Layers
A take can contain multiple animation layers. You can make changes in one layer without affecting the other layers.
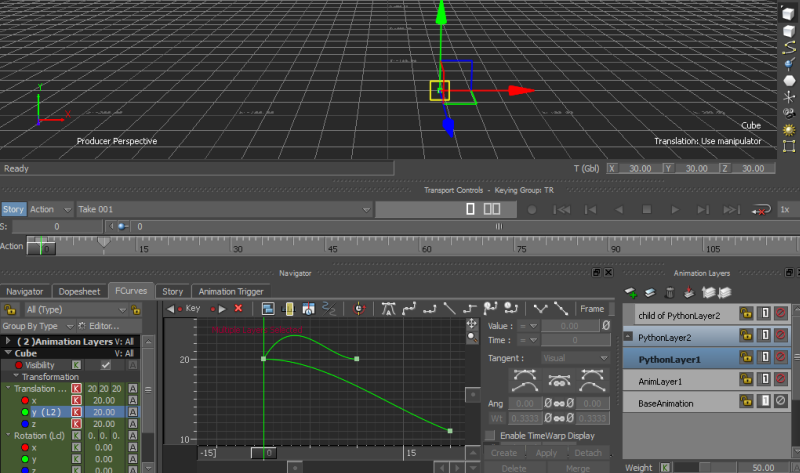
Run the create_animation_on_animation_layers.py script to create animation in multiple layers. Select the two animation layers as shown in the following figure.

Following are the points to keep in mind:
lSystem.CurrentTake.SetCurrentLayer(index)– Sets an animation layer as the current animation layer.lSystem.CurrentTake.GetLayerCount()– Gets the number of animation layers.lSystem.CurrentTake.GetLayerByName()– Gets an animation layer by name.lSystem.CurrentTake.CreateNewLayer()– Creates a new layer.ParentLayer.AddChildLayer(NewChildLayer)– Builds the animation layer hierarchy.
Animation layers have properties such as, Weight, LayerMode, and others that you can set in the script.
Merging Animation Layers
In the scene used in the
!!CONVERSION WARNING!! broken xref detectd, likely a cross-book reference. The target GUID file is GUID-8EC1E48A-B713-42A9-A174-24F7778A4833.htm#SECTION_3C633784B8E14926A355BBF593E5D83E and the target link text is Creating Animation on Animation Layers
section, select two layers (PythonLayer1 and PythonLayer2). Run the merge_animation_layers.py script to merge the layers into one layer as shown in the following figure.

Following are the points to keep in mind:
lSystem.CurrentTake.GetLayerByName("PythonLayer1").SelectLayer(True, False)– Selects an animation layer.lSystem.CurrentTake.MergeLayers()– Merges the selected animation layers into one. Refer to theMergeLayers()function in the SDK help for information about the function parameters.