This section provides an example to explain how to move the pivot of an object from an offset position to its center, using the Temporary Pivot Shift tool.

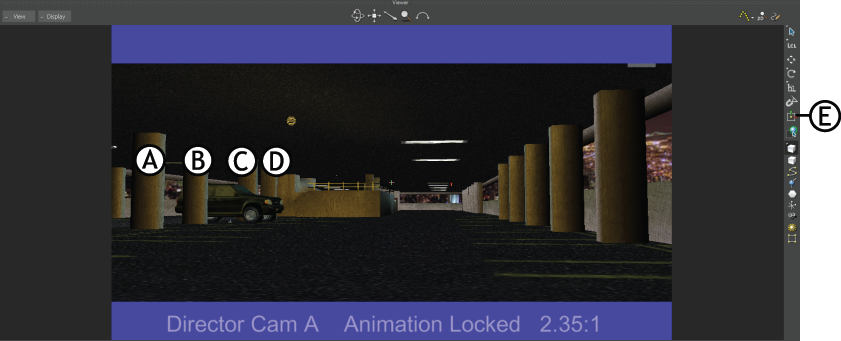
Camera view of a parking lot scene in Viewer window A, B, C, D Pillars E. Temporary Pivot Shift icon

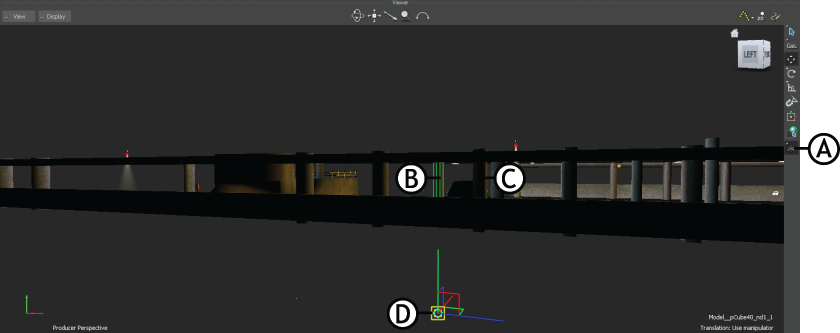
Parking lot scene rotated to locate the pivot of pillar C A. Pivot Mode B, C Pillars between which the car is parked D. Offset location of the pivot of pillar C
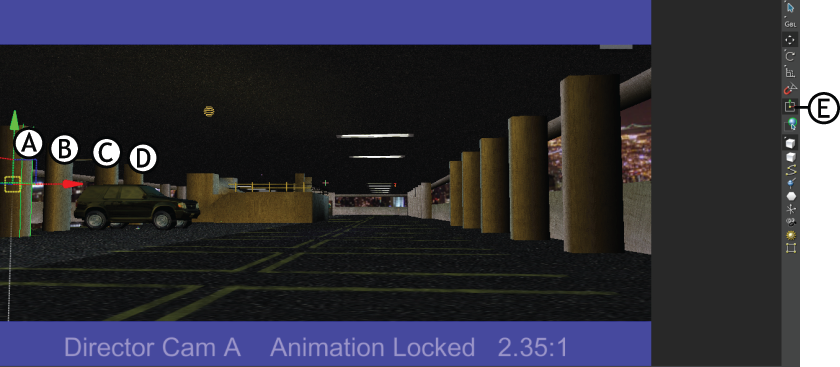
In a virtual production environment, if the director want to immediately reposition all the pillars (A, B, C, and D) on the scene, then it is time consuming to rotate the scene, locate the offset position of each pillar, and drag them to the center point of each pillar, before repositioning them.
To avoid this:
- Select the object that you want to move.
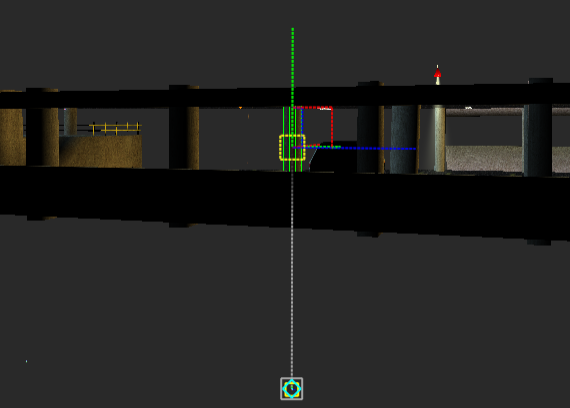
- From the Viewer window toolbar, click the Temporary Pivot Shift icon. The pivot moves from the offset position to the center of the bounding box of the object, as shown in the following figure:

Notice that the coordinates of temporary pivot and the line that connects the offset location and the temporary shift to the bounding box center appears dotted. This specifies that the shift from offset pivot location to the center of an object is only temporary.

Parking lot scene A, B, C, D Pillars moved backward E. Temporary Pivot Shift tool active
By default, the temporary pivot appears in the translation mode (T). You can change to the rotation and scaling modes using the R and S keys, respectively.
You can manipulate the translation, rotation, and scaling of pivots using the properties listed in Resources window > Properties tab. For more information regarding the pivot properties, see Transformation Pivots properties.
You can save a scene with the Alt+Shift+W keys enabled. When you reload the scene, it contains the saved settings.