Lets you create a visual representation of a camera view of the action playing in the Action timeline.
You cannot create a shot clip with Producer cameras.
To create a shot clip:
- Add and position cameras in your scene.
-
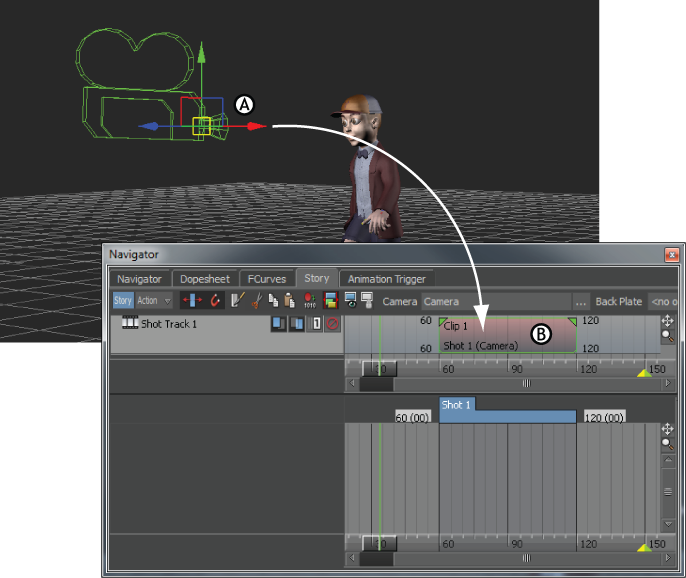
Alt-drag cameras from the Viewer window or Scene browser into the Edit Track.
Note: You can use one camera to create multiple shots, or use different cameras for each shot.A Shot track appears, and a shot clip is created for each camera you drag onto the Edit track.

Shot clip A. Custom camera in the Viewer window B. Shot clip created after dropping the Custom camera into a Shot track
- Make sure the Story mode is set to Action.
This enables the camera shots to play in order of their positions, from left to right, on the Edit timeline.
- Right-click a shot clip and select Make Camera Switcher current from the context menu.
This enables you to view the results of the Edit track in the Viewer window.
- Do any of the following to the shot clips on the Edit track:
- Drag the clips along the Edit track to arrange them.
- Stretch the beginning or end of clips to increase or decrease the duration of the camera shot.
- Overlap the clips to create a cross fade effect.
Note: To overlap the clips, switch the Story window into Edit mode.

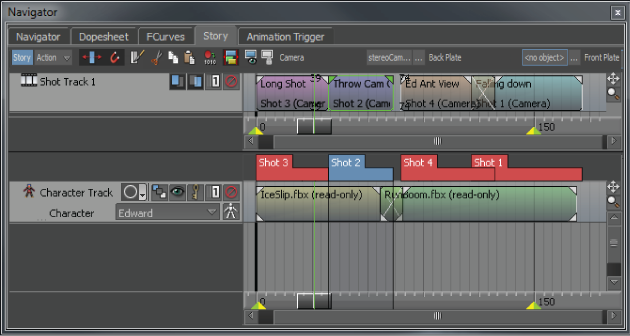
Three cameras arranged into four shot clips on the Edit track
In the preceding figure, the first and third camera shots are the same, only the shot clips are renamed.
- Click Play in the Transport controls to view the scene.
- Fine-tune the camera angles so that they cover the action the way you want. If you want to reposition a camera, right-click the shot clip on the Edit track and select Make Camera Current to reposition that shot’s camera view.
- When you are satisfied with the camera set-up, you can plot the resulting camera switches from the Edit track to a take by right-clicking a shot clip and selecting Plot Shot Track To from the context menu.
This way, you can use the camera switches in the Camera Switcher settings.
- To combine all animation in a scene with the take selected in the Transport controls, right-click any shot clip and select Plot Scene to Current Take.
Note: This plotting includes the animation of the take selected in the Transport Controls window as well as the animation in the Story window.
To rearrange shots so they are out of sequence using the Time Discontinuity function, see Changing the order of events in a scene.