Now switch to Autodesk® Advanced Toolpath Utility for Netfabb® () and import the Example Graph.toolpathxml file
Prerequisites
- The Example Graph.toolpathxml file created in the previous step
- ATU opened
Steps
-
Creating the ATU project
- Choose .
- In the Import Project Wizard dialog select the configuration (*.toolpathxml) project type.
- Set the project name, project file name, and the path for the project. (Creating a separate folder for the project can help keep order.)
In this example, the project name is example_import, the project file name example_import.fsp, and the project path is D:/import_demo.
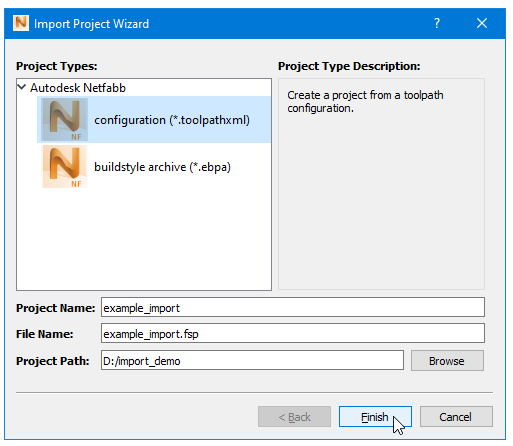
The file name is suggested automatically as you type the project name.
- Then click Finish.
- In the dialog to select the toolpath configuration, select and open the TOOLPATHXML file for import. (In this example, the
Example Graph.toolpathxml file is used).

The dialog to import the TOOLPATHXML file opens automatically after finishing project creation.
Once opened, a dialog box shows with a collection of information about the TOOLPATHXML file.

Some content items can be edited, but during this tutorial, this is not needed.
- Click OK to start the generation of the project based on the information from the TOOLPATHXML file.
This concludes this tutorial. You can now customize the generated code further to develop more advanced toolpathing algorithms.