View Clash Results
In this section you will learn how to interact with the results of your clash tests.
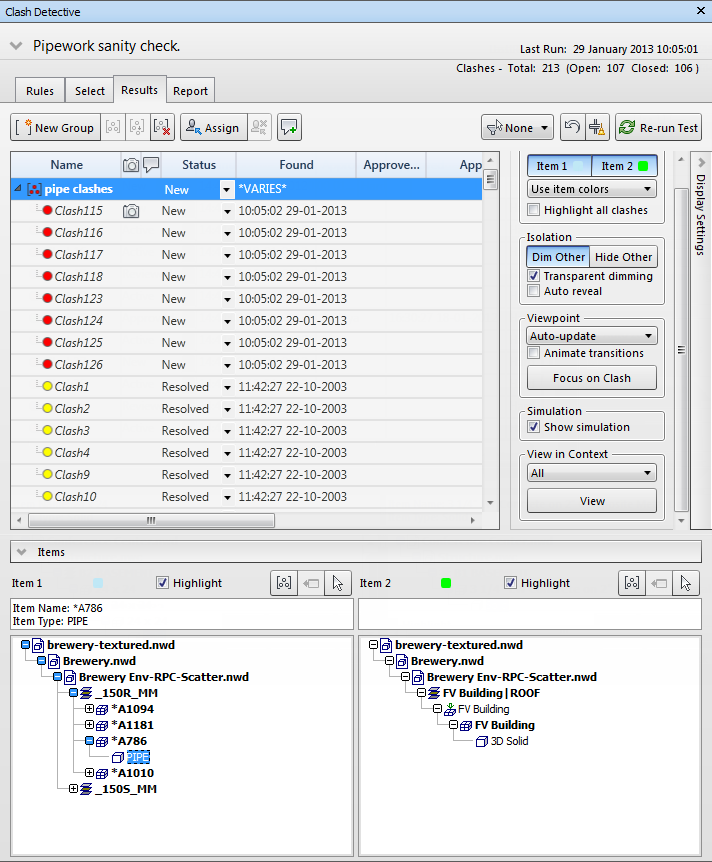
All found clashes are shown in the Results tab in a multi-column table. You can click on any of the column headings to sort the table using that column's data. This sorting can be alphabetical, numerical, date-related, or, for the Status column, in workflow order: New, Active, Reviewed, Approved, and Resolved.

If you run a time-based, soft, or time-based soft clash test, the start time/date of any clashes are recorded next to the appropriate clash under the Start and End columns, together with the event name (an animation scene or a TimeLiner task) in the Event column. If multiple clashes are found on a particular date, each individual clash is listed with identical simulation information. If your model contains a grid system then grid levels and intersections are also displayed.
The two panes in the Items panel show the Quick Properties relating to each item in the clash, and also the path through the standard Selection Tree from the root to the geometry of the item.
Clicking on a clash highlights the two objects involved in the clash in the Scene View. By default, the center of the clash is the center of the view, which is zoomed in so that the parts of objects involved in clash fill the view. You can use the options in the Display Settings panel (and additional settings in the Options Editor) to control how the clash results are shown.
When your clash results contain multiple clashes which are associated with a single design issue, consider manually grouping them together. Organizing clashes into groups can simplify keeping track of design issues. When clashes are grouped together they are listed as a single clash in summaries and reports. The distance shown for a clash group is that of the largest 'open' clash within the group. Clash groups are identified with the ![]() icon. You can click the arrow next to a clash group to toggle between showing and hiding the clashes contained in the group.
icon. You can click the arrow next to a clash group to toggle between showing and hiding the clashes contained in the group.
Finally, selecting an item on one of the panes in the Items panel, and then clicking on the SwitchBack button sends the current view and currently selected object back to the originating CAD package. This makes it very simple to show clashes in Navisworks, take them back to the CAD package, alter the design, and then reload them in Navisworks for a very fast design review turnaround.