Work with the Scene View
Create a Custom View
Create custom views by splitting your active view:
- Click View tab > Scene View panel > Split View.
- Choose either Split Horizontal
 , or Split Vertical
  .
.
Make a Custom View Dockable
- Click View tab > Scene View panel > Show Title Bars.
- Use the title bars to move views around and dock them in different positions.
Delete a Custom View
If your view is not dockable, click View tab > Scene View panel > Show Title Bars.
Click
 to close the scene view.Note: You cannot delete the default view.
Toggle Full Screen Mode
Click View tab > Scene View panel > Full Screen
 .Tip: If you use two monitors, your default view is automatically placed on the primary display, and the interface can be placed on the secondary display to control the interaction.
Command entry: F11
Shortcut menu: Viewpoint > Full Screen
Resize the Active Scene View
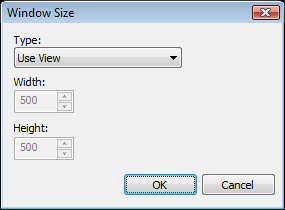
Click View tab > Scene View panel > Window Size
 .
.In the Window Size dialog box, open the Type drop-down list and select the sizing type required:

- Use View - makes the content fill the currently active scene view.
- Explicit - defines the exact width and height for the content.
- Use Aspect Ratio - uses the aspect ratio of the current scene view to automatically calculate the width of the content when the height is entered, or the height of the content when the width is entered.
If you selected the Explicit or Use Aspect Ratio option, enter the width and/or height for your content in pixels.
Click OK.