Set the TimeLiner Options
Click
 > Options.
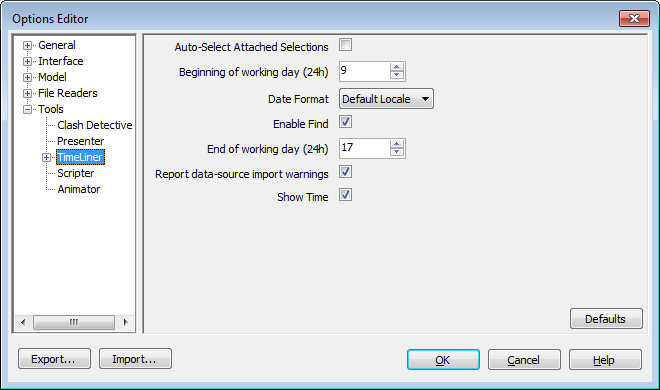
Expand the Tools node in the Options Editor, and click the TimeLiner option.

On the TimeLiner page, select the Auto Select Attached Items check box if you want TimeLiner to select any attached items in the Scene View as you select each task in the TimeLiner window.
Select the time that you want the working day to begin using the Beginning of Working Day (24h) option.
Select a date format from the Date Format drop-down.
Select the Enable Find check box if you want the find option to be available when you right-click in the Tasks tab.
Select the time that you want the working day to finish using the End of Working Day (24h) option.
Select the Report Data-Source Import Warnings check box to enable the displaying of warning messages if an issue is encountered when importing data in the TimeLiner window, Data Sources tab.
Select the Show Time check box to display the time in the date columns in the Tasks tab.