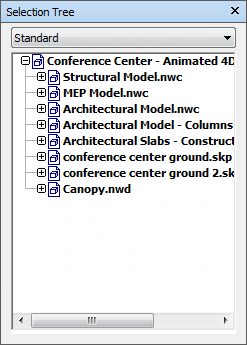
Selection Tree Window
The Selection Tree is a dockable window, which displays a variety of hierarchical views of the structure of the model, as defined by the CAD application in which the model was created.

Navisworks uses this hierarchical structure to identify object-specific paths (from the file name down to a particular object).
For Revit 2014 and later (RVT or NWC) files, the model hierarchy can be structured to display category, family, type, and instance below each level, and show the material from which the Revit object is made. For example, a door may be broken up into constituent parts such as glass or wood panel.
By default there are four options on the drop-down list:
Standard. Displays the default tree hierarchy, including all instancing. The hierarchy can be sorted alphabetically.
Compact. Displays a simplified version of the hierarchy on the Standard option, omitting various items. You can customize the level of complexity of this tree in the Options Editor.
Properties. Displays the hierarchy based on the items' properties. This enables simple manual searching of the model by item property.
Sets. Displays a list of selection and search sets. If no selection and search sets have been created, this option is not shown.
Note: The list of the items on the Sets option is exactly the same as the list on the Sets dockable window.
Additional customized Selection Tree options can be added by using the Autodesk Navisworks API.
Naming of items reflects the names from the original CAD application, wherever possible. You can copy and paste names from the Selection Tree. To do this, right-click an item in the Selection Tree, and click Copy Name on the context menu. Alternatively, you can click an item in the Selection Tree, and press CTRL + C. The name is now copied to the clipboard.
There are different tree icons representing the types of geometry making up the structure of the model. Each of these item types can be marked as hidden (gray), unhidden (dark blue) or required (red).