Use the Simulation Issues dialog to turn on machine tool collision checking, specify a clearance value around the machine tool to identify 'near misses', and review any collisions or 'near misses' that occur when simulating a toolpath.
Click Simulation tab > Issues panel > Display Issues to display the Simulation Issues dialog.
This dialog contains the following:
 — Displays the name of the machine tool.
- Check for Collisions — Click to enable collision checking.
 — Hover over this button to receive additional information about the settings on this dialog.
- Machine tool clearance — Enter a clearance value around the machine tool that
PowerMill takes into consideration when checking for collisions. When a machine tool axis-component and the part come with the specified clearance value, the axis-component is highlighted yellow.
PowerMill checks for collisions and 'near misses' at fixed points. Although these points are distributed frequently, it is possible that PowerMill may not identify small collisions that occur in between two points.
Machine tool collision-checking does not check the tool assembly for collisions. To check the tool assembly, use the Toolpath Verificationfunction.
- Check the tool and tool holder — Click to enable collision checking for the tool and tool holder.
If selected, the cutting part of the tool is checked against the machine, and the holder is checked against the machine and the model.
- Holder clearance — Specify the minimum distance, between the tool holder and the model or machine tool, before a clearance issue is generated.
- Shank clearance — Specify the minimum distance, between the tool shank and the model or machine tool, before a clearance issue is generated.
- Check the holder against the stock — Select this option to include collisions between a tool holder and the stock as an issue to stop simulation. This enables you to identify and address any tool holder collisions with a dynamically changing stock during the simulation process.
- Check for rapid moves that cut the stock — Some rapid moves that are very close to the stock are identified as potential collisions. Deselect this option if you do not want to include rapid moves when processing gouges during simulation.
- Check for reconfiguration moves — Select this option to include reconfiguration moves as an issue to stop simulation. If this option is unselected then reconfiguration moves do not cause the simulation to be paused and are not added to the issues list. This option is selected by default.
 — Select an option from the list to specify how often the simulation is paused when encountering issues:
- Always pause on issues — Simulation stops for all issues encountered.
- Pause on the first issue of each type — Simulation stops on the first issue of any type encountered. If you resume simulation it will not stop again on an issue of the same type. This option is selected by default.
- Never pause on issues — Simulation does not stop for any issues encountered. Encountered issues are still logged in the Issues found list.
- Issues found
— Displays a chronological list of issues and warnings. Click on an issue in the list to move the active machine tool to the position where the issue occurs.
Issues are added to the list when:
- there is a collision between the tool (or the shank, or holder) and the model.
- there is a machine tool collision.
- the machine tool cannot reach a location.
- the machine tool exceeds its limits.
Warnings are added to the list when:
- a toolpath is not verified.
- a toolpath could not be verified.
- a toolpath is verified, but the NC program has higher clearance values.
- a connection is not verified.
- the machine tool overlaps with the clearance of another component.
- Clear — Click to clear the table of entries.
Reviewing a collision or 'near miss'
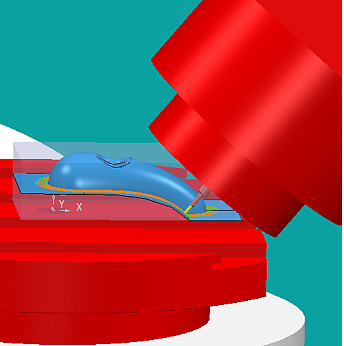
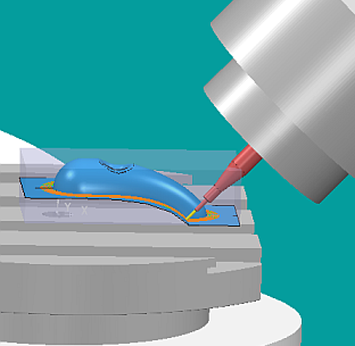
Select an entry from the table to review the position of the machine tool when the collision or near miss occurred. Colliding axis-components are highlighted red, 'near miss' axis-components are highlight yellow.
Reviewing the collision enables you to decide how best to resolve the collision. In the following example, the collision is resolved by using a longer holder to increase clearance.


If PowerMill does not identify a collision when the machine tool collides with itself, the part, tool holder, or table, see Edit the .mtd file to improve collision checking.