This procedure assumes that you have a fixed-length piping spec available in your project and that your joint configuration (in Project Setup) supports fixed-length piping connections.
- On the ribbon, click Home tab
 Part Insertion panel
  Spec Selector drop-down list.
 - In the drop-down list, click a fixed-length pipe spec (for example: Resistoflex).
- In the Pipe Size Selector drop-down list, click a pipe size (for example: 6”).
- On the ribbon, click Route Pipe.
- In the drawing area, click to specify a location for the start point of the pipe.

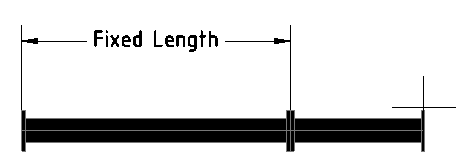
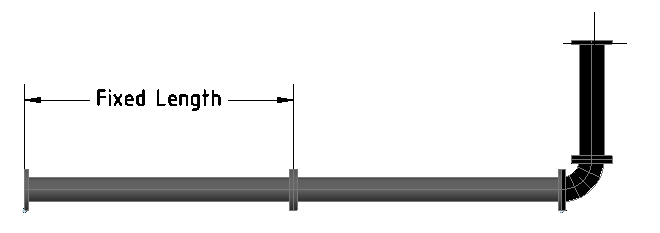
- Click to specify the next point of the pipe. Pipe segments are added if you specify a length of pipe that is longer than the Fixed Length property.
- Click to specify the next point of the pipe.

- Continue clicking in the drawing to specify any additional points of the pipe. Notice that if the last segment routed is at maximum length, fittings added as you turn are not cut back (extending the centerline endpoint).
- Press ENTER to finish routing pipe.
To modify a fixed length piping segment
Grips on fixed-length piping work like other piping. When using grips, segments are not added or removed which restricts how far you can stretch a piping segment. This procedure illustrates that behavior.
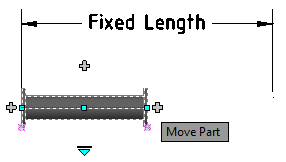
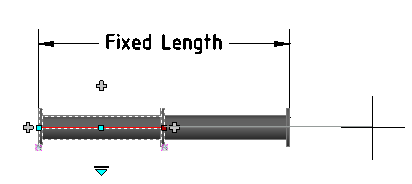
- Click on a fixed-length pipe segment. Click the Move Part grip at a pipe end.

- Move the mouse (do not click) to a location that is beyond the maximum length. Notice that the pipe segment stretches up to the maximum (Fixed Length) or down to the minimum (Minimum Cut Length) length but does not add or remove segments.

Note: Fixed length piping does not stretch as other piping does. The stretch command can move a fixed length piping segment, but it does not change the segment length.