Analytical panels represent the simplification of plate-like structural elements such as floors, slabs, and walls.
To create an analytical panel
They contain the data needed for analyzing these elements in a structural analysis application.
When analytical panels are created the analytical nodes are automatically created at the ends of the panel edges.
There are two types of analytical panels:
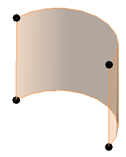
- Planar analytical panel:
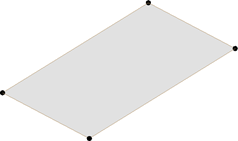
- Curved analytical panel:
By Boundary
- In the Analyze tab
 Structural Analytical Model panel, click
 (Panel), and from the drop-down, select
 (Panel by Boundary).
Note: Only planar analytical panels can be created By Boundary.
 - In Modify | Create Analytical Panel contextual tab
 Draw panel, select one of the methods to sketch the boundary of the analytical panel.
- In the Modify | Create Analytical Panel contextual tab
 Mode panel, click
 (Finish Edit Mode) to save your boundary and exit the edit mode.
Note: The analytical panel will be created in the selected reference plane, but it is not bound to that reference plane; You can change the position of the analytical panel. You can also change the reference plane while in the sketch editor.
By Extrusion
- In the Analyze tab
 Structural Analytical Model panel, click
 (Panel), and from the drop-down, select
 (Panel by Extrusion).
Note: Curved analytical panels can only be created By Extrusion.
 - You can define the analytical panel by drawing its projection to a workplane
- You can use a number of drawing tools to define this projection:
- Straight Line.
- Curves - arc or ellipse.
- Polygons.
- Use the physical model as context by selecting te edges of the physical elements.
- The path of the analytical panel is drawn on the current workplane - the path is extruded perpendicular to this workplane.
Note: The default extrusion path is 10' (3m in metric templates).
To control and adjust analytical panels
Planar analytical panel:
- Select an analytical panel.
- In the Modify | Analytical Panel tab
 Mode panel, select
 (Edit Boundary) to edit the boundary of the selected analytical panel.
OR
- Select an analytical panel.
- Drag the end or edge controls of the selected analytical panel.
Curved analytical panel:
- Modify the curved analytical panel radius:
- Using the edge controls. This adjustment will maintain the position of the start and end points of the analytical panel.

- Changing the radius value using the temporary dimension. This type of adjustment will maintain the arc-panel center.
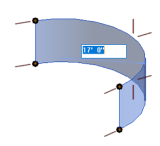
- Using the edge controls. This adjustment will maintain the position of the start and end points of the analytical panel.
- Modify the curved analytical panel height:
- Using the edge controls.
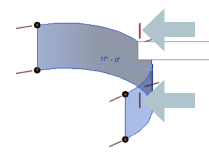
- Using the node constraints to grids and levels in the properties palette.
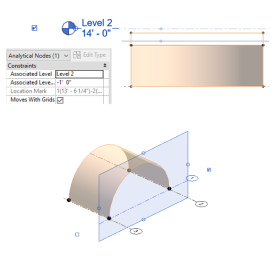
- Using the edge controls.
- Modify the curved analytical panel length using the start and end controls.
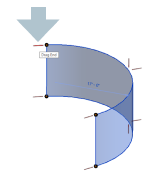
Warnings
- The curved analytical panel is uniform along its height - the top and the bottom arcs/ellipses are parallel, equal and aligned. If a modification changes these conditions, the "Analytical Curved Panel is not valid." warning message will be displayed. Only the Cancel button is available. The change will be undone.
- If changes to other elements cause invalid changes to the curved analytical panel, the "Cannot move analytical surface" warning will be displayed: . Only the Cancel button is available. The change will be undone.