Use these lighting best practices to get the most accurate results in shaded views and rendered images.
Use IES Files
When specifying photometric properties for a lighting fixture, set the light distribution to Photometric Web, and use the manufacturer’s IES file, if one is available. Because an IES file provides a more accurate representation of the light source, you get better results in a rendered image.
To obtain an IES file, go to the website of the lighting manufacturer, and search for ies. Locate the IES file for the desired lighting product, and save it to your computer. See Specify an IES File for a Light Source.
Leave Connectors in Place
When displayed in the Family Editor, some lighting fixtures include a connector. In the drawing area, a connector typically displays a green outline with an orange lightning bolt at the origin.

These connectors allow electrical engineers to connect the lighting fixtures to circuits in an electrical plan.
If you are not working with an electrical engineer, you can delete these connectors from their lighting fixture families, or hide them in views. (See About hiding elements in a view.) Otherwise, leave the connectors in place.
Adjust Light Sources Before Rendering
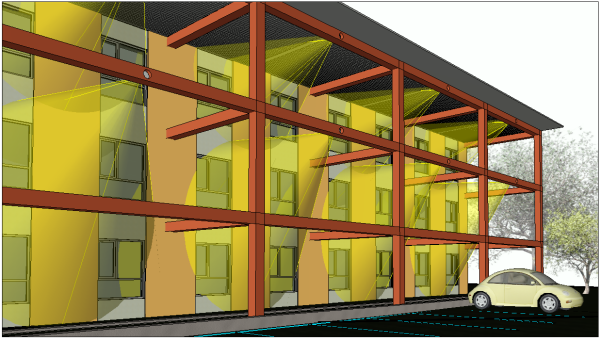
A common goal of rendering an image is to check the effect of lighting on the building model. For example, suppose you want to evenly illuminate the facade of a building. After placing lighting fixtures, you want to make sure that the lights provide the desired result.
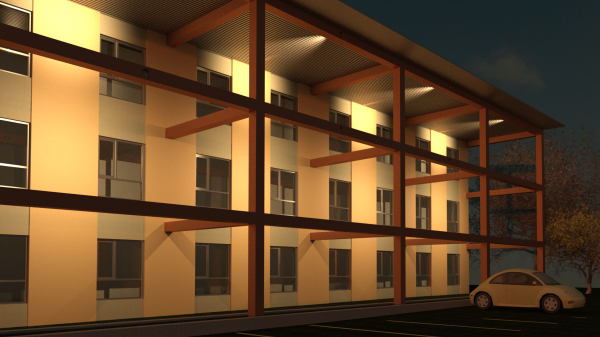
Before rendering, do as much as possible to plan the placement of lighting fixtures for maximum effect. In Revit, you can use 2D and 3D views to plan the appropriate spacing, angle, and setback of lighting fixtures in the building model. For the view’s visual style, use Shaded or Realistic to see how the light hits a wall or other surface.