This workflow describes a typical method of using phases and phase filters to manage a project.
- Determine the phases of work that you want to track for the project, and create a phase for each.
For example, depending on your office standards and the needs of the project, you might create phases named Phase 1, Phase 2, and Phase 3.
- Create one or more copies of a view for each phase, and name these views appropriately.
For example, duplicate the Level 1 floor plan several times, and rename the views to include the phase names: Level 1 - Phase 1, Level 1 - Phase 2, and so on.
Tip: Organize the Project Browser by phase. The Project Browser sorts phases and views by name alphanumerically. Plan your phase names and view names carefully so they will be listed in the desired sequence. - For each view, on the Properties palette:
- Set the Phase property to indicate the project phase to which the view corresponds.
- Set the Phase Filter property to control the display of elements for that view.
Example

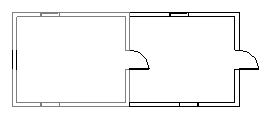
Phase = Phase 1, Phase Filter = Demolition
Phase = Phase 2, Phase Filter = New + Existing
- (Optional) Specify graphics for elements that are existing, new, temporary, and demolished.
Example
You can override the default graphics for the different phase statuses.
Line graphics for demolished elements = red dotted lines
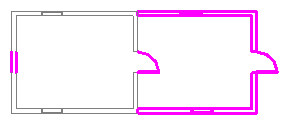
Line graphics for new elements = magenta solid lines
- (Optional) Specify the Phase property for each element.
By default, elements are assigned to the phase that is specified for the view in which they are created. (For example, in the Level 1 - Phase 1 floor plan, you create a wall. By default, the wall is assigned to Phase 1.) If needed, you can use the Properties palette to change the Phase property of an element.
- (Optional) Create phase-specific schedules for the project.
For example, you can create a Phase 1 door schedule that lists all doors to be removed or demolished, and a Phase 2 door schedule that lists all new doors to be purchased and installed.
- Create phase-specific construction documents.