You can add text to a panel schedule. You can also insert a Notes parameter in the template so that the Notes information can be entered and saved in the panel schedule.
Also, when in Edit mode, you can enter text into blank cells in the panel schedule template. However, if you enter text that is not associated with a parameter in the template, it will be lost if you update or change the template associated with the panel schedule. To store text in a panel schedule template, you must associate it with a system parameter, such as one of the Notes parameters described below, or in a parameter that you define.
Adding a Notes parameter
If you want to save text/information in a panel schedule, in the template you must use a parameter to hold the text.
- Click Manage tab
 Settings PanelPanel Schedule Templates
 Edit a Template.
 - In the Edit a Template dialog, specify the Template type, and click Open.
- Select a cell and on the Parameters panel, in the Choose Category drop-down, select a category. For a header note, select the Electrical Equipment category. For a circuit table note, select the Electrical Circuits category.
You can select the following note parameters when you select a cell/column in their respective part: Schedule Header Notes (for adding a note cell to a header), and Schedule Circuit Notes (for adding a Notes column to the circuit table).
- Click the Add Parameter drop-down and under Electrical Engineering, select a parameter (Schedule Header Notes or Schedule Circuit Notes).
The parameter placeholder displays in the cell(s).
-
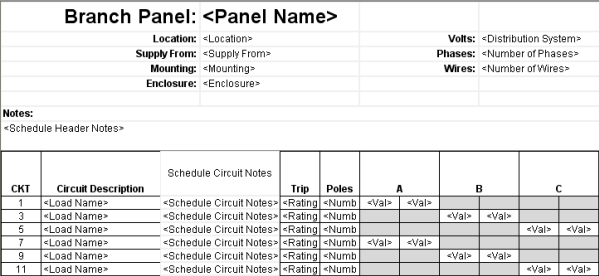
In the template shown here Header and Circuit Notes parameters have been added. Note that the Schedule Circuit Notes is added as a column.
Adding a Note to Panel Properties
- In the drawing, select a panel.
- On the Properties palette, under Electrical Engineering, for Schedule Header/Footer Notes click Edit.
- In the Edit Text dialog, enter the note, and click OK.
- Create a panel schedule for the panel selected in step 1. Note that the note entered in step 3 displays in the panel schedule.