Use View Templates to make applying visibility and graphic overrides to your views faster and more consistent. Revit
What are View Templates?
Using View Templates gives you a way to quickly apply many visibility and graphic properties to a view at once. The settings for view templates are managed at the project level. When you use view templates, it is easier to make views of your model look consistent. When the same view template applied to multiple views, the views will look the same.
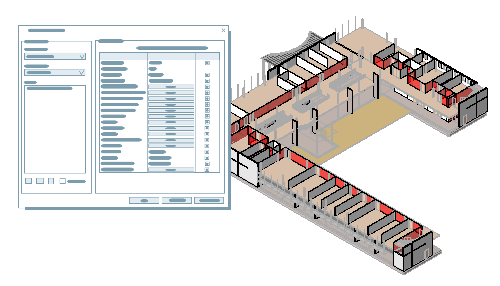
For example, you need floor plans for a set of construction documents and you want all of the floor plans to have the same appearance. Make a view template that has all of the visibility and graphic overrides needed for construction documents and apply it to the floor plan views used for construction documents. If visibility requirements change, make a change to the view template assigned and all of the construction document floor plans will be updated.
Where do you find them?
 . The three main tools are:
 Apply Template Properties to Current View - Select a template and apply the visibility settings from it to the current view.
 Create Template from Current View - Use the visibility and graphics setting in the current view to create a view template. This is a good way to begin your template. Make changes to the view properties of a view to make it appear the way you want. Then make a template from the view so you can assign it to other views of your model.
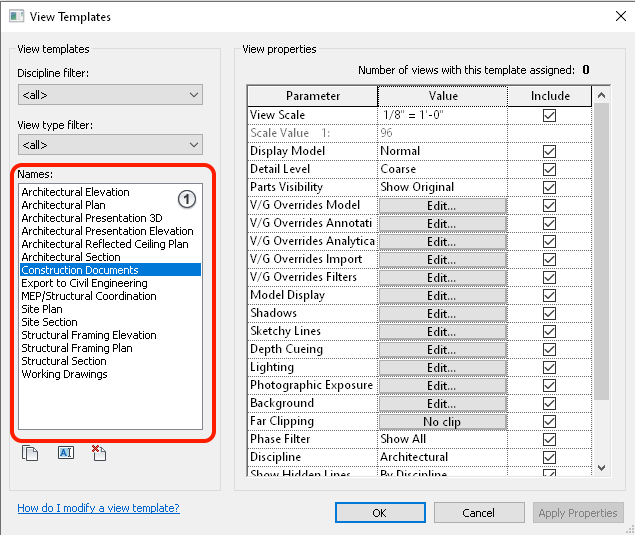
 Manage View Templates - Open a dialog where you access all the view templates in your model and can make changes to the view property settings of each template. You can create new view templates from the dialog.
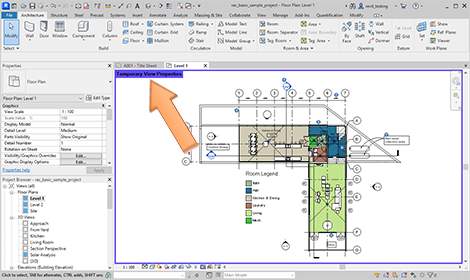
On the Properties Palette, use the View Template property to assign a View template to the current view. When you assign a view template this way, only templates that can be assigned to the current view type will be available. Other view templates in the model will not be listed.
How do I use View Templates?
To learn how to use a View Template, review the following video:
- Assign a view template to an existing view in a way that allows the settings to be changed after the template has been applied.
- Assign a view template to an existing view in a way that does not allow the settings to be changed after the template has been applied.
- Set controls to apply a template to new views.
- Apply a view template to the current view. This can be done from the Properties Palette or by using the command from the ribbon.
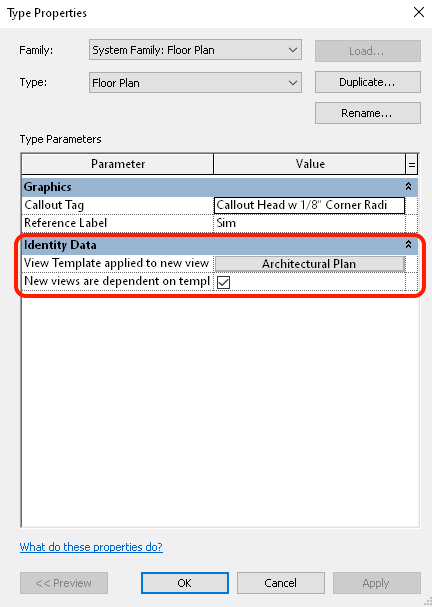
- Set a view template to be applied when new views are created. In the Identity Data of a view type, a view template is assigned. When a new view of this type is created, the template will automatically be assigned.
When starting to use view templates in your projects, first create a number of view templates for different use cases. For example, create view templates for presentation views, construction document view and for coordination views. Once you have these view templates created, now assign them to individual view as needed. Having a template ready for each use makes it easy to assemble views for your needs and each view is displayed in a consistent way.
Include View Templates as part of your project templates. View templates can be transferred from one project to another using the transfer project standards tool. You can continue to develop view templates and then transfer them as required from one project to another to ensure office wide consistency of your views.
View templates control many aspects of a view's appearance. Other aspects such as scale, shadows, or phase status can be included as part of a view template. All of the properties of a view controlled with a view template are displayed on the right side of the view properties dialog. When creating your view templates be sure to review all of the aspects of the view that are controlled so you can get as much as possible out of your view templates.
 |
 |