Learn about using the realistic visual style on a view of your model.
What are they?
In Revit 2021 enhanced realistic views have replaced "Realistic" and "Ray Trace" visual styles. Now, the "Realistic" view style combines the material qualities of the realistic view style with the lighting characteristics of the "ray trace" visual style and delivers it in real time to the view display in Revit.
Video of Enhanced Realistic Views
- View Navigation in a realistic view.
- Change the appearance of a light emitted from a fixture.
- Smooth view navigation.
Why should you use them?
Enhanced Realistic Views lets you visualize your designs in real time as you are working. You do not have to render specific views one at a time. Set a view to realistic, make sure your materials and lighting are set, and explore a rendered version of your model in real time. Automatic exposure controls let you navigate your model from inside to outside without the need to change settings.
Where do you find the tool?
The "Realistic" view style has been enhanced with this new functionality, nothing has changed in the way to apply a realistic view style to a view.
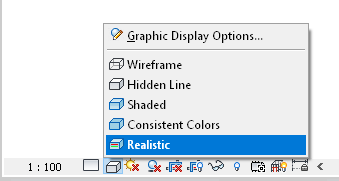
The easiest way to set the view style is from the View Control Bar at the bottom of the view frame. In previous versions, setting a view to Realistic applied the appearance assets to elements in the view. Beginning in Revit 2021, setting the visual style to Realistic, applies the appearance assets to elements in the view as well as the lighting settings (sun position, exposure control, artificial lighting). As an alternative, set the visual style in the Graphic Display Options dialog or by applying a view template to the view.
 |
 |
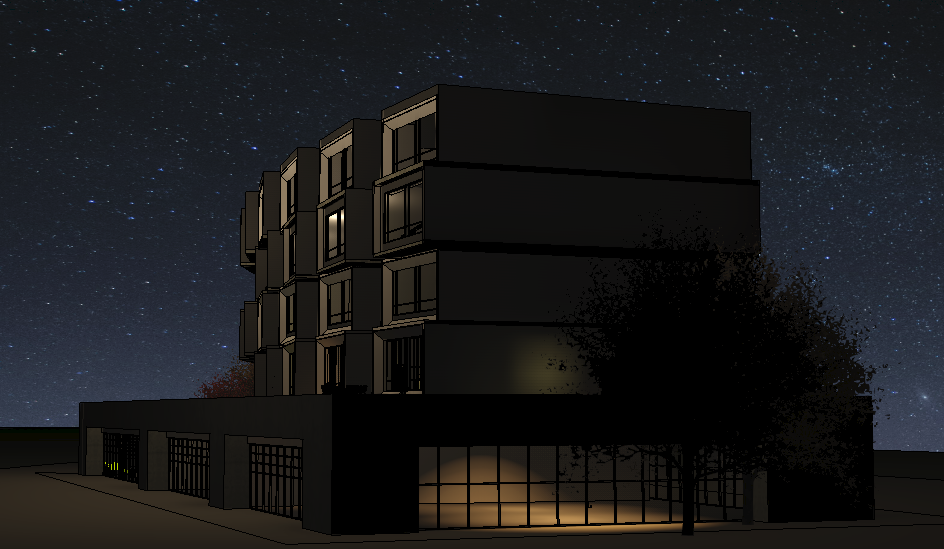
The realistic views can be used to create compelling real time rendered 3D views and walk through presentations of your designs. However, it’s important to remember that the realistic view style can be applied to all views in Revit, so you may want to consider them for rendered elevation studies to evaluate shadows or rendered plan views to illustrate finishes in a floor plan view.
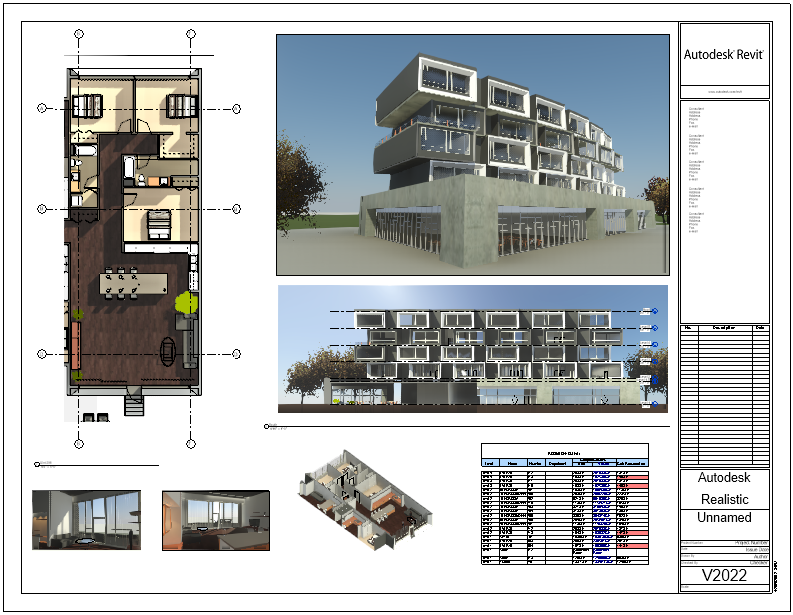
In the example image, a realistic view of the floor plan is combined with realistic views of the interior and exterior of the building. None of the images in the presentation are rendered and any changes will be reflected on the sheet in real time.
How do you get the best results?
Since the realistic visual style is applying material appearances and lighting effects in the view, both must be considered in order to get the best results. A view using the realistic visual style needs to be considered in the same way you would consider a rendered view. You must consider material appearances, the composition of the view, and the lighting/exposure settings.
Material appearances are handled by the materials assigned to the elements in your model. Before applying a realistic visual style, review all elements and make sure they have appropriate materials assigned to them. View composition is going to be like previous releases, but take extra care to show what is most important in the view and try and reduce anything that is unnecessary or distracting. The lighting plays a significant role in the appearance of the view. Lighting settings are established in the Graphic Display Options of the view. Let’s review the settings to understand their effects when the realistic view style is applied to a view.
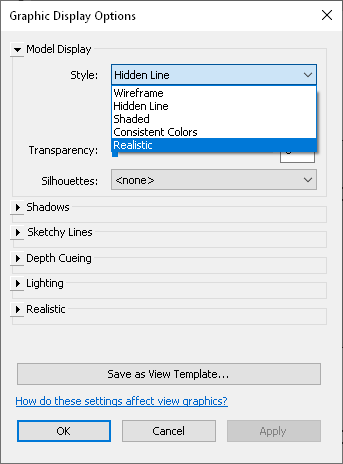
Modify the Graphic Display Options
- With nothing selected in the view, on the Properties palette Click Edit on Graphic Display Options.
- In the Model Display section, use the dropdown menu to set the style to Realistic.
Tip: Consider clearing the show edges check box. This will turn off the hard edges of elements defined with linework in the view. Turning off edges will give the view a rendered appearance.
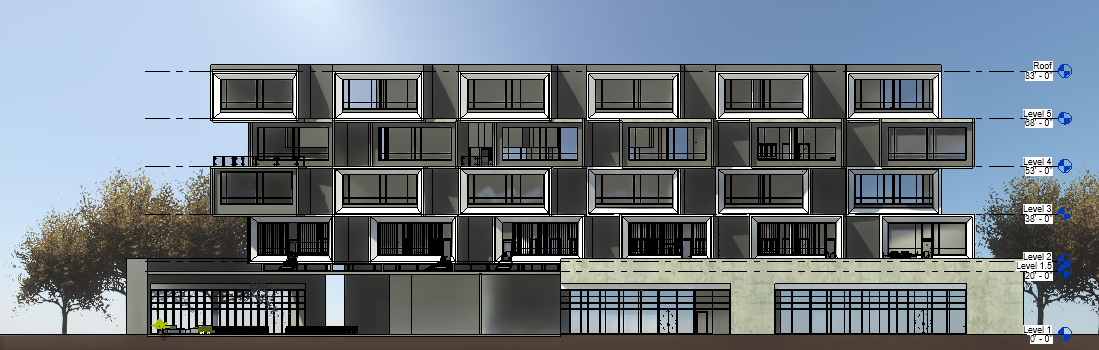
Elevation with edges turned on.
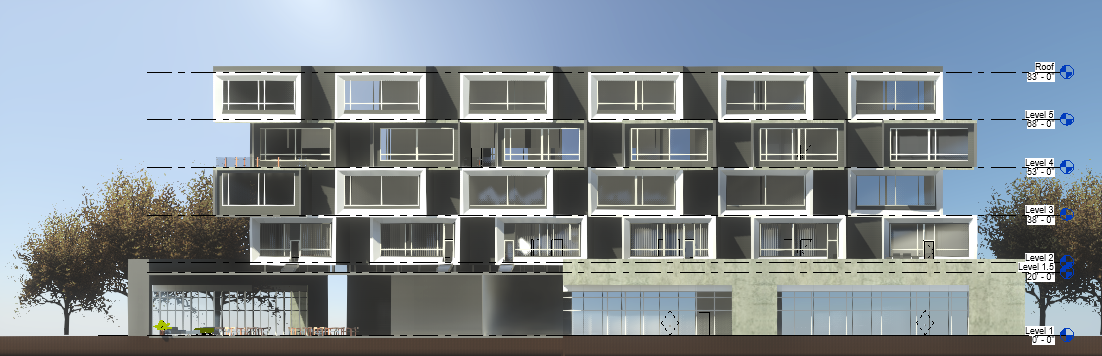
Elevation with edges turned off.
- In the Shadows section, select Cast Shadows.
Note: Without shadows, the lighting of the view will have little effect in the view. The way lighting conditions are understood is based on the shadows in the view. Selecting Show Ambient Shadows will add additional depth to the shadows cast in the view and simulate subtle differences in lighting.
- In the lighting section, use the drop-down menu to select the Scheme that best matches the condition for your view. The Scheme setting makes exposure adjustments under the Realistic section of the Graphic Display Options dialog when Automatic exposure is selected.
- Set the Sun Setting to the value required.
- <In-Session, Lighting> - Directly set the Azimuth and Altitude of the Sun in the view.
- <In-Session, Still> - Azimuth and Altitude of the sun is related to the location, date, and time of day you set for the view.
- In the Realistic section, set the Exposure to Automatic or Manual. When set to Automatic, the slider to make the exposure Brighter or darker is not available. When set to Manual, you can control the brightness of the overall view. Click Color correction to open the dialog and make minor adjustments to:
- Highlights – Light areas of the view.
- Shadows – Dark area of the view.
- Saturation – Color intensity of the view.
- White Point – Shifts the color values in the view warmer (red and orange) or cooler (blue and violet).
Tip: You may want to experiment getting the desired result by setting the scheme and trying it with Automatic exposure and with Manual exposure. You may also want to try setting the value brighter or darker to get the desired appearance. - In the Background section, to set the background for the view use the drop down to select from the following:
- None – View uses background color set in Revit Options.
- Sky – A sky is simulated based on the time of day and view direction.
- Gradient – Set a color for the sky at the highest point and a color for the horizon color.
- Image – Select a custom image to use behind the view.
- Click Apply to see all your changes without closing the dialog or click ‘OK’ to apply your changes to the view and close the dialog.