Launch from Autodesk® Fusion 360
Use this step to launch from Fusion 360.
Step 1: Start Fusion 360 and open the model
In the Samples section of your Data Panel, browse to:
Basic Training > 14 - CFD Tutorials > transient-VALVE
- Click the
 Show Data Panel icon at the top of the screen, if the Data Panel is not currently shown. The Data Panel appears at the left side of the program window.
 - The top level (home view) of the Data Panel is divided into two subsections - PROJECTS and SAMPLES. Scroll to the bottom of the PROJECTS list if necessary to see the SAMPLES list.
- Locate the Basic Training entry under SAMPLES and double-click it. The Data Panel now displays a list of the folders containing the training lesson models.
- Open the 14 - CFD Tutorials folder.
- Double-click the transient-VALVE file to open it.
Step 2: Save the model
When opening a sample model for the first time the active workspace in Fusion is the Modeling or Sculpt Workspace. The model is in Read only and needs to be saved to a personal project.
Click File > Save As.
Optionally, create a Project to store your training models.
- Click New Project .
- Specify the project name of your choice.
- Press Enter.
Optionally, create a folder within the project to store your training models.
- Click New Folder.
- Specify a folder name of your choice.
- Press Enter.
- Double-click the new folder to make it the current file saving location.
Click Save.
Step 3: Enter the Simplify Workspace
The Simplify workspace in Fusion 360 is a sub-workspace of the Simulation Workspace.
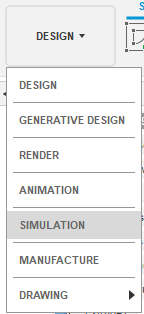
Select Simulation in the Workspace drop-down menu.

Select Simplify Model in the New Study window.
Step 4: Launch the model
Click the CFD 2023 icon in the toolbar.
Step 5: Create the Design Study
The Design Study Manager dialog opens. For the tutorial, leave the Study name, Design name, Scenario name, and Study path as the defaults. Optionally, change the study path of your choosing.
Click Launch.
Autodesk® CFD starts, and creates the Design Study for the tutorial.