Cluster Dialog
Rendering > Cluster
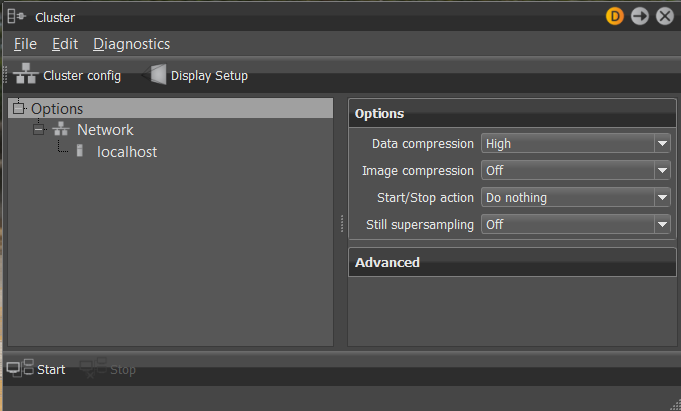
For information on using clusters, see the following:
For troubleshooting tips, see Cluster Manager Troubleshooting.
For reference information on them, see The Cluster Manager Dialog Box.
Menu
File - Contains the following file options:
New - Creates a new set of presets for clustering.
Load - Loads the presets for clustering from an .xml-file.
Import Legacy - Loads the presets for clustering from a legacy .xml file.
Save - Saves the current definitions into a cluster configuration file (.vhpc).
Save As - Saves the current definitions into a cluster configuration file (.vhpc).
Edit - Contains the following editing options:
Cluster Config - Opens the Cluster Config dialog box, where you can add multiple render nodes at once.
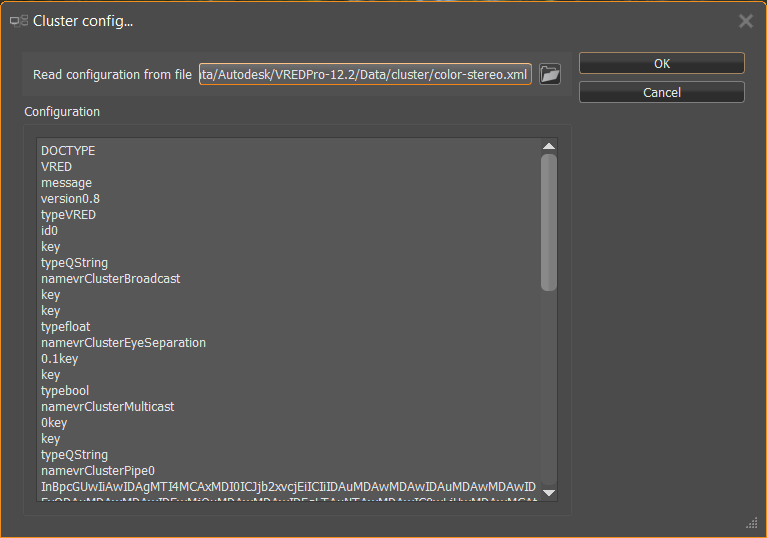
Read Configuration From File - Select a configuration file containing the names of all usable cluster nodes. The file could be externally generated. For example, a startup script could generate a file that contains the names of all usable cluster nodes. The configuration file in this field is read each time the Start button is clicked.
Configuration - Add the configuration. A wide range of formats is recognized, including the connection string from the Cluster module in previous VRED releases.
PC1 PC2 PC3 PC4

PC1, PC2, PC3, PC4

PC1 - PC4

Master1 {PC1 PC2 PC3}

Master1\[forwards=PC1|PC2|PC3\]

Master1 {C1PC01 - C1PC50} Master2 {C2PC00 - C2PC50}
Add Compute Node - Adds a rendering node to the cluster.
Remove Compute Node - Removes a rendering node from the cluster.
Add Network - Adds a network to the cluster.
Remove Network - Removes a network from the cluster.
Diagnostics - Contains the following file options:
- Show tiles
- Show test image
- Run network speed test
Display Setup
Opens the Display Configuration dialog box, where you can set up a cluster to project (for example, on Powerwall or Cave). Add projections, displays, windows, and viewports, then customize their attributes. When finished, click Apply and OK.
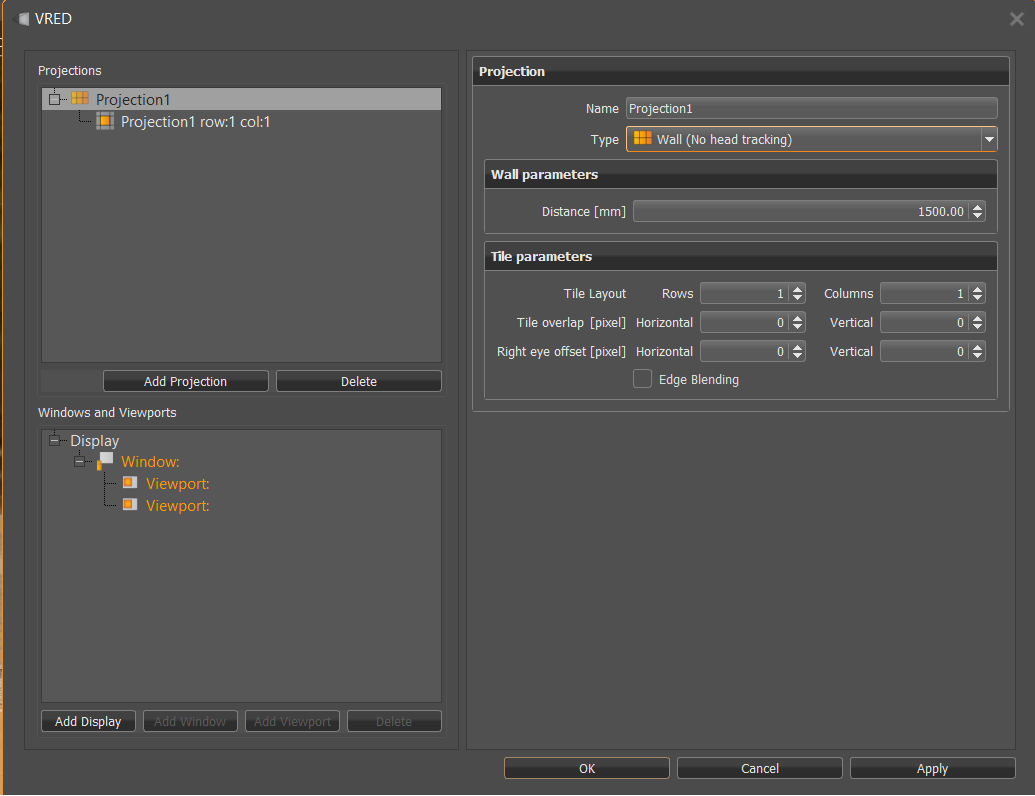
Projections
This section lists all the projections added to the display setup. Click Add Projection, then use the Projection properties to the right to change the name, set the type of projection, then customize the attributes for the selected display.
To delete a projection, select it in the Projections list, then click Delete.
Windows and Viewports
This section lists all the displays, windows, and viewports added to the display setup. Click one of the following to add that type of display:
- Add Display
- Add Window
- Add Viewport
After adding any of the following, use the properties to the right to customize the attributes for the selected display.
To delete any of these displays, select one from the Windows and Viewports list, then click Delete.
Cluster Options
Click the Options entry in the tree to access the Cluster Options.
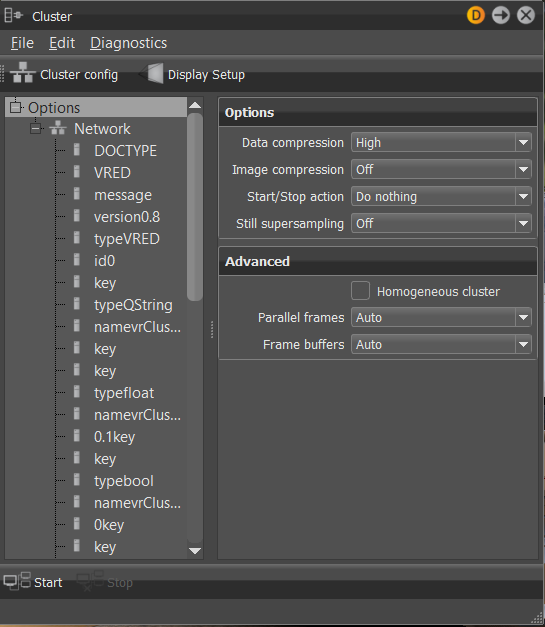
Data Compression - Compression method used to transfer the Scenegraph from VRED to the cluster nodes.
Off - No compression.
Medium - Fast but low compression ratio.
High - Slow but higher compression ratio.
Image Compression - Compression method used to transfer the rendered images from the cluster nodes to VRED.
Off - No compression.
Low (lossless) - Low compression without loss of quality.
Medium (lossy) - Fixed compression ratio of 1/3 and fast.
High (lossy) - Slow but high compression ratio.
Start/Stop Action - This option can be used to prevent excessive rendering times on cluster stop or cluster crash.
Do nothing - No action is performed on cluster start or cluster stop.
Downscale Off/On - Switch downscale Off on cluster start and back to On when the cluster stops.
Raytracing On/Off - Enable raytracing during cluster rendering and use OpenSG rendering when the cluster stops.
Rendering On/Off - Rendering is switched off, when the cluster is not running.
Still Supersampling - If the CPU use during still antialiasing is poor, then by increasing the image size the use could go up. With a supersampling of 2x2, 4 pixels are rendered by the cluster and later combined to a single pixel. To get the same rendering quality, the number of image samples should be reduced by a factor of 4. (9 with 3x3, 16 with 4x4)
Advanced
Homogeneous cluster - If not selected, the load balancer measures the performance of the render nodes when the cluster connection starts. If selected, the load balancer assumes that the render nodes perform the same as each other and does not measure their performance. Select this option if all render nodes use the same hardware to avoid unnecessary and possibly inaccurate measurements.
Parallel Frames - On clusters with many nodes (>100) and low-resolution rendering, use this option to increase the frame rate. If there are 500 nodes and Parallel Frames is set to 2, then 250 nodes are rendering one image while 250 are rendering the next image. This increases the latency and should only be used on high frame rates.
Frame Buffers - VRED is able to render a new image while the last images are still transferred over the network. Slow internet connections increasing the number of frame buffers could increase the frame rate.
Network Options
Click the Network entry in the tree to access the Network Options.
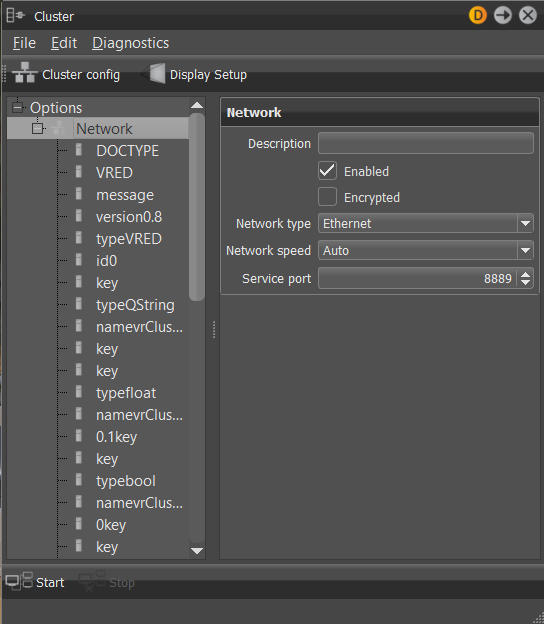
Description - For documentation only.
Enabled - If not selected, all the nodes connected to this network will not be used during cluster rendering.
Encrypted - The whole communication in the network is encrypted. For each session a new key is used. The communication is safe against listening and recording network sessions. If you expect attacks to your network infrastructure and elaborate "man in the middle" attacks, you should consider using other mechanisms like encryption hardware or encryptions that are secured by signed certificates.
The following algorithms are used for encryption:
Key negotiation - Unified Diffie-Hellman, Ephemeral Unified Model Scheme (X9.63) or Static Unified Model (NIST). 1024 Bit
Transport layer security - AES128 Bit.
Network Type - Contains the following network type options:
Ethernet - Standard network connection
Infiniband - On linux the ibverbs interface is used to communicate with infiniband network cards. In some situations, this can be faster than using IPoIB. To be able to use Infiniband, the nodes must also be reachable over Ethernet.
Network Speed - VRED uses this option to optimize the communication. In most cases, select Auto. With 10GBit Ethernet you can get a higher throughput by selecting 10 Gigabit. If you have a 10GBit link to a 1GBit switch, then select 10G Uplink to 1G.
Service Port - This is the TCP socket port where the VREDClusterService is listening for incoming connections. Communication over this port must not be blocked by a firewall. 8889 is the default port. To start VREDClusterService on another port, use the
-poption.
Compute Node Options
Click any of the entries below Network in the tree to access the Compute Node Options.
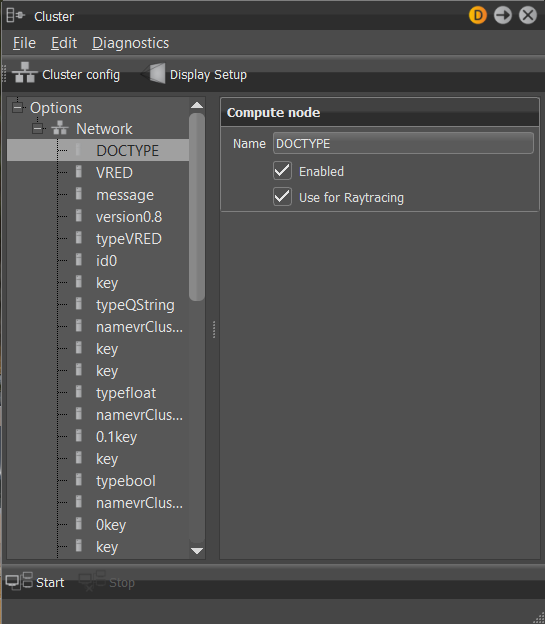
Name - IP address or host name of the compute node.
Enabled - If not selected, this node is not used for cluster rendering.
Use for Raytracing - If not selected, this node is not used for raytracing and no raytracing license is required.
Icon Bar
![]()
Start Cluster - Starts the Cluster.
Stop Cluster - Stops the Cluster.