This section describes the recommended procedure for setting up Vault and Inventor with a default Inventor Project File (*.ipj).
Setup Your Environment
With Inventor and Vault, you create a new folder for each design, not a new project file. The following steps show how to configure Vault in the simplest way.
- Create a vault in the Vault Server Console (ADMS).
When you install the Vault Server, a new vault needs to be created to get started. You can create a new Vault or restore an existing Vault in the ADMS console. See help topic for more information. For the illustration purpose, let's name the new vault "TestProject".

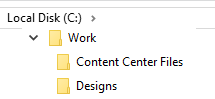
- On a workstation machine, create a folder under C:\ called "Work". This is where all work on Inventor parts will be performed. In addition, create two new folders underneath Work called "Content Center Files" and "Designs". These folders will store all your design data.
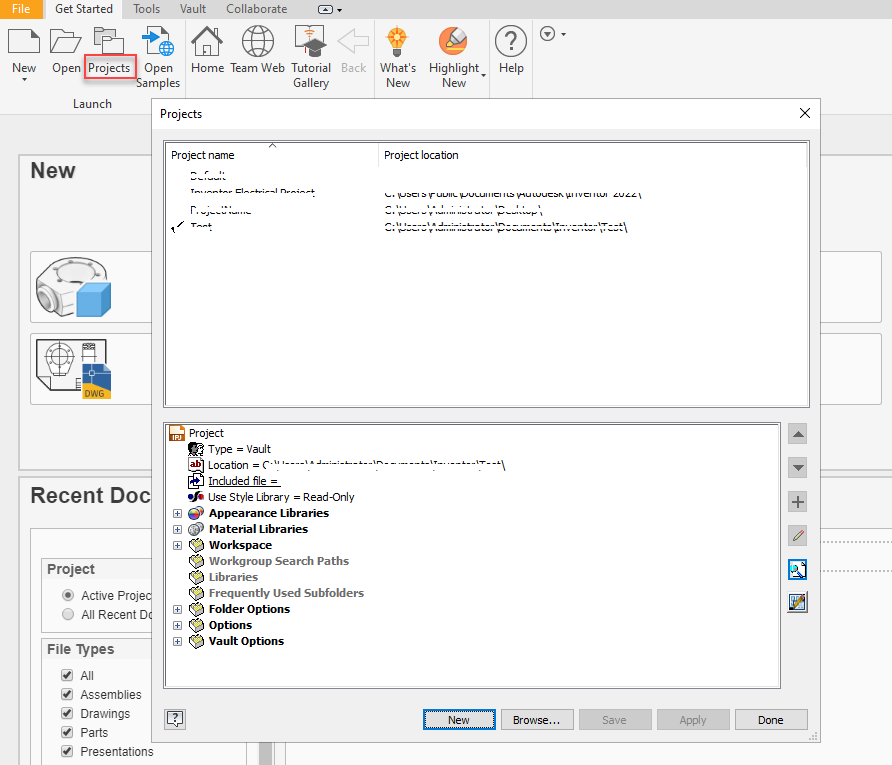
- Open Inventor and click Projects to open the Project Editor. Click New at the bottom and step through the wizard to create a new Vault Project.

- Enter Designs for the project name and set the Project (Workspace) Folder to C:\Work.
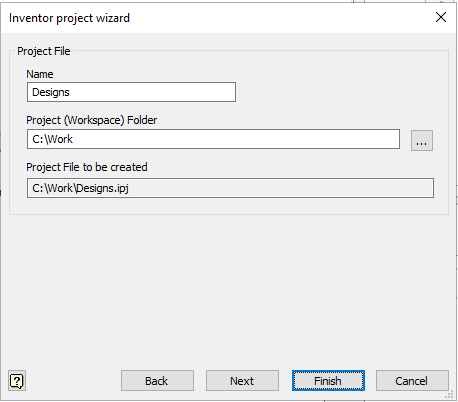
- Click Finish to create the project file. The newly created project "Designs" is set as the active project.
- In the Project Editor window, click the expand button next to Workspace, then right-click to edit the location of the Workspace folder and type "\Designs". In the same way, expand Folder Options and edit the Content Center Files option to read ".\Content Center Files".
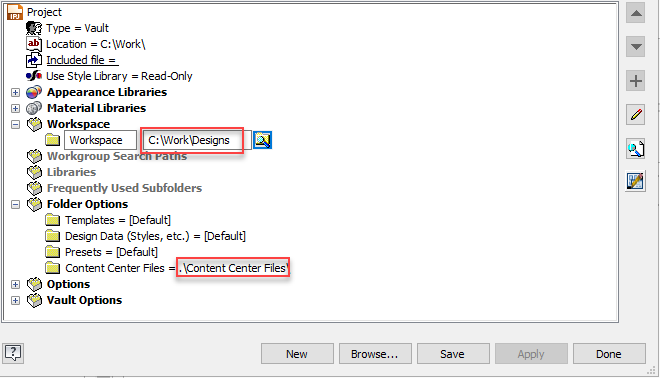 Note: Typing ".\" instructs Inventor to use a path relative to the project file. This means that the project file could be located anywhere on a user's machine, but it will always look in a subfolder called Content Center Files.
 - Click Save to save the changes made to the Project file, and then click Done to exit the Inventor Project Editor.
- On the Inventor ribbon, click the Vault tab, and then click Login.
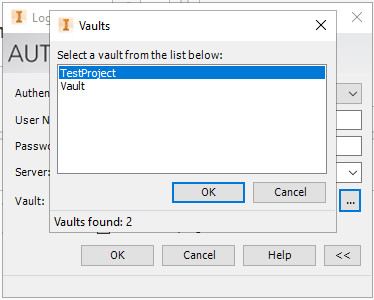
- On the Vault Login dialog, type in the Vault server name in the Server field.
- In the Vault Login dialog, click the ellipses next to the Vault field. Select the newly created Vault and log in as a user with (Vault) administrator privileges.
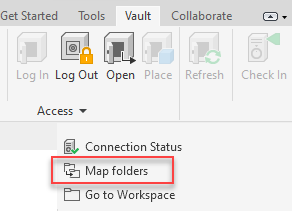
- Click the Down Arrow next to the Access command, and then click Map Folders to map the actual folders defined in the project file with the Vaults virtual folder structure.
- In the Project Folder Mapping dialog box, select Project Root. Click Edit to create a mapping between the local project file and its intended location in the Vault. In this case, we are mapping the project file location to the root ($) of Vault.
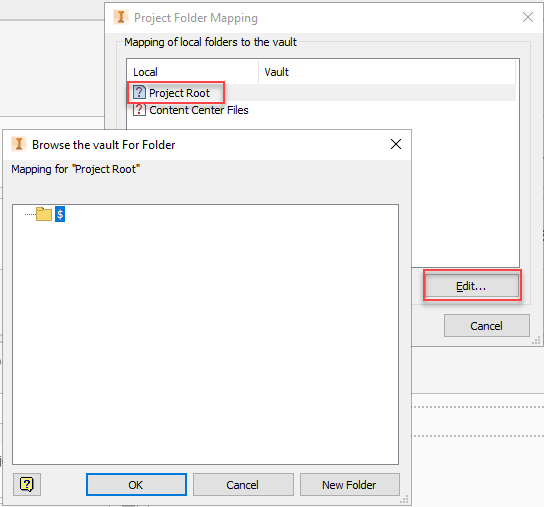
- Repeat for the Content Center Files folder. Click New Folder and enter the folder name as Content Center Files. Ensure that the Library folder option is selected. Vault project file creation logic dictates that all libraries must be located beneath the project file. Click OK. Click OK again to close the Content Center Files mapping dialog box.

- Click OK to close the Project Folder Mapping dialog box.
You will now have the correct structure configured to begin adding Inventor files to the Vault.
Add Data to the Vault
You are now ready to start adding data to your Vault.
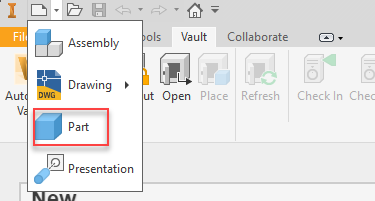
- In Inventor, create a new part file and then click Save. It does not need to have any geometry; we just need to create a file.

- By default, Inventor will save it in the Workspace folder C:\Work\Designs and assign the file a name "Part1.ipt" for now. Click OK.
- The Check In dialog box is displayed.
In this window, you can see that both the project file and the part file will be checked in to Vault. All subsequent work will be done beneath the \Designs folder.

The project file is located locally in C:\Work\Designs.ipj. The file will be vaulted as $\Designs\Designs.ipj.
The part file is located locally in C:\Work\Designs\Part1.ipj. The file will be vaulted as $\Designs\Part1.ipj.
- While performing a check-in, DWF files can be created and linked (attached) to the file being checked in. The advantage of this is that it allows other users to review the file as it was checked in to Vault. This option is on, by default. Click Settings to enable/disable visualization attachment options.
Note: Send to Job Server is an option that is only available to users of Vault Workgroup or Vault Professional.

- Once satisfied with the DWF publication options, click OK, and then click OK again to check the file into the Vault for the first time. A progress bar will appear while the DWF file is created and copied into the Vault. Once the operation is complete, the dialog box will disappear.
Configure the Vault Settings
- Once the file has been checked in to Vault, open the Vault Client and log in as a member of the Administrators group.
- In the Vault Client, go to Tools > Administration > Vault Settings.
- In the Vault Settings dialog box, click Define in the Files tab to enforce a consistent working folder for all clients.
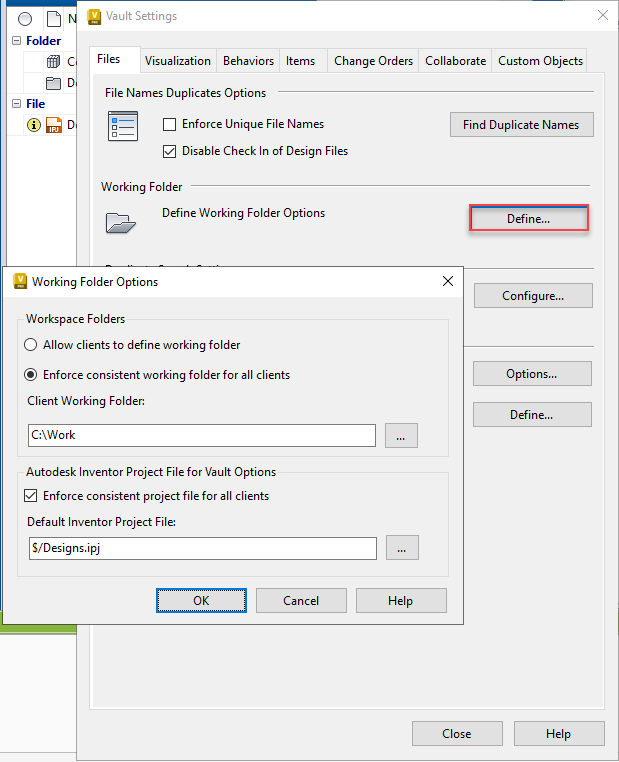
- In the Working Folder Options dialog box, select "Enforce consistent working folder for all clients" option and change Client Working Folder to C:\Work. Hence, all users connecting to this Vault database will be using the same local working folder.
- Select the checkbox "Enforce consistent project file for all clients" and change the Default Inventor Project File to $/Designs.ipj. Thus, if multiple project files are checked into the Vault, features such as Copy Design, Move, Rename, and the Job Processor will all defer to this project file. It reduces the likelihood of unresolved links in Inventor.
- Click OK to save.
Share Data with Other Users
The next step is to get all your users up and running with Vault. This starts with creating a Vault user account for them.
For each user, do the following:
- In the Vault Client, create the user account and grant them access to the Vault you created and assign them a role. See Add a New User for more information.
- On the user's machine, install the Vault client and log them into the Vault database.
- Right-click the Designs.ipj in the Vault client and select "Get". This will automatically download the ipj file to the same location, "C:\Work".
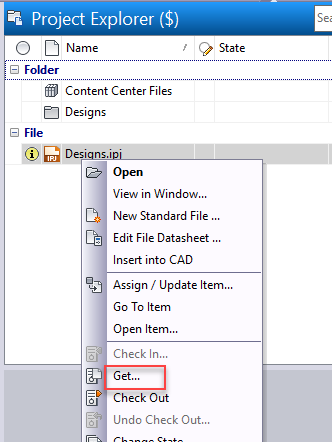
- The Active Project is set to "C:\Work\Designs.ipj". Each user can copy their Inventor files into folders beneath "C:\Work\Designs" and open them in Inventor starting with drawings and assemblies.
Note: If prompted with a message to resolve a missing file, ensure that the file is copied beneath the C:\Work folder before being checked in to the Vault.