Note: Debugging is not available in AutoCAD LT.
- In Visual Studio Code, open and activate an editor window that contains the AutoLISP source code to debug.
- On the Activity Bar, click Debug and Run (or click View menu > Debug).
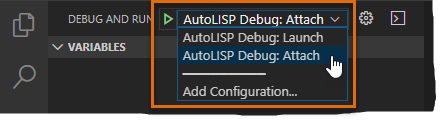
- Click the Configurations drop-down list and choose one of the following configurations:
- AutoLISP Debug: Launch – Launches a new instance of AutoCAD and attaches VS Code to that instance
- AutoLISP Debug: Attach – Allows you to attach VS Code to an instance of AutoCAD that is already running
- Click Start Debugging or press F5.

A new instance of AutoCAD is started if you choose AutoLISP Debug: Launch from the Configurations list.
- If you choose AutoLISP Debug: Attach from the Configurations list, choose acad (or AutoCAD on Mac OS) from the list of running processes.

Whether you start debugging with the AutoLISP Debug: Launch or AutoLISP Debug: Attach configuration, VS Code should now be attached to an instance of the AutoCAD application. Once attached to AutoCAD, you should see the Debug toolbar displayed above the active editor window.

The Debug toolbar contains these tools:
- Continue – Continues the execution of the AutoLISP program to the next breakpoint
- Step Over – An entire expression (and all nested expressions) are evaluated, then execution stops at the end of the overall expression
- Step In – Execution begins and halts before evaluation of the inner parenthetical expression
- Step Out – Execution resumes executing the rest of the expressions within a function and then execution halts on the outermost parenthetical expression
- Restart – Terminates and restarts the debugging operation; the AutoLISP source (LSP) file in the active window is automatically reloaded into the AutoCAD application
- Disconnect/Stop – Terminates the debugging operation and disconnects VS Code from the AutoCAD application