You can label corridor point codes using a code set style or a section label set. When you use a section label set, which is described in the following procedure, you can include a corridor points label style in the label set.
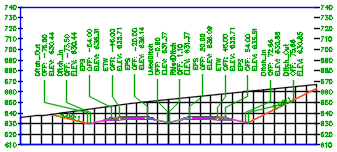
When using a label set that contains a corridor points label style, you can stagger the placement of the labels so they do not overlap each other, as shown in the following illustration.
To label corridor point codes in section view using a section label set
- Open an existing drawing that contains a corridor.
- On the Toolspace Settings tab, expand General
 Multipurpose Styles Code Set Styles.
- Right-click the Code Set Styles node and click New, or right-click an existing code set style and click Edit.
- Use the Codes tab of the Code Set Style dialog box to add the subassembly points to the code set style.
- Assign label styles to the point codes you want to label.
Note: Because a label set is going to be applied, these label styles will not be directly used for the point codes in the section views but assigning styles here does control whether the points will be labelled (see step 13 below).
- Change any other settings in the dialog box as needed and click OK.
- On the Toolspace Settings tab, expand Section Label Styles Corridor Points.
- Right-click the Corridor Points node and click New, or right-click an existing label style and click Edit.
- Use the Label Style Composer dialog box to set up the style and click OK.
- On the Toolspace Settings tab, expand Section Label Styles Label Sets.
- Right-click the Label Sets node and click New, or right-click an existing label set and click Edit.
- Use the Labels tab of the Section Label Set dialog box to add a Corridor Points type to the label set.
- Use the Style column to assign a label style.
Important: The Corridor Points label style will be applied only to those points that already have a label style assigned to them in the code set style (see step 4 above). The Corridor Points label style overrides the styles assigned in the code set style within the section views only.
- Use the Stagger Labels column to specify a staggering option so the point code labels do not overlap each other.
- Change any other settings in the dialog box as needed and click OK.
- Click Home tab Profiles & Section Views panel Sample Lines Find. Select the alignment and use the Sample Line Tools toolbar to create the sample lines.
- On the Toolspace Settings tab, right-click Section View Edit Feature Settings.
- In the Edit Feature Settings - Section View dialog box, under Section View Creation, verify that the Corridor Point Code Labelling Method setting is set to Section Label Set. Specify any other settings as needed and click OK.
- Click Home tab Profiles & Section Views panel Create Multiple Section Views Find.
- In the Create Multiple Section Views wizard, click the Section Display Options page.
- In the Select Sections to Draw area, verify that the Draw tick box is selected for the corridor.
- In the row for the corridor, click the Label Set column to display the Select Label Set dialog box.
- Select the label set that you added the Corridor Points label type to and click OK.
- In the row for the corridor, click the Style column to display the Select Style dialog box.
- Select the code set style that you set up using the previous steps in this procedure and click OK.
- Click Create Section Views and select a location in the drawing for the section views.
Set up a code set style in a drawing that contains a corridor
Set up a section label style for corridor points
Set up a section label set
Create sample lines for the corridor if they do not already exist
Before you create sections and section views, specify the Corridor Point Code Labelling Format setting
Create the sections and section views
To control whether to add labels to interpolated corridor points on a data-referenced corridor, you can use the Add Labels to Points Interpolated from DREF Corridors setting in the Edit Feature Settings - Section View dialog box.
To change existing corridor point labels so they use a section label set
If corridor point code labels that use a section code set style already exist in a drawing, you can add a Corridor Points label type to the section label set by editing the section labels. Then you can turn off the display of the section code set style labels.
- Right-click on the corridor in an existing section view and click Edit Labels.
- Use the Labels tab of the Section Label Set dialog box to add a Corridor Points type to the label set.
- Click OK.
- At the Command line, enter CorridorSectionLabelsConvert.
- Select a section view in the group you want to convert.
- Enter P to turn off the display of existing code set style labels and to display only the corridor point style labels.
Note: If you want to switch the display of labels so that only existing code set style labels are displayed, you can run this command and enter C.Note: These options do not create new labels. They enable you to switch between the display of existing code set style labels and corridor point style labels.