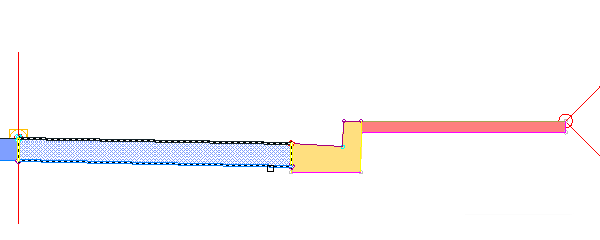
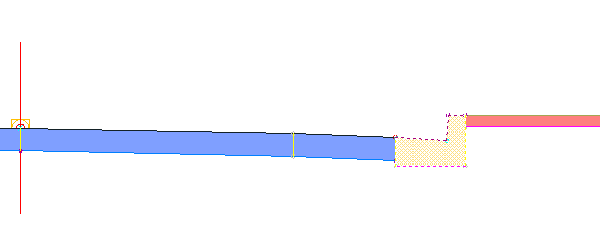
You can insert subassemblies into a drawing from the Prospector tree, from a tool palette, or from the Content Browser.
To insert a subassembly PKT file into a drawing from the Prospector tree
You can create a subassembly object by adding it to your drawing from the Prospector tree directly rather than importing it to a tool palette first.
- Right-click the Subassemblies collection in the Prospector tree.
- Click Import to Drawing.
- In the Open dialog box, navigate to the location of the subassembly PKT file that you want to insert.
- Select one or more subassemblies. You can use Ctrl or Shift to select multiple subassemblies.
- Click Open.
- Do one of the following:
- If you selected a single subassembly, you can select an insertion point on an existing assembly in the drawing or you can enter Detach at the command line to insert it without associating it with an assembly. You can also use the Insert and Replace options described in the following sections in this topic.
- If you selected multiple subassemblies, select an insertion point in the drawing for them. All the subassemblies are inserted as detached subassemblies (not associated with an assembly).
To insert a subassembly from a tool palette
You can create a subassembly object by adding it to your drawing from a tool palette. Once selected in the tool palette, you can add the subassembly to an assembly baseline, or to a subassembly attached to an assembly. You can also just add the subassembly to your drawing and not associate it with an assembly. This is referred to as a detached subassembly.
For information about adding subassemblies to a tool palette, see To Add Subassembly PKT Files to a Tool Palette.
- Display the Tool Palettes window.
Click

 Tool Palettes Find.
- On the Tool Palettes window, click the desired subassembly.
- Do one of the following:
- Select an insertion point on an existing assembly in the drawing.
- Enter Detach to insert the subassembly without associating it with an assembly.
- Enter Insert to insert the subassembly between existing subassemblies. For more information, see the following sections.
- Enter Replace to replace an existing subassembly in the drawing. For more information, see the following sections.
The subassembly name is displayed under its parent assembly in the Assemblies collection in the Prospector tree.
If you subsequently move the subassembly from its original insertion point in an assembly, you can return it to that point by clicking Clear Offset in Assembly on the Modify Subassembly panel, or by entering SubassemblyClearOffset at the command line.
The Clear Offset in Assembly button is only enabled if a selected subassembly is part of an assembly and was moved away from its original insertion point.
To insert a subassembly from the Content Browser
Use this procedure to insert a subassembly from a tool catalogue in the Content Browser.
- To open the Content Browser, click View tab
 Palettes panel
  Content Browser
  .
.
- Open the tool catalogue containing the subassembly you want to use.
- Move your cursor over the subassembly image to display options for inserting the subassembly into the drawing or adding it to a tool palette.
- Click the Insert into Drawing option.
- Do one of the following:
- Select an insertion point on an existing assembly in the drawing.
- Enter Detach to insert the subassembly without associating it with an assembly.
- Enter Insert to insert the subassembly between existing subassemblies. For more information, see the following sections.
- Enter Replace to replace an existing subassembly in the drawing. For more information, see the following sections.
To insert a subassembly between two existing subassemblies
- Select a subassembly from a tool palette, from a tool catalogue through the Content Browser, or import a subassembly using the Import to Drawing command from the Subassemblies collection in the Prospector tree.
- When prompted to select a marker point within the assembly, enter I.
- Click the subassembly to insert the new subassembly after.
 Note: Alternatively, enter B to click the subassembly to insert the new subassembly before.
The new subassembly is inserted, and the subassembly after it is highlighted and attached to the outermost top attachment point of the new subassembly.

- Click a new attachment point for the highlighted subassembly, or press Enter to accept the current location.
- Press Esc to end the command.
To replace an existing subassembly with a new one
- Select a subassembly from a tool palette, from a tool catalogue through the Content Browser, or import a subassembly using the Import to Drawing command from the Subassemblies collection in the Prospector tree.
- When prompted to select a marker point within the assembly, enter R.
- Click the subassembly to replace.
- If the existing subassembly has mapped targets, a task dialog box is displayed. Select one of the following options:
- Keep Similar Targets: In all corridors that use the assembly, the applicable targets are kept. The ability to keep similar targets is supported for all target types.
Note: Similar targets are determined by the target name. For example, a width or offset target named "Width" that is used by the existing subassembly will be kept if the replacement subassembly also has a width or offset target named "Width".
- Clear Similar Targets: In all corridors that use the assembly, similar targets in the new subassembly are set to <none>.
The new subassembly is inserted.
- Keep Similar Targets: In all corridors that use the assembly, the applicable targets are kept. The ability to keep similar targets is supported for all target types.
- Press Esc to end the command.