To import a subassembly PKT file into a drawing from the Prospector tree
You can create a subassembly object by adding it to your drawing from the Prospector tree rather than importing it to a tool palette first.
Note: This command only supports PKT files created with the Subassembly Composer. Other types of subassemblies must be inserted into a drawing from a tool palette.
- Right-click the Subassemblies collection in the Prospector tree.
- Click Import to Drawing.
- In the Open dialog box, navigate to the location of the subassembly PKT file that you want to insert.
- Select one or more subassemblies. You can use Ctrl or Shift to select multiple subassemblies.
- Click Open.
- Do one of the following:
- If you selected a single subassembly, you can select an insertion point on an existing assembly in the drawing or you can enter Detach at the command line to insert it without associating it with an assembly. You can also use the Insert and Replace options described below.
- If you selected multiple subassemblies, select an insertion point in the drawing for them. All the subassemblies are inserted as detached subassemblies (not associated with an assembly).
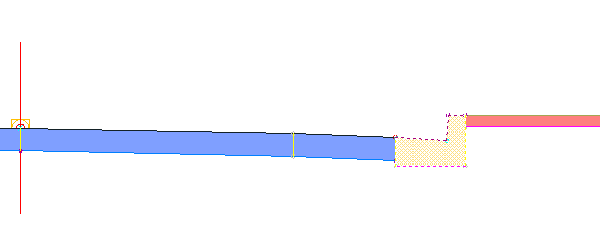
To insert a subassembly between two existing subassemblies
- When prompted to select a marker point within the assembly, enter I.
- Click the subassembly to insert the new subassembly after.
 Note: Alternatively, enter B to click the subassembly to insert the new subassembly before.
The new subassembly is inserted, and the subassembly after it is highlighted and attached to the outermost top attachment point of the new subassembly.
- Click a new attachment point for the highlighted subassembly, or press Enter to accept the current location.
- Press Esc to end the command.
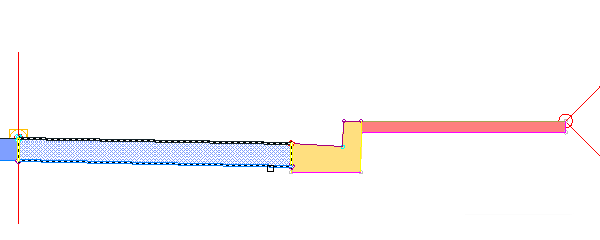
To replace an existing subassembly with a new one
- When prompted to select a marker point within the assembly, enter R.
- Click the subassembly to replace.
- If the existing subassembly has mapped targets, a task dialog box is displayed. Select one of the following options:
- Keep Similar Targets: In all corridors that use the assembly, the applicable targets are kept. The ability to keep similar targets is supported for all target types.
Note: Similar targets are determined by the target name. For example, a width or offset target named "Width" that is used by the existing subassembly will be kept if the replacement subassembly also has a width or offset target named "Width".
- Clear Similar Targets: In all corridors that use the assembly, similar targets in the new subassembly are set to <none>.
The new subassembly is inserted.
- Keep Similar Targets: In all corridors that use the assembly, the applicable targets are kept. The ability to keep similar targets is supported for all target types.
- Press Esc to end the command.