Create a report that lists coordinate, angle and distance, and slope information for a list of specified COGO points, either consecutively, or radially from an occupied COGO point.
When you create this report, you specify the report type, a list of COGO point numbers, and the COGO point properties that you want to include in the report. The resulting report displays the point numbers and properties based on the specified report type.
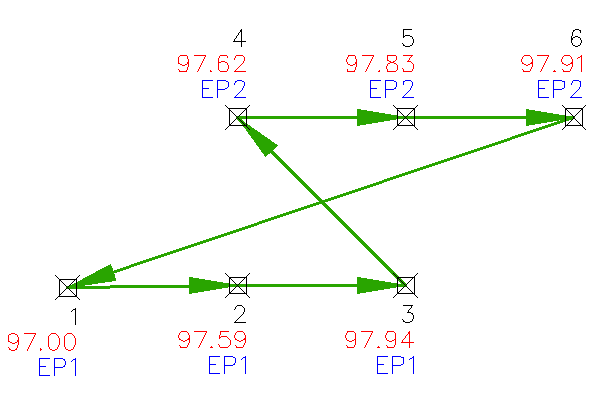
Consecutive Inverse Report
A consecutive inverse report lists the specified data in the order of the specified points.
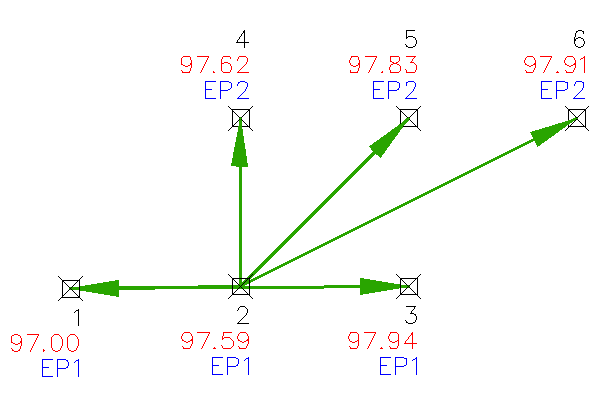
Radial Inverse Report
A radial inverse report lists the specified data for each specified point, relative to the specified occupied point and backsight point.
In the following example, Point 1 is the backsight point, and Point 2 is the occupied point.
To create a consecutive/radial inverse report
- In the Toolspace, on the Toolbox tab, expand Miscellaneous Utilities
 Reports
Point. Double-click Radial/Consecutive Inverse Report.
Reports
Point. Double-click Radial/Consecutive Inverse Report.
- In the Create Reports - Consecutive/Radial Inverse Report dialog box, specify the Report Type.
- If you selected Radial Inverse as the Report Type, specify an Occupied Point and a Backsight Point or a Backsight Direction.
- Under Report Type, specify an angle type from the Select Angle Type list.
- Under List Of COGO Points, click
 , and then select the points in the drawing.
- Under Report Settings, use the table to specify the data to include in the report, as well as the order in which the data is presented:
- Arrow Buttons: Moves the currently selected row up or down in the table.
- Include: Includes a property in the report when the check box is selected. To remove a property from the report, clear the check box.
- Property: Identifies the Autodesk Civil 3D COGO point property name.
- Column Name: Specifies the user-defined column name for the property in the inverse report.
- Under Save Report To, click
 to browse to the location to which you want to save the report, enter a file name, and select a file format.
- Click Create Report.
The report is displayed, and is saved to the specified location.
- If you want to generate another report, you may modify the report parameters and click Create Report again.
- Click Done to close the dialog box and save the current report parameters for a future session.