- On the Part Builder toolbar, click Validate.
Upon successful completion of these procedures, the part is validated and the status bar is updated with a message indicating if the part validation is successful.
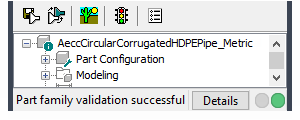
Part is valid
If you have errors in your model, the status bar message displays that the part validation failed, and a dialog box is displayed listing the errors. Review the errors, make necessary modifications, and repeat this step until validation is successful.
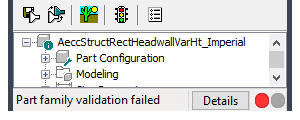
Part is invalid
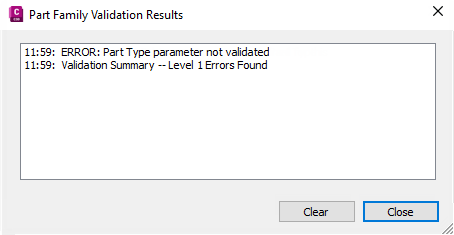
resulting error dialog box when part is invalid
Note: You may have warnings in the Part Family Validation Results dialog box even when the part is valid. - Once validation is successful, on the toolbar, click Save Part Family or Save Part Family As.
- Specify whether to make the part available in the catalog.
- Click Yes to make the part available to users.
- Click No to keep the part hidden.
Note: This prompt toggles the Hide Part option in the Options dialog box in Part Builder.The part is saved in the specified catalog location.
- Click Close on the File menu. Note: At this point, you are prompted to save changes to the drawing file <new part family name>.dwg. If you saved the part family, you should also save this drawing file, so click Yes at this prompt. If you did not save the part family, then you should click No at this prompt and not save this drawing file.