You can add some ShaderFX nodes to the Parameters rollout in the Material Editor. This way, you can adjust the attribute value without having to open the ShaderFX editor.
With the ShaderFX editor open, select the node, then on the Properties panel click Expose As Material Input. When you close the ShaderFX editor, the node's attribute is available on the Parameters rollout. You can now adjust this attribute and see it update real time in viewports.
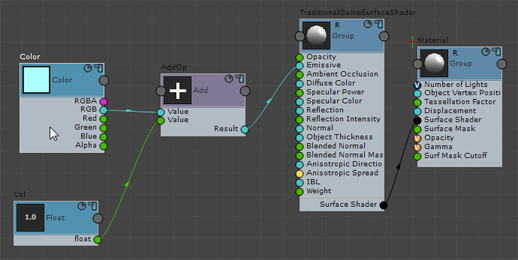
1. Select the node.

2. Turn on Expose As Material Input.

3. The attribute is now available on the Material Editor  Parameters rollout for the DirectX Shader material.
When you turn off Expose As Material Input, a value that you have set in the Material Editor reverts to its original value in ShaderFX.
Setting Spinner Ranges
When you add a Float node and turn on Expose As Material Input to make the value appear in the Material Editor, by default the range is 0.0–99.0.
- Right-click and choose Tools Toggle Advanced Mode to turn on advanced mode.
- Create the Value Float node.
If you've already created the Float node, deselected it and then select it again to see the advanced-mode options on the Properties panel.
- On the Properties panel, use UI Slider Min and UI Slider Max to change the range that will appear in the Material Editor.
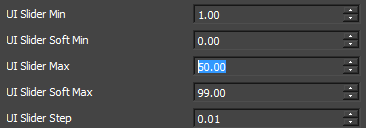
Advanced-mode slider settings for a Float node
This method also works for Integer nodes and other numeric types of Value nodes.