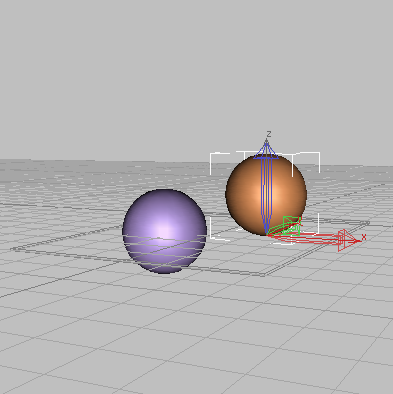
Sphere produces a full sphere or a horizontal portion of a sphere such as a hemisphere. You can also "slice" a sphere about its vertical axis.

Examples of spheres
Procedures
To create a sphere:
- On the Create menu choose Standard Primitives
 Sphere.
- In any viewport, drag to define a radius.
As you drag, a sphere emerges with its center at the pivot point.
- Release the mouse to set the radius and create the sphere.
To create a hemisphere:
- Create a sphere of desired radius.
- Type
0.5
in the Hemisphere field.
The sphere is reduced to exactly the upper half, a hemisphere. If you use the spinner, the sphere changes in size.
You can reverse the order of the following steps, if you like.
Interface
Creation Method rollout
- Edge
-
Draws a sphere from edge to edge. You can change the center location by moving the mouse.
- Center
-
Draws a sphere from the center out.
Parameters rollout

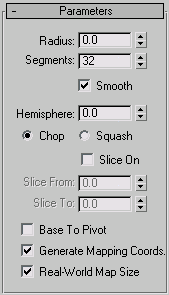
The defaults produce a smooth sphere of 32 segments with the pivot point at its center.
- Radius
-
Specifies the radius of the sphere.
- Segments
-
Sets the number of polygonal divisions for the sphere.
- Smooth
-
Blends the faces of the sphere, creating a smooth appearance in rendered views.
- Hemisphere
-
Increasing values progressively will "cut off" the sphere, starting at the base, to create a partial sphere. Values range from 0.0 to 1.0. The default is 0.0, producing a full sphere. A setting of 0.5 produces a hemisphere, and 1.0 reduces the sphere to nothing. Default=0.0.
Chop and Squash toggle creation options for Hemisphere.
- Chop
-
Reduces the number of vertices and faces in the sphere by "chopping" them out as the hemisphere is cut off. Default=on.
- Squash
-
Maintains the number of vertices and faces in the original sphere, "squashing" the geometry into a smaller and smaller volume toward the top of the sphere.

Effects of Chop and Squash during hemisphere creation
- Slice On
-
Uses the From and To angles to create a partial sphere. The effect is similar to lathing a semicircular shape fewer than 360 degrees.
- Slice From
-
Sets the start angle.
- Slice To
-
Sets the stop angle.
For both settings, positive values move the end of the slice counterclockwise; negative values move it clockwise. Either setting can be made first. When the ends meet, the whole sphere reappears.
Smoothing groups are assigned to sliced spheres as follows: The surface of the sphere is always assigned group 1; the bottom, when Smooth is on, gets group 2. Facing the pie-slice surfaces, the cut on the left gets group 3, and the cut on the right gets group 4.
Material IDs are assigned to sliced spheres as follows: The bottom is 1 (when Hemisphere is greater than 0.0), the surface is 2, and the slice surfaces are 3 and 4.
- Base To Pivot
-
Moves a sphere upward along its local Z axis so the pivot point is at its base. When off, the pivot point is on the construction plane at the center of the sphere. Default=off.
Turning on Base To Pivot lets you place spheres so they rest on the construction plane, like pool balls on a table. It also lets you animate a hemisphere so it appears to grow out of the construction plane or sink into it.

Effect of using Base To Pivot setting
- Generate Mapping Coords
-
Generates coordinates for applying mapped materials to the sphere. Default=on.
- Real-World Map Size
-
Controls the scaling method used for texture mapped materials that are applied to the object. The scaling values are controlled by the Use Real-World Scale settings found in the applied material's Coordinates rollout. Default=off.