The Relax Tool dialog offers an advanced toolset for modifying the spacing of selected texture coordinates parametrically, for the purpose of eliminating or minimizing distortion in texture maps.

-
Unwrap UVW Modifier > Edit UVs rollout > Open UV Editor button > Edit UVWs dialog > Reshape Elements rollout >
 Relax Settings button (on Relax: Custom flyout)
The dialog provides four different methods for relaxing vertices, plus several numeric parameters and checkboxes. You can use Relax to separate texture vertices based on geometric mesh data, and help create distance so that the texture vertices are not too close together. This can help to resolve overlapping areas.
The dialog is non-modal, which means that you can work directly in the editor while keeping the dialog open. You can make a selection of texture vertices, apply relaxation, make a different selection, apply relaxation, and so on, without having to close the Relax Tool dialog.
 Expand Selection Detach Edge Verts will break the selection away from the mesh into a new UV element.
Procedures
To relax texture coordinates:
- Select the texture-coordinate vertices to relax. You can make this selection at any sub-object level (Vertex, Edge, or Face), but Relax only affects texture vertices. If you don't select any sub-objects, Relax works on all texture coordinates.
- The quickest way to use Relax is by clicking
 (Relax Custom) on the Reshape Elements rollout of the Edit UVWs dialog. This supplies the default Relax algorithm to your selection, or if nothing is selected, all textured vertices.
If you are unhappy with the results, undo (Ctrl+Z) and open the Relax Tool dialog in the Edit UVs window, under Tools > Relax Tools by following either UI path at the start of this topic.
This opens the Relax Tool dialog.
- Choose the relax method from the drop-down list:
- Relax By Face Angles
- Relax By Edge Angles
- Relax By Centers
- Unfold3D Optimize
- Click Apply. If you are unhappy with the results, try changing some of the settings, such as Iterations, Amount, and Stretch.
The appropriate relax method and other settings depend on a variety of conditions, including the complexity and topology of the mesh, so experimentation is usually required. Relaxing is undoable, so if one method doesn't work, undo and try another.
To use Relax to fix overlapping faces:
- Open the Edit UVWs dialog and on the lower toolbar, click
 (Polygon Sub-object Mode).
- From the Edit UVWs dialog Select menu, choose Select Overlapped Faces.
Only the overlapping faces are selected.
- Also on the lower toolbar, click
 (Grow: UV Selection) to select faces surrounding the overlapping faces.
This gives the overlapping faces a larger area in which to spread out.
- Open the Relax Tool dialog.
- Choose your Relax algorithm, such as Unfold3D Optimize.
- Click Apply.
This procedure provides general guidelines for resolving overlapping texture faces. It might not work in every case, but it should give you a starting point for correcting most situations.
Interface
- [relax method]
-
The method used to relax the texture vertices. Choose from the drop-down list:
- Relax By Face Angles Relaxes the vertices based on the shape of the faces. It tries to align the geometric shape of the face to the UV face. This algorithm is mainly used to remove distortion and not so much to remove overlap, and is best suited for simpler shapes.
- Relax By Edge Angles This default method is similar to Relax By Face Angles except that it uses the edges that are attached to the vertices as the shape to match. It typically works better than Relax By Face Angles but tends to take longer to reach a solution. This method is bested suited for more complex shapes.
- Relax By Centers The original Relax method from previous versions of 3ds Max. It relaxes vertices based off the centroids (centers of mass) of their faces. It does not take into account the face or edge shapes/angles so it is mainly useful for removing overlap or for faces that are mostly rectangular.
- Unfold3D Optimize The Unfold3D Optimize algorithm relaxes the surface in UV space. This can only succeed if the surface is not a closed object, or has been cut beforehand. This method eliminates degeneracy and distortion, even at complex corners, in one unfold operation. Unfold3D Optimize gives the best results, but is the slowest of the four options.
- Relax By Face Angles, Relax By Edge Angles, and Relax By Centers
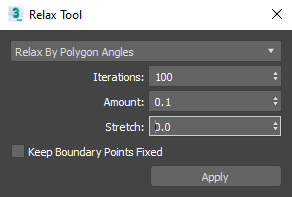
- Iterations
-
The number of times the Relax settings are applied when you click Apply. Each iteration is applied successively, to the results of the previous iteration. Range=0 to 100000. Default=100 (except for Unfold3D Optimize which is 1 iteration).
- Amount
-
The strength of the relaxation applied per iteration. Range=0.0 to 1.0. Default=0.1.
- Stretch
-
The amount of stretching that can occur. Stretching is useful mainly to resolve overlapping texture vertices, at the cost of reintroducing distortion into the texture mesh. Range=0.0 to 1.0. Default=0.0.
- Keep Boundary Points Fixed
-
Controls whether vertices at the outer edges of the texture coordinates are moved. Default=off.
When off, the outer edge of the texture mesh can float, allowing a wider range of the available texture-mapping space to be used. Typically you would keep this off when relaxing an entire element or cluster, so 3ds Max can minimize distortion by moving the edges.
When relaxing an interior subset of vertices, it is recommended you turn this on to prevent the selected vertices from overlapping unselected vertices. For Relax By Edge and Face Angles, turn this off until you get a good solution for the outer boundaries of the mesh and then turn it on to resolve the interior sections.
- Save Outer Corners
-
Preserves the original positions of texture vertices farthest away from the center. Available only with the Relax By Centers method.Note: This option only exists when using Relax By Centers.
- Unfold3D Optimize
-
Note:
 Starting in 3ds Max 2024.2, the Unfold3D Relax tool respects the current UV selection, and the operation is only applied to the selection.
- Iterations
-
The number of times the Relax settings are applied when you click Apply. Each iteration is applied successively, to the results of the previous iteration. Range=0 to 100000. Default=100 (except for Unfold3D Optimize which is 1 iteration).
- Surfangle (U)
-
Controls the strength of the surface and angular optimization, minimizing stretching and angular errors in your UV map. The default value is 1.0.
- Map Size
-
The size of your bitmap in pixels. The default is 1024.
- Room Space
-
Specifies the distance between parts of the selected UV islands in pixels. When Room space is greater than 0, it prevents textures from bleeding past the UV borders. Avoid increasing this value past its default (1 pixel), because it can slow down the optimization calculations and create distortion.

- Apply
-
Begins the relaxation process using the current settings. As relaxation takes place, a textual progress indicator appears at the bottom of the dialog, showing the current iteration (Process frame) and the total number of iterations being processed.
To abort the relaxation process, press Esc. You can then use Undo (Ctrl+Z) to return to the prior state, if necessary.