The horizon of a scene is the edge of vision at the height of the camera, parallel with the world coordinate plane. You can view the horizon in camera viewports.
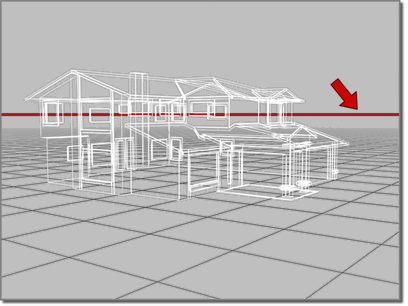
Horizon line displayed in a camera viewport
A camera is level when it and its target are the same height from the world coordinate plane. In other words, the camera’s local Z axis is parallel to the world plane. When the camera is level, the horizon line is centered in the viewport. As the camera tilts up, the horizon line lowers; as it tilts down, the horizon line raises.
The horizon line control is on the camera’s Parameters rollout.
The horizon line can help you match the perspective of your scene to the perspective of a still image. In general, matching perspective involves the following steps:
- Display the horizon line. Use it to help you adjust the camera and target so they are level.
- Display the image in the camera viewport. Use Views
 Viewport Background and choose Files in the Background Source group.
 If the image's horizon and the camera horizon don't match, you have to offset the image, perhaps by using a paint program.
- Use
 (Orbit) to move the camera until the perspective of the scene roughly matches that of the still image.
 - Adjust the camera's
 perspective to fine-tune the perspective match.
 - Use
 (Move) with the camera or target to position the scene against the background.
 If you raise or lower the camera, raise or lower the target by an equal amount, in order to keep them level and maintain the horizon.
Tip: For a Physical Camera, you can adjust perspective by using controls on the Perspective Control rollout. For a legacy Free Camera, you can match the camera perspective to a photograph by using the Perspective Match utility.