Secondary flares are the small circles you would normally see coming out from the source of the lens flare along an axis relative to the camera position. These are caused by light refracting off the different lens elements in the camera. As the camera position changes relative to the source object, the secondary flares move.

Adding secondary flares to the light
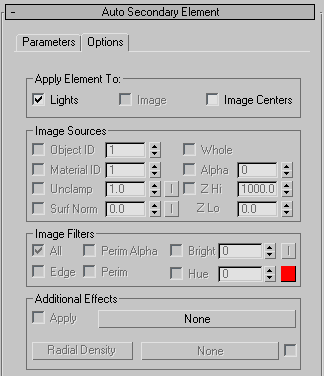
Interface
Auto Secondary Element rollout, Parameters panel
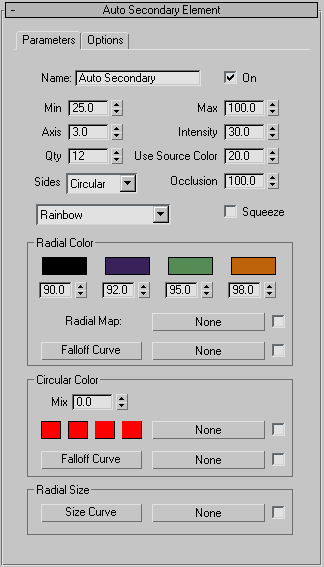
- Name
- Displays the name of the effect. With Lens Effects you can have many different effects under one instance of Lens Effects. To keep them in order, it is necessary to name them to make sure that when you change parameters you are changing the parameters to the correct effect.
- On
- Applies the effect to the rendered image when activated. Default = on.
- Min
- Controls the minimum size of secondary flares in the current set. This number is defined as a percentage of the overall image.
- Max
- Controls the maximum size of secondary flares in the current set. This number is defined as a percentage of the overall image.
- Axis
- Defines the overall length of the axis the automatic secondary flares will be distributed along. Increasing the value creates more space between the flares, while decreasing the value creates less space between the flares. You can set the axis from 0 to 10 degrees.
- Intensity
- Controls the overall brightness and opacity of the individual effect. Higher values produce a bright, more opaque effect, and lower values produces a dim, transparent effect.
- Qty
- Controls the number of secondary flares that appear in the current set of flares.
- Use Source Color
- Mixes the source color of the light or object you are applying the effect to with the color or mapping set in the Radial Color or Circular Color parameters. A value of 0 uses only the values set in the Radial Color and Circular Color parameters while a value of 100 uses only the light or objects source color. Any value between 0 and 100 will render a mix between the source color and the effect’s color parameters.
- Sides
- Controls the shape of the secondary flares for the current set. The default is circular, but you can choose from 3- to 8-sided secondary flares.
- Occlusion
- Determines how much the Lens Effects Scene Occlusion parameters will affect the particular effect. The value entered determines what percentage of occlusion set in the Lens Effects Globals panel will be applied.
- [presets drop-down list]
- Displays a list of preset values that can be selected and applied to the rendered scene.
- Squeeze
- Determines whether the effect will be squeezed. When activated, the effect will be squeezed according to Lens Effects Globals under the Parameters panel in the Squeeze spinner.
Radial Color group
The Radial Color settings affect the inner and outer colors of the effect. You can set the color swatches to set the inner and outer colors of the Lens Effect. Each color swatch has a percentage spinner that determines at what point that color should stop and the next should start. You can also use bitmaps such as gradient or cellular to determine the radial color.
- Falloff Curve
- Displays the Radial Falloff dialog in which you can set weights for the colors used in Radial Color. By manipulating the Falloff Curve you can make the effect use more of one color or map than the other. You can also use a map to determine the falloff when a light is used as a Lens Effects source.
Circular Color group
Circular Color determines the color of the effect by using four different color swatches that are matched to the four quadrants of the effect. A map can also be used to determine circular color.
- Mix
-
Allows you to mix between colors set in Radial Color and colors set in Circular Color. Setting the spinner at 0 will only use values set in Radial Color while setting the spinner at 100 will only use values set in Circular Color. Any value between 0 and 100 will mix between the two values.
- Falloff Curve
-
Displays the Circular Falloff dialog in which you can set weights for the colors used in Circular Color. By manipulating the Falloff Curve you can make the effect use more of one color or map than another. You can also use a map to determine the falloff when a light is used as a Lens Effects source.
Radial Size group
Determines the radial size around the particular Lens Effect. Clicking the Size Curve button displays the Radial Size dialog. Using the Radial Size dialog you can create points on a line and move those points along a graph to determine where the effect should be placed around the light or object. You can also use a map to determine where the effect should be placed. A checkbox is used to activate the map.