A streak is a wide band that runs through the center of the source object. In real camera work, it is produced when using anamorphic lenses to film a scene.
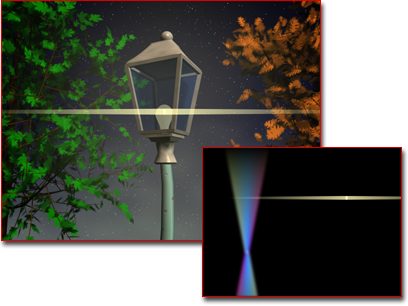
Adding a streak to the light
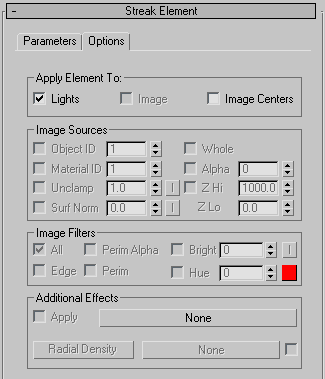
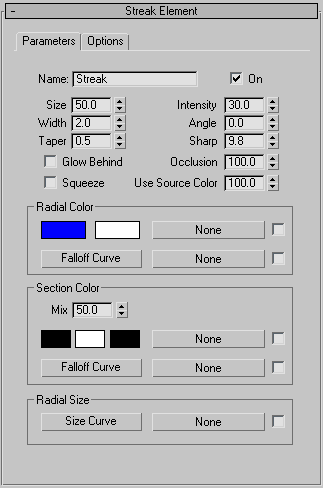
Interface
Streak Element rollout, Parameters panel
- Name
- Displays the name of the effect. With Lens Effects, you can have many different effects under one instance of Lens Effects. To keep them in order, it is necessary to name them to make sure that when you change parameters you are changing the parameters to the correct effect.
- On
- Applies the effect to the rendered image when activated.
- Size
- Determines the size of the effect.
- Intensity
- Controls the overall brightness and opacity of the individual effect. Higher values produce a bright, more opaque effect, and lower values produces a dim, transparent effect.
- Width
- Specifies the width of the streak, as a percentage of the frame.
- Angle
- Specifies the angle for the streak. You can enter both positive and negative values so, when animated, the streak rotates in a clockwise or counterclockwise direction.
- Taper
- Controls the taper of the individual spokes of the streak. Taper widens or narrows the tips of the individual streak points. Low numbers create a sharp point, while high numbers flare the points.
- Sharp
- Specifies the overall sharpness of the streak. Higher numbers produce crisp, clean, and clear streaks. Lower numbers produce more of a secondary glow look. Range=0 to 10.
- Glow Behind
- Gives the effect the ability to be displayed behind objects in your 3ds Max scene.
- Occlusion
- Determines how much the Lens Effects Scene Occlusion parameters will affect the particular effect. The value entered determines what percentage of occlusion set in the Lens Effects Globals panel will be applied.
- Squeeze
- Determines whether the effect will be squeezed. When activated, the effect will be squeezed according to Lens Effects Globals under the Parameters panel in the Squeeze spinner.
- Use Source Color
- Mixes the source color of the light or object you are applying the effect to and the color or mapping set in the Radial Color or Circular Color parameters. A value of 0 uses only the values set in the Radial Color and Circular Color parameters while a value of 100 uses only the light or objects source color. Any value between 0 and 100 will render a mix between the source color and the effect’s color parameters.
Radial Color group
- Falloff Curve
- Displays the Radial Falloff dialog in which you can set weights for the colors used in Radial Color. By manipulating the Falloff Curve you can make the effect use more of one color or map than the other. You can also use a map to determine the falloff when a light is used as a Lens Effects source.
Section Color group
Section Color determines the color of the effect by using three different color swatches that are matched to the three sections of the effect. A map can also be used to determine section color.
- Mix
- Mixes colors set in Radial Color and colors set in Section Color. Setting the spinner at 0 will only use values set in Radial Color while setting the spinner at 100 will only use values set in Section Color. Any value between 0 and 100 will mix between the two values.
- Falloff Curve
- Displays the Circular Falloff dialog in which you can set weights for the colors used in Section Color. By manipulating the Falloff Curve you can make the effect use more of one color or map than another. You can also use a map to determine the falloff when a light is used as a Lens Effects source.
Radial Size group
Determines the radial size around the particular Lens Effect. Clicking the Size Curve button displays the Radial Size dialog. Using the Radial Size dialog you can create points on a line and move those points along a graph to determine where the effect should be placed around the light or object. You can also use a map to determine where the effect should be placed. A checkbox is used to activate the map.