You will use the primitive Tube object with the Slice option to create an enclosure for the revolving door.
Set up the lesson:
- Continue with your scene from the previous lesson or go to the \startup\revolving_door folder and open revolving_door_enclosure.max.
- Right-click the Perspective viewport to activate it, and then in the Viewport Navigation Controls, click
 (Maximize Viewport Toggle). This button is at the extreme lower right of the
3ds Max window.
Create another layer:
- On the Layers toolbar, click
 (Create New Layer).
- Name the Layer
Enclosure.
Tip: If 3ds Max creates the layer without opening the Create New Layer dialog, then open the Layers drop-down list, right-click the new layer, and use the Rename Layer dialog to give it the name you want.
The Move Selection To New Layer setting should be off. If you leave this on, the hub will be moved from the previous layer to the new layer.
Click OK.
The Enclosure layer is now visible in the Layer Properties field.
Create the tube:
- On the navigation controls, click
 (Zoom Extents) to zoom back so you can see the area around the cylinder.
- On the
 Create panel
  Object Type rollout, click to activate Tube.
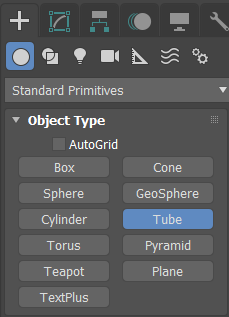
The Tube button highlights, indicating it is active and ready for use.
- Drag out a tube anywhere in the viewport.
The size doesn't matter; you'll be changing it in a moment.
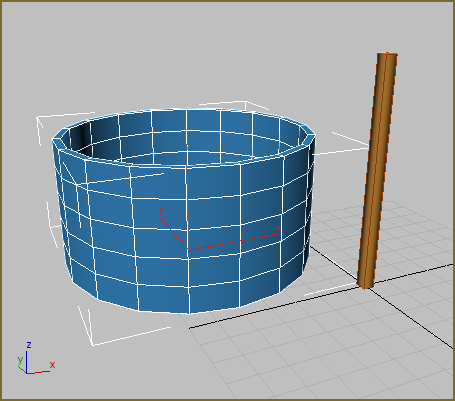
Make a tube.
- In the Parameters rollout on the Create panel, change Radius 1 to 6' 0.0". You may need to click
 Modify to display the Parameters rollout.
- Change Radius 2 to 5' 11.0"
- Change Height to
7' 0.0".
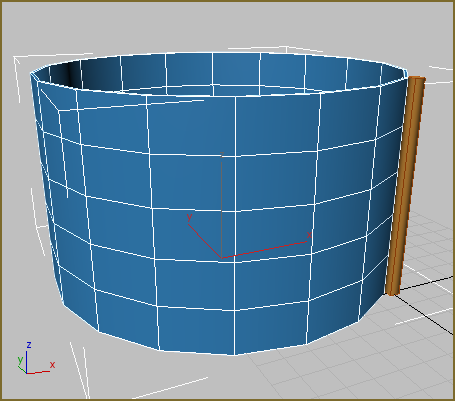
Change the radius and height of the tube.
- If necessary, zoom out so you can see both the tube and the cylinder.
Align the tube:
- On the toolbar, click
 Align.
The tube is already selected, so you'll align it to the cylinder.
- Click the cylinder in the viewport.
- In the Align Selection (Cylinder01) dialog
 Align Position (World) group, turn on X Position, Y Position, and Z Position. Choose Pivot Point for both Current Object and Target Object. Click OK.
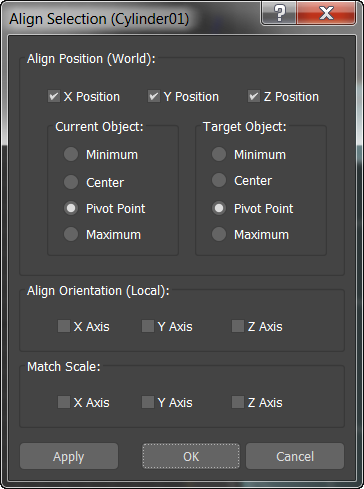
The tube is centered over the cylinder.
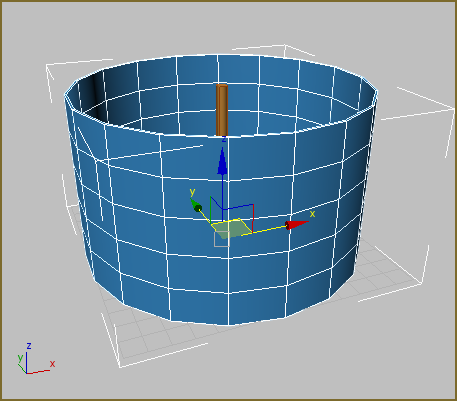
- On the main toolbar, click
 (Select Object) to deactivate Select And Move.
- Click the
 Create panel, then in the Name And Color group, rename the Tube object
left enclosure panels.
Next, you'll center the tube over the cylinder.
Slice the tube:
- Go to the
 Modify panel.
- On the Parameters rollout, turn on Slice On.
- Adjust the Slice From and Slice To values so you have a half of a tube visible in the viewport, resembling the illustration. Set them to
90.0 and
–90.0 degrees.
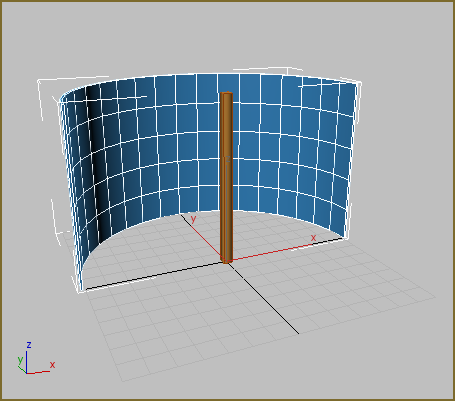
Slice the tube
- Change Sides to 6. The enclosure will be created out of flat panels, rather than curved glass.
- Change Height Segments to
1.
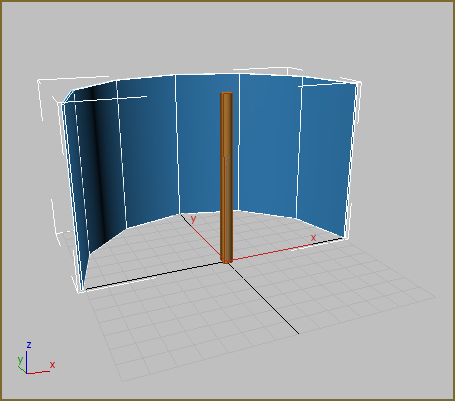
Reduce the number of faces.
Next you'll clone the tube to create the other side of the enclosure.
Clone the tube:
- On the main toolbar, click to activate
 (Select And Rotate).
- On the keyboard, press A to turn on Angle Snap.
- Hold down the
Shift key and rotate the left enclosure 180 degrees about the Z axis.
A copy of the tube rotates into place on the other side of the enclosure.
- When the copy of the tube is in the proper position, release the mouse button.
3ds Max opens the Clone Options dialog.
- On the dialog, set the Object option to Copy and name the clone
right enclosure panels. Click OK.
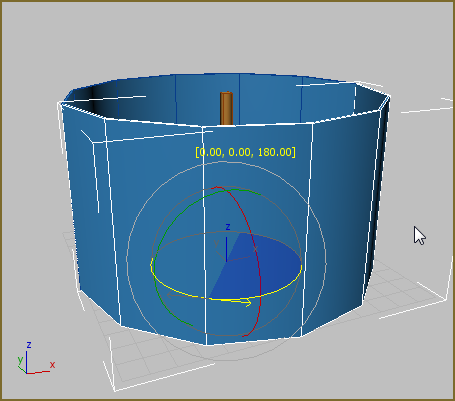
- On the main toolbar, click
 (Select Object) to deactivate Select And Rotate.
- Adjust the Slice values so the tube resembles the illustration below. Set Slice From = 45 and Slice To = –45.0.
- Change the Sides value to
3.
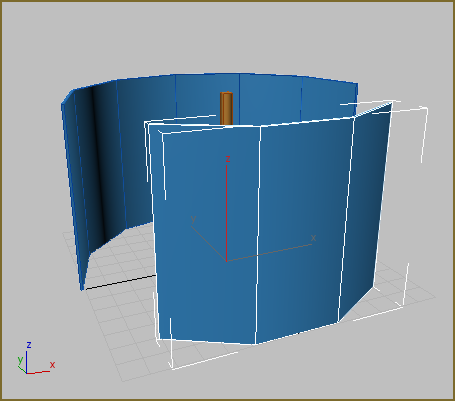
Left and right enclosures
You'll do some more work on the enclosures in a while, but first you'll construct the revolving door.
Save your work:
- Save the scene as my_enclosure.max.