In this lesson, you will use a variety of freeform tools to create a ridge of irregular spikes for the Viking helmet.
Set up the lesson:
- Continue working from the previous lesson or open helmet_04.max.
- If you opened the new file,
 select the helmet, and make sure the
 Modify panel is active.
Remove the middle seam from the helmet ridge:
- On the ribbon
 Polygon Modeling panel, activate
 (Edge).
- On the Modify Selection panel, click
 (Loop Mode) to turn it on.
You will use this tool to remove the edge loop in the middle of the helmet ridge.
-
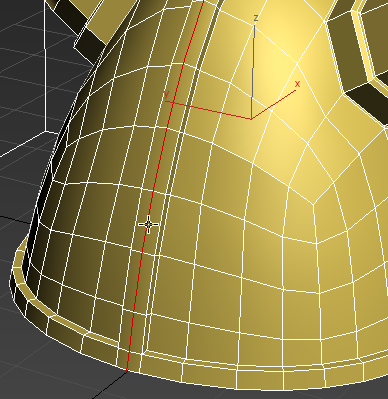
 Click a vertical edge along the middle seam of the helmet ridge.
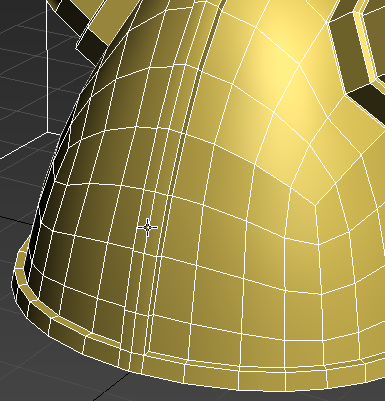
Loop mode selects the entire edge loop that forms the middle seam.
- On the Edges panel, click
 (Remove).

- Activate the
 (Vertex) sub-object level.
Notice that while the loop edges have been deleted, their vertices remain. You want to remove the vertices as well.
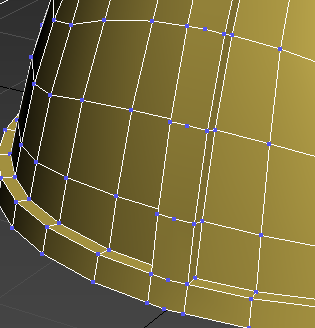
Unwanted vertices left over from edge removal
-
 Undo the Remove operation so that the loop redisplays.
- Activate
 (Edge) again, then on the Edges panel,
Ctrl+click
 (Remove).
Ctrl+Remove removes the vertices as well as the edges.
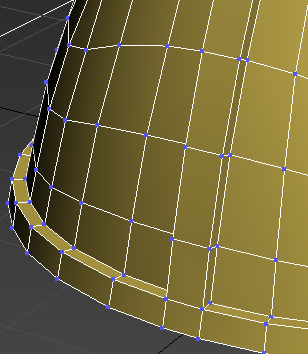
Both edges and vertices removed
Subdivide the ridge into rectangular faces:
-
 Click and
Ctrl+click to select two of the longer vertical edges on either side of the helmet ridge, as shown in the next illustration.
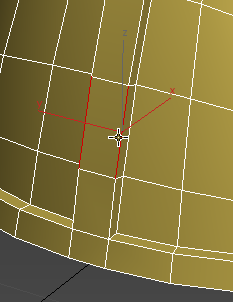
- On the Loops panel,
Shift+click
 (Connect).
- On the caddy controls for Connect, make sure Segments is set to
1 and Pinch and Slide are set to
0, then click
 (OK).
(OK).
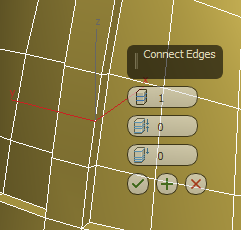
These values ensure you are connecting the edges just once, with no offset.
-
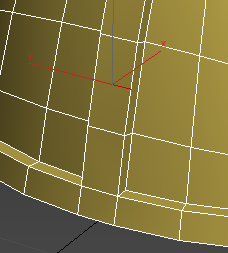
 Select the next pair of edges above the ones you just connected, and click
 (Connect) to add horizontal edge to the ridge.
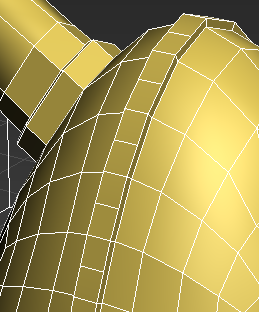
- Repeat the previous step for each pair of edges along the ridge, except for the shorter edges just above the rim of the helmet. Stop when you have connected edges on the rear side of the helmet as well as along the front.
Create irregular spikes using the Freeform tools:
- On the ribbon
 Polygon Modeling panel, activate
 (Polygon).
-
 Select the polygon at the base of the ridge.
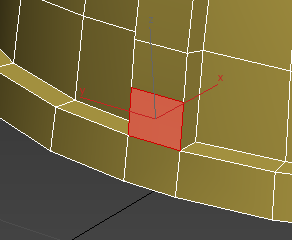
- Adjust the Perspective view to make sure you are looking at the helmet from an oblique angle.
Note: If you start extruding the polygon while looking at the model head on, the extrusion will take on a 2D appearance.
- On the ribbon, click the Freeform tab, and on the PolyDraw panel, click
 (Branches).

-
Shift+drag the selected polygon outward, away from the helmet, then release the mouse.
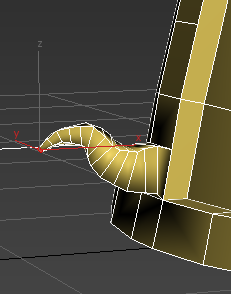
Helmet after first Branch extrusion
- Ctrl+click to select the polygon two above the one you just branched, then Shift+drag it to create another branch.
- Continue extruding every second polygon until the entire ridge is complete.
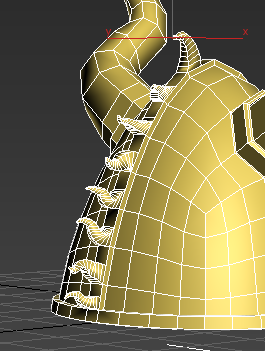
As you progress along the helmet, make sure you maintain an oblique view of the polygons. If you don’t like the shape of an extrusion, or you extrude the wrong polygon, press Ctrl+Z to undo the operation.
- Click the ribbon
 Modeling tab again.
- On the ribbon
 Polygon Modeling panel, click
 (Polygon) again to exit the Polygon sub-object level, then press
F4 to turn off edged faces.
- Again apply the OpenSubdiv modifier, and set Iterations to
4.
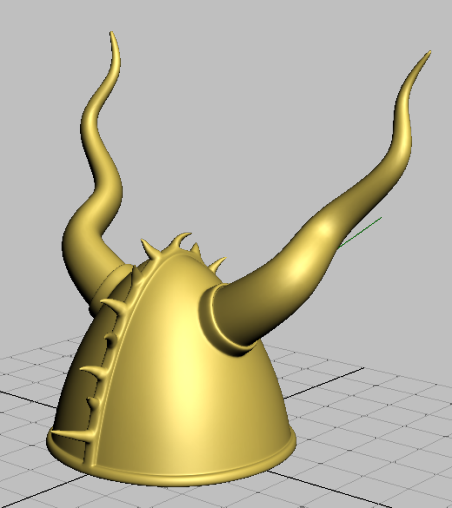
The helmet geometry is smoothed out and ready to accept materials.
Summary
Throughout this tutorial, you used a number of modeling tools on the ribbon to create a Viking helmet. While these tools are also available from the Command panel, the ribbon gives you faster access, in context, as you need them.
You also used the new OpenSubdiv modifier along with the existing editable poly Crease feature to save time in smoothing the model while keeping sharp edges where necessary.