Work with USD Data in the Command Panel

Once you have a USD Stage reference, you can work with your USD data directly in 3ds Max.
Parameters
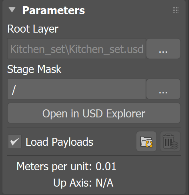
Use the Parameters Rollout in the Command Panel to configure or make changes to your loaded USD stage.
- Select the ellipses (...) next to the Root Layer label to select or change your loaded USD file.
- Select the ellipses (...) next to the Stage Mask label to select the prim and all descendants you want to display in your scene. You can use Stage Mask to configure your display and mask prim objects you don't want to display in the viewport.
- Note: Certain prim types are unavailable for mask selection. Materials and GeomSubsets are not included. Any prim outside this mask hierarchy will be excluded from the stage, including referenced data like materials. See the USD documentation on Stage Population Mask.
- Use the Open in USD Explorer button to bring focus to the USD Explorer and visualize your USD data in the tree hierarchy.
- Toggle the Load Payloads option to load/unload payloads into your scene. By default, all payloads are loaded into the scene.
- Reload USD Stage (
 ): Reloads the stage. Click this after you make changes to loaded USD files, when you want to see those changes in 3ds Max.
Note: USD files/layers are cached globally inside of 3ds Max; reloading from disk is an explicit operation that affects all stages using those layers. - Stage Info: Displays units and the up-axis of your USD file.
Viewport Display
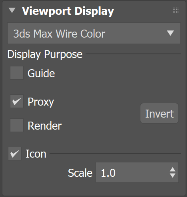
- Use the Show drop-down to select your display preference for the stage. To increase the performance of a stage, the default viewport setting is to show the stage using the stage node’s wire color or 3ds Max Wire Color. You can also display a stage with the USD Display Color (deriving colors from USD Prim data) or USD Preview Surface (which uses the imported material from USD).
Wire Color and Proxy
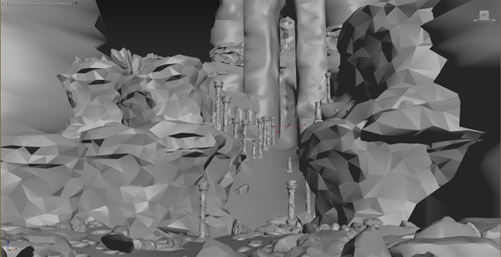
USD Display Color and Proxy

Wire Color and Render
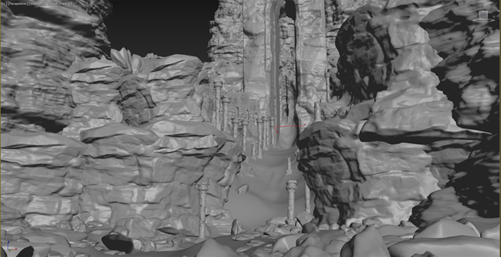
USD Display Color and Render
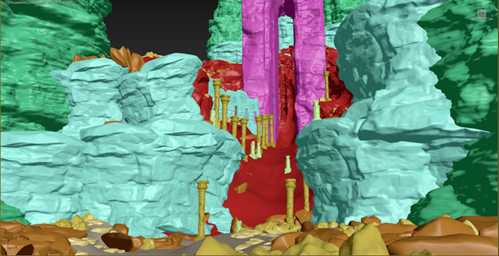
USD Preview Surface and Render

Credit: Scene in images above created by Ethan Olson and Shawn Olson.
Display Purpose: Use to toggle the visibility of assigned purposes in the viewport. In USD, the building block (called prims) can have a purpose, or intended usage. A well-structured USD file will have objects defined with a purpose of Render, Guide or Proxy. Assign purposes in your USD file so you can toggle the display of purposes in this setting.
When a stage is loaded in the viewport, the default state is to just display the Proxy and Default purposes. Prims with the Default purpose are always displayed in the stage node regardless of the stage’s current Display Purpose settings.- Guide: Intended for prims used as markings, arrows or interaction guides.
- Proxy: Intended for prims used as lightweight representations that can load efficiently in the viewport.
- Render: Intended for prims that will be used at render-time.
Tip: Use the Invert toggle to quickly flip states between Proxy and Render.
Icon: When you load a USD stage, a new icon for your USDStage node will display in the viewport, giving you a way to select the node in the viewport when no USD file is loaded into the stage. Toggle to display or hide the icon and use the Scale slider to change the size of the icon in the viewport.
Animation
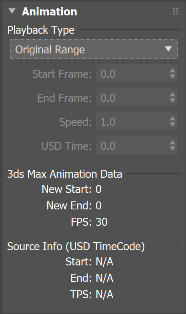
Use Playback Type settings to configure the animation of your USD stage. You can specify an original range, a custom range, a custom start and speed, or specific USD TimeCode.
USD Render Setup

Materials
Minimal support for rendering a USD Stage is available as a fallback when renderers do not support accessing a USD stage directly. The fallback rendering requires that the node in the scene has materials assigned directly onto the USD Stage node. A stage renders with its wire color by default when rendered using the fallback method. To render a stage with USDPreviewSurface materials using the fallback method, add the materials to the node with the Assign USD Materials button.
Assign USD Materials: Generates and assigns
UsdPreviewSurfacematerials to the USD stage node. This lets you work with offline renderers that do not support USD directly.Note: You can track the progress of material assignment with the live progress bar. In 3ds Max 2022 and prior, this bar appears in the Command Panel. In 3ds Max 2023, this progress bar appears below the time key.Warning: This process overrides the material currently assigned to the node referencing the stage.
Rendering process and key considerations
- The fallback renderer utilizes the current stage display settings. This means that if you are viewing a stage with the Proxy purpose and not the Render purpose, the Render purpose geometry will not render.
- The stage object supports a single UV channel in the viewport, however, using the fallback method, multiple UVs are supported for fallback rendering.
- Currently the fallback rendering only works with USD materials that use the
UsdPreviewSurfaceshader. - Materials are not automatically applied to a stage node because the generation of materials is time consuming and costly for very large scenes. This is also not required at all when renderers are able to support rendering the USD stage directly.
- For renderers that do have proper support for the USD stage, it is expected that the node’s display purpose is ignored, and USD prims marked as Default or Render purposes will render regardless of the display settings. For these renderers, the materials are derived from the USD data, and no materials need to be applied to the node in the scene. Although these are the expected results, refer to each renderer's documentation for USD compatibility to know its exact implementation.
Viewport Performance
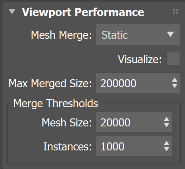
Mesh Merge: This option consolidates the meshes for better viewport performance, but there is no single optimal setting that works across all scenes. Select Static(default), if your USD set contains only static assets. For scenes with transform animations, you may get better performance by choosing Dynamic, especially if the scene is composed of many small objects with animated transforms or vertex animations.
- Use the Visualize toggle to enact your results in the viewport.
- Use the Merge Thresholds options to configure consolidation options for your viewport performance.
Tip: Experiment with Mesh Merge options and thresholds to achieve the best performance with your scene.