Create standard and variable grating.
Create a standard grating using a center point
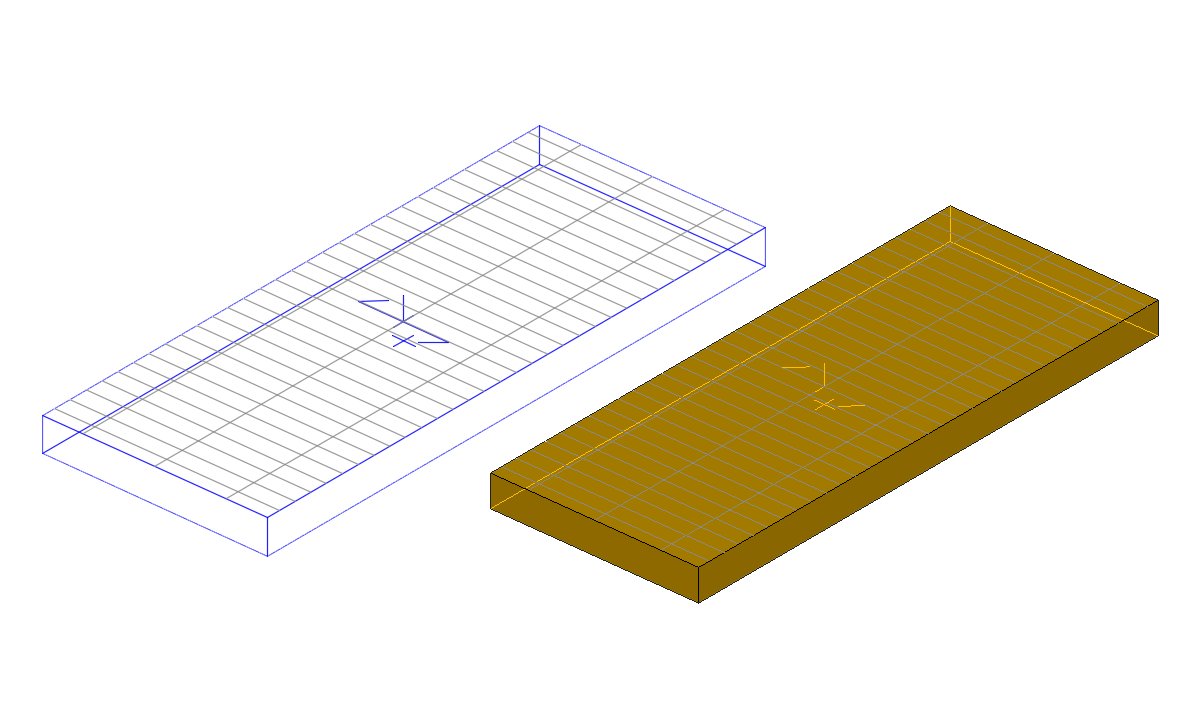
With this tool you can create a standard rectangular grating element using a center point. The rectangular gratings are placed in the X/Y plane of the current coordinate system.
Access the command
On the Objects tab  Grating panel, click
 (Standard Grating).
Command line: _astorcreatestandardgrating
Create a standard grating
- Place a coordinate system with the X/Y plane in the required grating plane.
- On the Objects tab Grating panel, click
(Standard Grating).
- Select a center point with an object snap or by entering coordinates.
- The grating is created and the properties dialog box appears.
Modify the grating hatch
- Access the grating properties.
- Select the Shape and Connector tab.
- Deselect the Use standard hatch option.
- From the Custom hatch drop-down list, select the desired hatch.
Specify another connector for a grating
- Access the grating properties.
- Select the Shape and Connector tab.
- From the Connector drop-down list, select Variable.
- In the Connector name field, enter the connector name to be displayed in the BOM.
- In the Connector quantity field, enter the number of connectors used for the grating.
Specify another material and coating for a grating
- Access the grating properties.
- Select the Material tab.
- From the Material/Coating drop-down list, select Variable.
- You can select another material and coating.
Change the grating display type
- Access the grating properties.
- Select the Display type tab.
- Select the desired representation type.
Create a rectangular variable grating
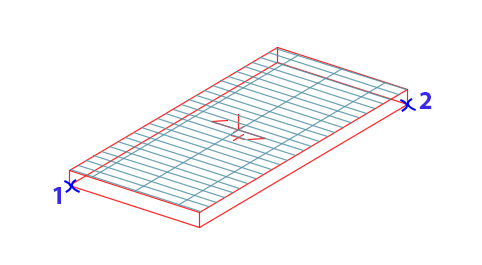
With this tool you can create a rectangular grating element by two diagonal points. The rectangular gratings are placed in the X/Y plane of the current coordinate system.
Access the command
On the Objects tab Grating panel, click
 (Variable Grating, rectangular).
Command line: _astorcreatevariablerectgrating
To create a rectangular variable grating
- Place a coordinate system with the X/Y plane in the required grating plane.
- On the Objects tab Grating panel, click
(Variable Grating, rectangular).
- Specify the first corner point by selecting or entering coordinates.
- Specify the diagonal opposite corner point by selecting or entering coordinates.
- The grating is created and the properties dialog box appears.
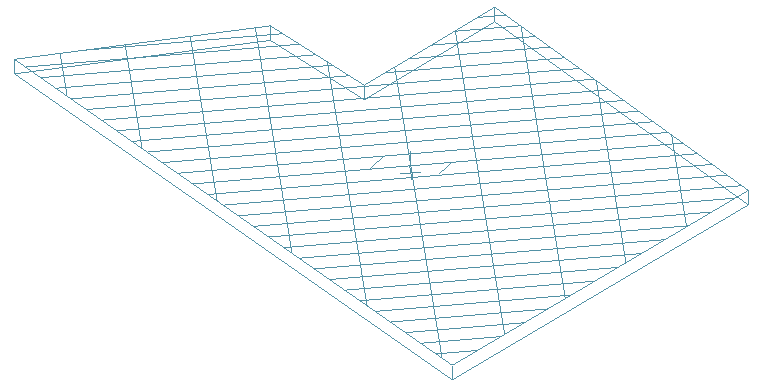
Create a polygonal grating by points
With this tool you can create a polygonal grating element by picking points. The polygonal gratings are placed in the X/Y plane of the current coordinate system.
Access the command
On the Objects tab Grating panel, click
 (Variable Grating, polygonal).
Command line: _astorcreatevariablepolygrating
Create a polygonal grating by points
- Place a coordinate system with the X/Y plane in the required grating plane.
- On the Objects tab Grating panel, click
(Variable Grating, polygonal).
- Select the corner points one after another and press <Enter> when finished.
- The grating is created and the properties dialog box appears.
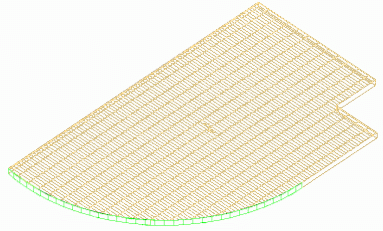
Create a polygonal grating at a polyline
Another way to create a polygonal grating is to transform an existing polyline, which does not have to be closed, into a grating.
In this case, the position of the grating element is independent of the coordinate system since it is determined by the position of the polyline.
Access the command
On the Objects tab Grating panel, click
 (Grating at Polyline).
Command line: _astorcreatevariablegratingfrompolyline
Create a polygonal grating at a polyline
- On the Objects tab Grating panel, click
(Grating at Polyline).
- Select the polylines and press <Enter>.
- The grating is created and the properties dialog box appears.