Marking Menus
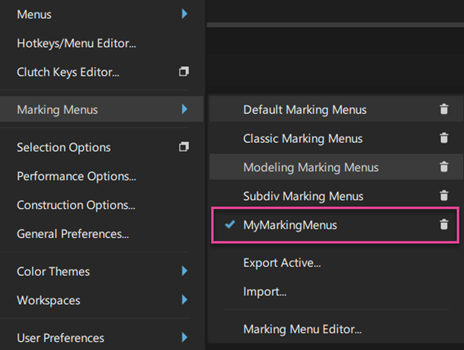
Marking menus are tool shortcuts that pop-up at your cursor position when you use the Shift + Ctrl keys and the mouse buttons. You can choose between the following default marking menus configurations, which are based on Workspace, or create your own custom versions:
- Default Marking Menus
- Classic Marking Menus
- Modeling Marking Menus
- Subdiv Marking Menus
Export Active
Saves the active marking menu to a .json file, which can be shared and later imported.
Import
Loads the selected .json marking menu file to your system. After importing a file, the marking menus appears in the list.
Marking Menu Editor
Use the Marking Menu Editor to add to, rearrange, or replace the marking menus with the tools you use often.
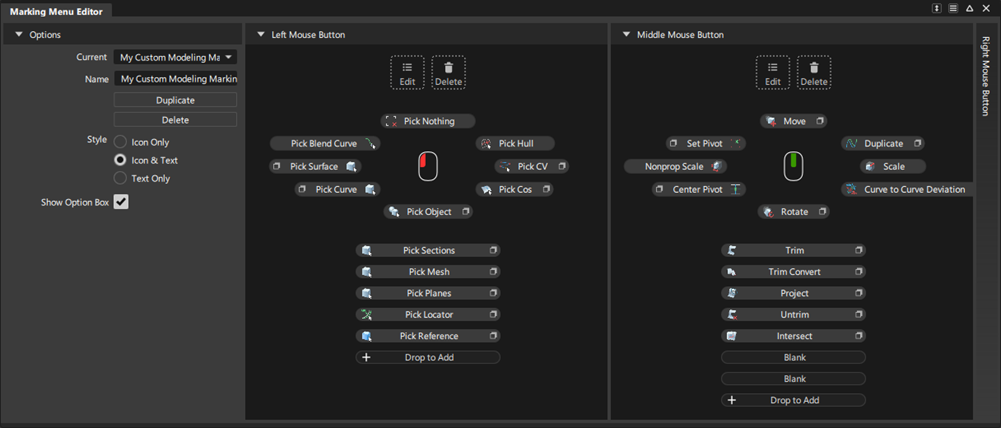
Options
Current - Displays the marking menus available in your Preference Profile. Selecting a marking menu from the list opens it in the editor displaying the current configuration for each button.
Note: To save screen space, you can collapse one or two of the button sections to focus on just one.Duplicate - Makes a copy of the selected marking menu. Use this option to create a modified version.
Delete - Removes the selected marking menu from the list.
Style - Choose what to display in your marking menus: Icon Only, Icon & Text, and Text Only.
Show Option Box - Turn on to display the option box icon
 in the marking menus.
Marking Menu Editor Workflows
Add items to a marking menu
You can add tools from the palette, menu items, or diagnostic shaders to marking menus.
- MMB-drag an item from the Tool palette or menu and drop it onto the Drop to Add zone below the marking menu.
Edit marking menu items
Edit marking menu items by renaming, assigning a hotkey, or choosing a custom icon for them.
- MMB-drag a marking menu item to the Edit icon. The Shelf Item Editor opens.
- Make the desired changes.
Remove a marking menu item
- MMB-drag a marking menu item to the Delete icon
 .
.