 Blend Curve Edit
Lets you edit the direction and continuity of a blend point.
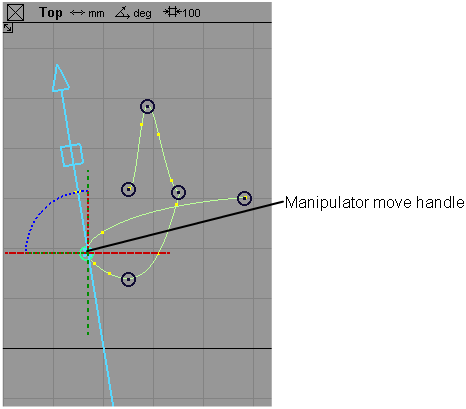
The Blend Curve Edit tool has a manipulator allowing you to move individual Blend Points in your curve and modify their tangent. This manipulator has a move handle, at the center of the point, which can be dragged into a new position, as well as other handles that let you adjust the tangent length and direction.
Access the Blend Curve Edit tool from the Blend Curve Toolbox:

Blend Curve Edit workflow
Change the tangent direction at a blend point
Edit blend points to change the shape of the blend curve
Select the Blend Curve Edit tool
 .
.Click the blend point you want to edit.
Use the tangent manipulator to set the tangent direction at the picked blend point, or to move the blend point.
 Tip: Hold
Shiftand click to select multiple blend points. Changes to the tangent direction manipulator are applied to all the selected blend points.
How do I use the tangent direction manipulator?

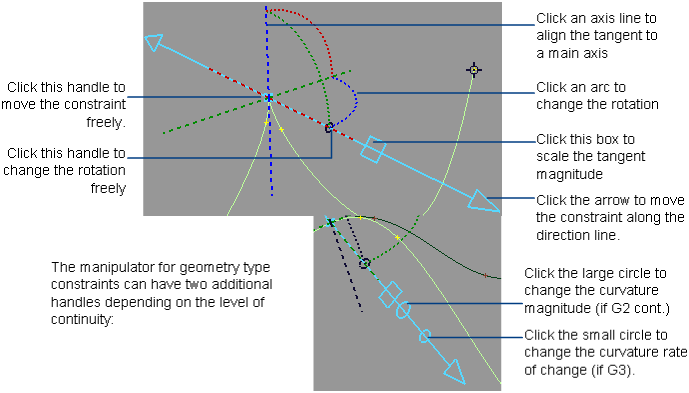
To set the tangent direction, click an axis line.
For direction constraints, the axis lines relate to world space (X, Y, Z). For geometry constraints, the axis lines relate to the curve, surface, or point cloud (U, V, Normal).
To change the rotation freely, click the rotation handle (the small circle on the arrow), then drag with the different mouse buttons or type rotational coordinates.

To change the rotation in a plane, click an arc, then drag left and right or type a rotation angle.
To change the tangent magnitude, click the square, then drag left or right or type a value.

To change the curvature magnitude, click the large circle, then drag left or right or type a value. The default is 1.0.

This handle appears when the constraint’s continuity is set to G2 or higher.
To change the curvature rate of change, click the small circle, then drag left or right or type a value. The default is 1.0.

This handle appears when the constraint’s continuity is set to G3 or higher.