 Pedestrian Protection
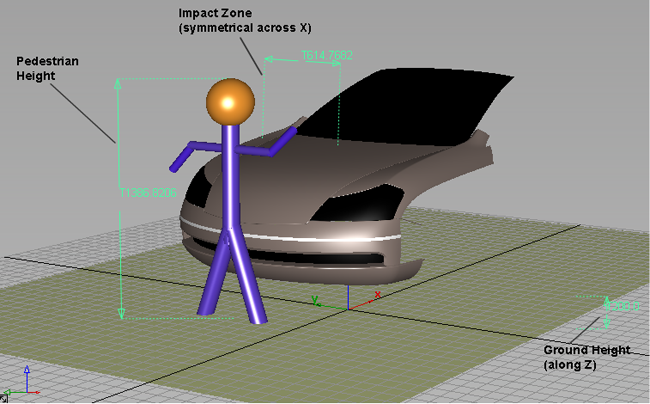
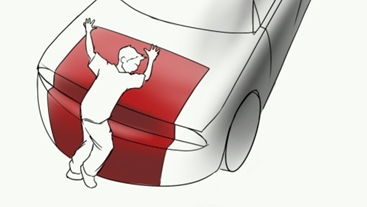
Provides the ability to evaluate pedestrian impact with a car hood. By knowing where the head of a pedestrian impacts the hood of a car during a collision, the design can be modified to reduce collisions with stiff under-structures, improving the ability of pedestrians to survive collisions with vehicles.
This is now required by automotive safety guidelines in several countries.
Access this tool from the Evaluate palette:

About the Pedestrian Protection Control tool
Input to this tool consists of:
- Pedestrian height
- Width of the impact zone (on each side of the center line)
- Ground height
- Car hood surfaces
(All distances and heights are in current units.)

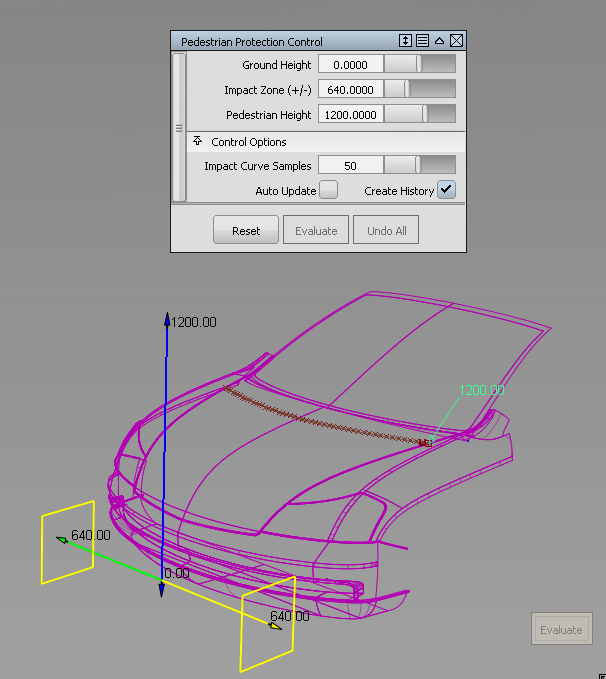
The output is a degree 1 curve (polyline) that lies on the hood and indicates where the top of the head of a pedestrian of the given height would impact the selected surfaces if the pedestrian was hit by the car and fell across the hood. The number of spans corresponds to the value of Impact Curve Samples in the control window.
This impact curve produced by the Pedestrian Protection tool has construction history and updates when the input values (such as pedestrian height) or target surfaces are modified.
The input values can be modified through the control window or using the manipulator, and the curve is re-calculated.
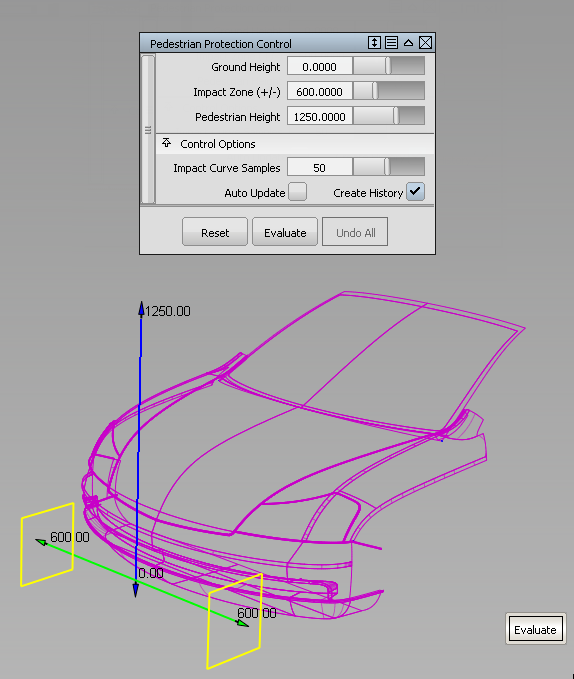
Pedestrian Protection Control settings
Ground Height
Ground plane location (height along the Z axis in current units). The default is Z = 0.
Impact Zone (+/-)
Distance from the centerline (along the Y axis) that defines the impact zone. This will be the extent covered by the output curve. The default is +/- 600 mm.
Pedestrian Height
Height of the pedestrian in current units. The default is 1250 mm.
Control Options
Impact Curve Samples
Number of points calculated for the output curve. This also corresponds to the number of spans since the curve has degree 1.
Auto Update
When this is checked on, the impact curve updates as you change the values in the Pedestrian Protection control window.
Create History
When this is checked on, construction history is created for the impact curve. After leaving the tool, you can modify the surfaces and the impact curve will update.
Buttons
Evaluate
Click this button to re-calculate the impact curve if Auto Update is turned off.
Undo All
Removes the impact curve and de-select the surfaces. The values in the control window are not reset.
Pedestrian Protection tool workflow
How to create a degree 1 curve representing the impact zone of a pedestrian’s head with a set of surfaces that form the hood of a car.

This impact curve produced by the Pedestrian Protection tool has construction history and updates when the input values (such as pedestrian height) or target surfaces are modified.
Generate an impact curve
Select the surfaces that define the front of the vehicle.
The surfaces turn purple.
A manipulator appears 100 mm in front of the selected surfaces.
Note: Surfaces that were already picked prior to accessing the tool are included in the selection.
Adjust the parameters (Pedestrian Height, Impact Zone and Ground Height) through the control window or by dragging one of the manipulator arrowheads.
Note: The manipulators move in 10-unit increments. You can also enter a more precise value through the keyboard.Click the Evaluate button (either in the control window or at the bottom of the active view window) or press the space bar.
The impact curve is calculated and drawn. An annotation is attached to the curve showing the corresponding pedestrian height.

Modify the Pedestrian Height, Impact Zone or Ground Height through the control window, or by dragging one of the manipulator arrowheads.
Add or remove surfaces from the selection by clicking on them.
Note: In the default configuration, the toggles the selection.
Click the Evaluate button again.
The impact curve and its annotation update.
After exiting the tool, you can still edit the impact curve’s parameters by choosing the Query Edit tool ![]() from the Object Edit tool palette. Select the impact curve, or select the impact curve first then re-entering the Pedestrian Protection tool.
from the Object Edit tool palette. Select the impact curve, or select the impact curve first then re-entering the Pedestrian Protection tool.
Since the impact curve has construction history, modifying the input surfaces (for example by pulling CVs) causes the curve to update.
Click Undo All to remove the impact curve and start again.